A Guide to Understand Bird with Diagram
Birds are warm-blooded animals and can fly in the sky. Their body structure suits their requirement of flight. It is essential to study their anatomy to understand the birds, their flight, and reproductive system. The students must use a bird anatomy diagram for that. It may seem challenging to create a bird anatomy diagram by hand. The students must use the EdrawMax Online tool, which can help them create a high-quality bird anatomy diagram.
1. The Bird Anatomy
A bird belongs to the class Avis and is warm-blooded. They have their bodies covered with feathers and have a temperature of 40° centigrade. Their bodies also have air sacs and hollow bones, which help them in flight.
1.1 The External Anatomy of Bird
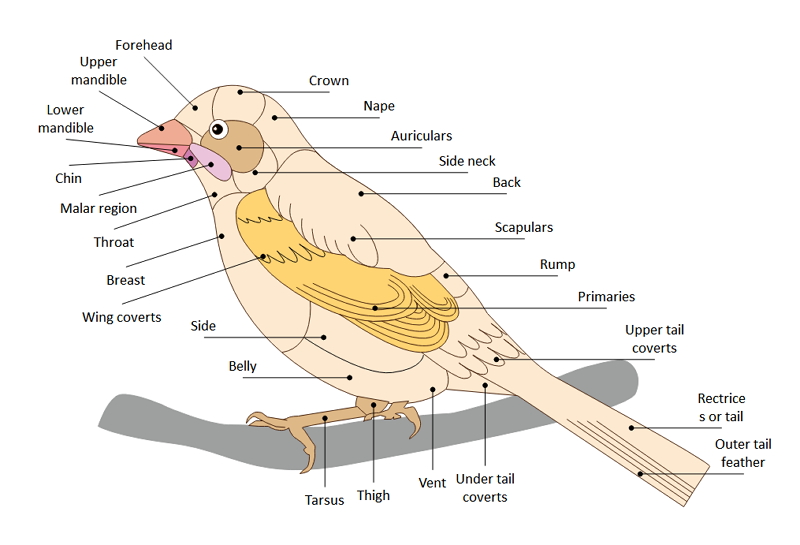
Bird skeleton: The bird skeletal system helps to maintain the form and, at the same time, makes the birds fit for flight. The neck can move the neck in different directions. They have hollow limb bones, which make them strong. The particular structure of their skeleton also ensures their ability to balance.
Beak: The bird's jawbone gets extended, and keratin covers it. The top of it is known as cere, and there are nares on the same. It helps in eating, grooming, etcetera.
Eye: The bird's eye gives them an accurate vision and has receptors like rod cells and cone cells.
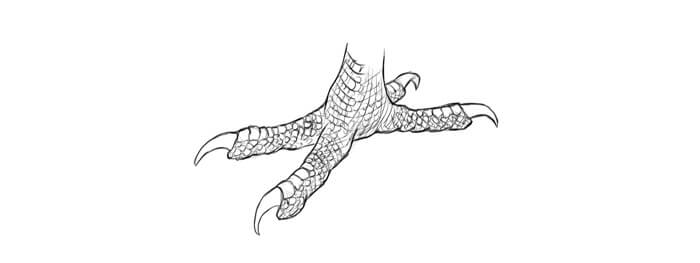
Feet: Birds' feet have claws, and their sharpness depends on their food habit. For example, preying birds have sharper claws than others in the flock. They use their feet in grasping, landing, etcetera. Since they stay in an elevated position most of the time, birds have tough skin on their feet.
Wings: The bird's wings have thin bones, and the structure helps them in flying. They contain different types of feathers. It includes primary flight feathers, secondaries, Main and Lesser Converts, the Alula, etcetera.
Tail: The tail acts as the radar for the bird and helps the bird move in a particular direction. The tail muscle expands and allows the bird to take in more air when required.
Anus: The opening on the external part of the bird to remove the waste material from its body.
 Source:EdrawMax Online
1.2 The Internal Anatomy of Bird
Spine: Birds' brains are tiny but help process their actions, indicating dangers and other senses. Their brains also can learn specific things.
Spinal Column: The spinal column of the bird has delicate spinal cords. It is present along the body of the bird. As the brain's messenger, it informs the brain when the bird wants a movement. The muscles of its body act accordingly.
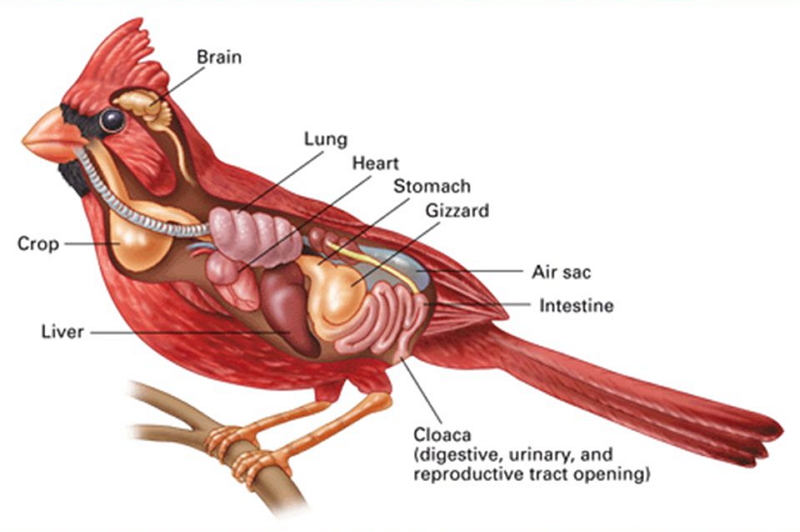
Trachea: Trachea is a long tube-like structure connected the bird's throat to their lungs and carries fresh air.
Esophagus: A narrow tube that moves the food from the mouth to the crop, here it stays until digested.
Lung: A bird’s lungs also take oxygen from the bloodstream. There are air sacs that allow the one-way airflow for providing fresh oxygen to the lungs of the birds.
Crop: A part made of muscle layers that keeps and softens the food until it gets transferred to the gizzard for digestion.
Gizzard: This part is made of tough muscle tissues and has roughage. It grinds the food before passing it on to the intestine.
Kidney: Liquids that the bird's intake filtered through the kidney and later got out of their body.
Heart: The heart of birds has four chambers. They pump the oxygenated blood throughout the body. They have a high heartbeat rate. It is so because, primarily, they stay in an elevated position of fly. Some bird species have a high heart rate which has a rate of 500 beats per minute.
Liver: The bird's liver filters the toxic elements from its body.
Ureter: There is a tube-like structure at the kidney extended to the cloaca. It removes the liquid wastes from the body of the bird.
Intestines: The intestine absorbs the nutrients from the ground food present in the gizzard and then passes it to the rectum, which later excretes it.
Rectum: The rectum helps in the excretion of the birds.
2. How to Draw the Bird Anatomy Diagram?
To understand the bird anatomy, the students can use a bird anatomy diagram. They can create a bird anatomy diagram by hand, but the process is challenging and may take time. Here are the steps which they can follow to draw a bird anatomy diagram:
2.1 How to Create Bird Anatomy Diagram from Sketch
Creating such a diagram by hand can be difficult. The students can follow these steps to make their bird anatomy diagram:
Step 1: To start with the diagram, the students need to draw a circle. The students need to create the beak, a structure with a narrow tip and a broad base.
Step 2: The students need to draw a small circle at the end part of the beak. After that, make a pair of circular eyes.

Step 3: The students need to make a structure with a thick middle part and a pointed end to draw the body. In the end, there is a tail that is of a triangle shape.
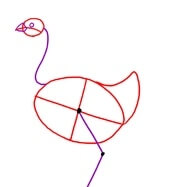
Step 4: The wings should be there on both sides of the body, and feathers should cover them.
Step 5: Finally, the students should draw a thin stick figure with three fingers at the front and one at the end for the feet. The feet have curved nails at the end.
2.2 How to Create Bird Anatomy Diagram Online
If a student wants to draw a bird anatomy diagram by hand, that can be challenging. It can take enough time, and the students may not get a good result. To avoid such conditions, the students must use the EdrawMax Online tool. The tool is user-friendly, and anyone can use it without any difficulty. Here are a few simple steps which they need to follow:
Step 1: The tool is easy-to-use, and hence the students can work on this tool without any prior knowledge of working on this tool. To start with their diagram, they need to open the EdrawMax Online tool and then open New. Under this section, there is the Science and Education tab.

Step 2: In Science and Education, there are several diagrams which the students can use for their studies and projects. The students can choose Biology and then select the bird anatomy diagram. They can modify the bird anatomy diagram per their requirement.

Step 3: After selecting the template they require, the students should modify it as per their choice. The tool gives the students some hassle-free options to edit their diagrams. They can work on those images according to their preference to create a high-quality bird anatomy image.

Step 4: Once the students finish their bird anatomy diagram, they can save it in different file formats. They can also export the file to use it in their lessons and projects.

3. More Knowledge of Bird
As the birds take flight, their bodies are designed to fit the action. Here are some adaptations that the class Aves or birds have undergone for flying:
- Light skeleton with hollow bones.
- Central limb bones are hollow, and they make the birds strong.
- Birds have lightweight bones that decrease their body weight.
- Their side bones are locked with ribs creating a single brace called a wishbone.
- For their flight muscles to work, they need a big and strong heart.
- They have muscles helping them in flying.
4. Conclusion
To understand Aves, its function, and body system, the students must learn bird anatomy diagrams. Making a bird anatomy diagram by hand is time-consuming, and the students may fail to get a satisfactory result. The students must use the EdrawMax Online tool to create a high-quality bird anatomy diagram.
In conclusion, EdrawMax Online is a quick-start diagramming tool, which is easier to make bird anatomy diagram and any 280 types of diagrams. Also, it contains substantial built-in templates that you can use for free, or share your science diagrams with others in our template community.


