How to Make a Decision Tree in PowerPoint
A Decision Tree is a flowchart of decisions and their outcomes — it is used as a decision support tool. It is also a way to show a diagram of the algorithm based on only conditional statements. The purpose of drawing a decision tree is to quickly understand the outcomes of a decision and further results of the decisions based on the previous outcomes.
You can easily create a decision tree in PowerPoint. This article is a step-by-step guide on how to create a decision tree in PowerPoint and EdrawMax.
How to Make a Decision Tree in PowerPoint
Now that we've discussed what a decision tree is, let's go ahead and start making it on PowerPoint!
Step 1: Open MS PowerPoint on your computer. Making a decision tree ppt in PowerPoint is easy. You can use any of the two ways to make a decision tree PowerPoint presentation: either draw using a decision tree template PowerPoint or use SmartArt Graphics.
Let's see how to make a decision tree in PowerPoint using SmartArt Graphics.
Step 2: Insert a blank slide from the New Slide option. Click the Insert tab and then select SmartArt Graphics from the Illustrations section. A dialogue box will open. You can see the dialogue box in the image below.
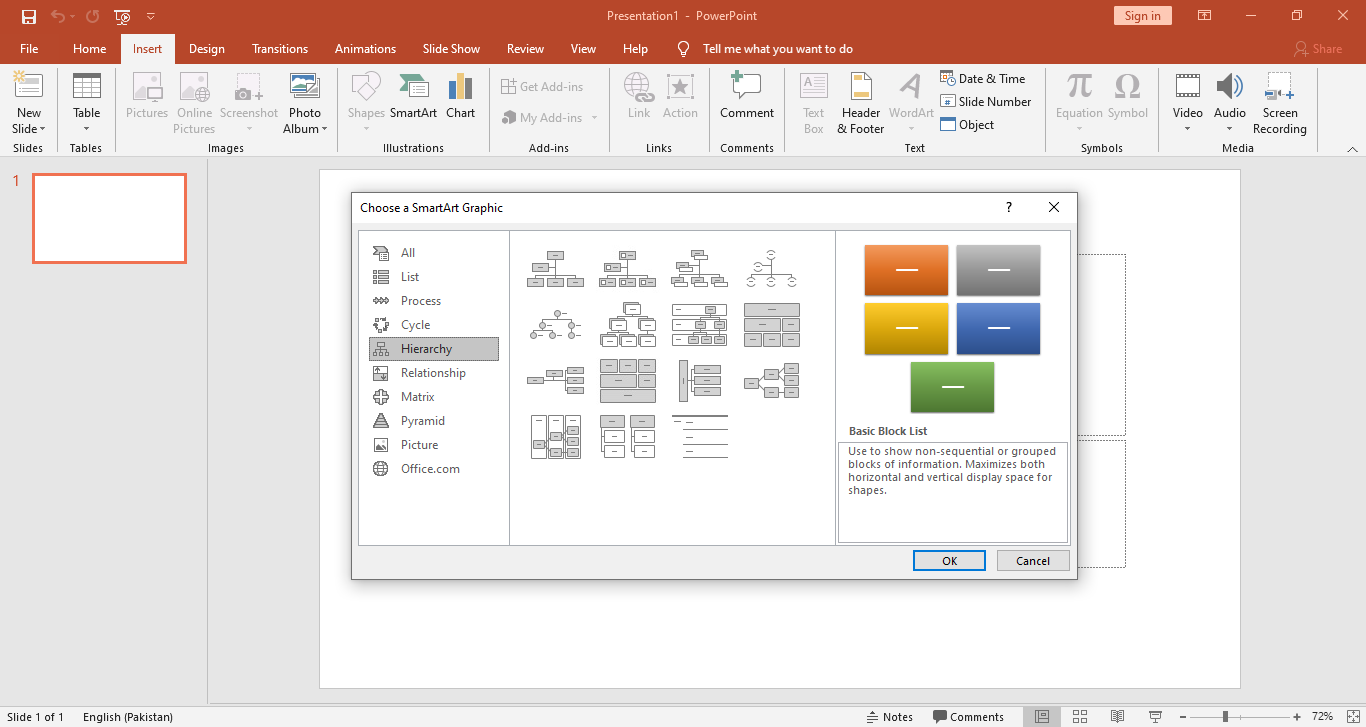
Step 3: Go to the Hierarchy tab, then click and select the Horizontal Hierarchy. Next, click the OK button at the bottom of the dialogue box, and SmartArt Graphic will revamp in the PowerPoint window.
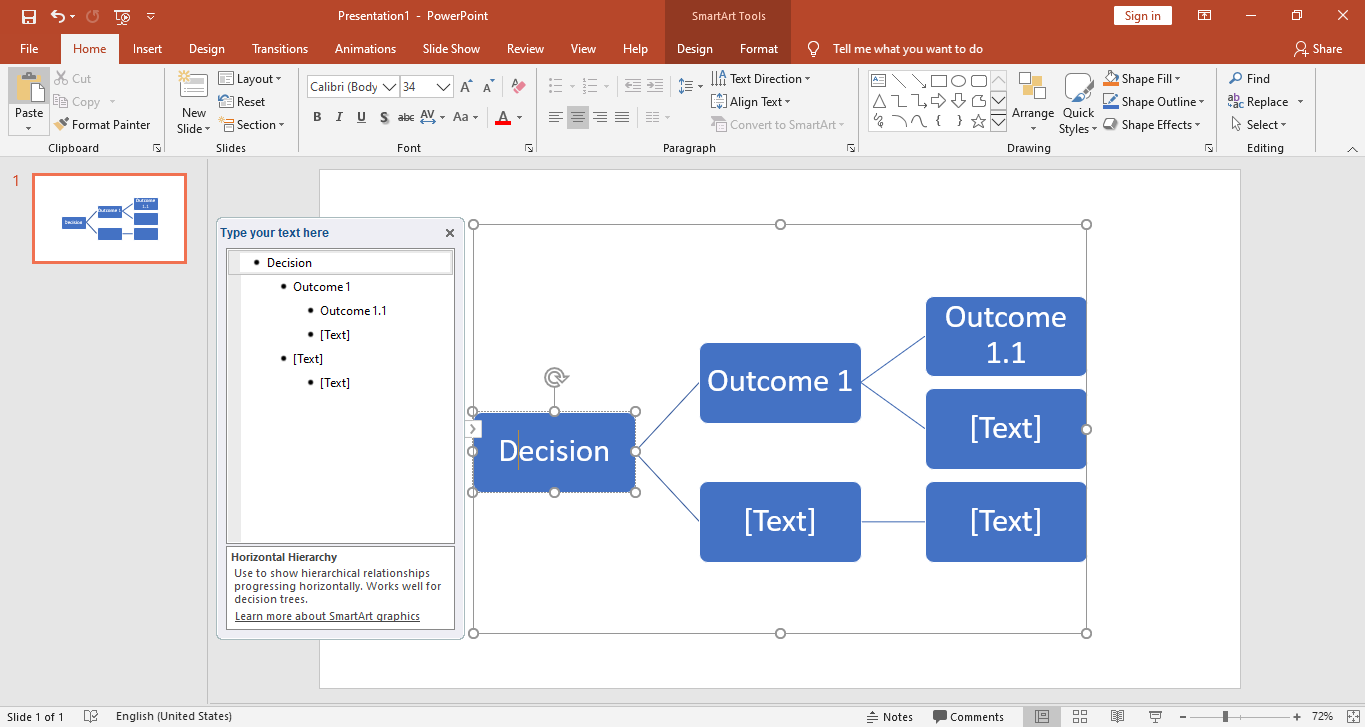
Step 4: You will be able to edit the Horizontal Hierarchy SmartArt Graphic in the PowerPoint editor window. Click the placeholder text in the Hierarchy boxes and replace them with your decision and outcomes.
You can see the decision and outcome boxes edited in the image below.
Now, let’s see how to make a decision tree in PowerPoint using a template.
Step 1: Open PowerPoint on your computer.
Step 2: Click on the File tab and then select the New tab. You can see the New menu in the image below.
Step 3: You' 'll find several categories of templates. To create a decision tree using a template, you need to find the template for a Tree Diagram. Now, typeTree Diagramin the search bar. You'll find some templates after a short wait.
You can see a preview thumbnail of the template. Click the template, and a dialogue box will appear. From the dialogue box, click theCreatebutton. After the download, the template will open in PowerPoint in a new window.
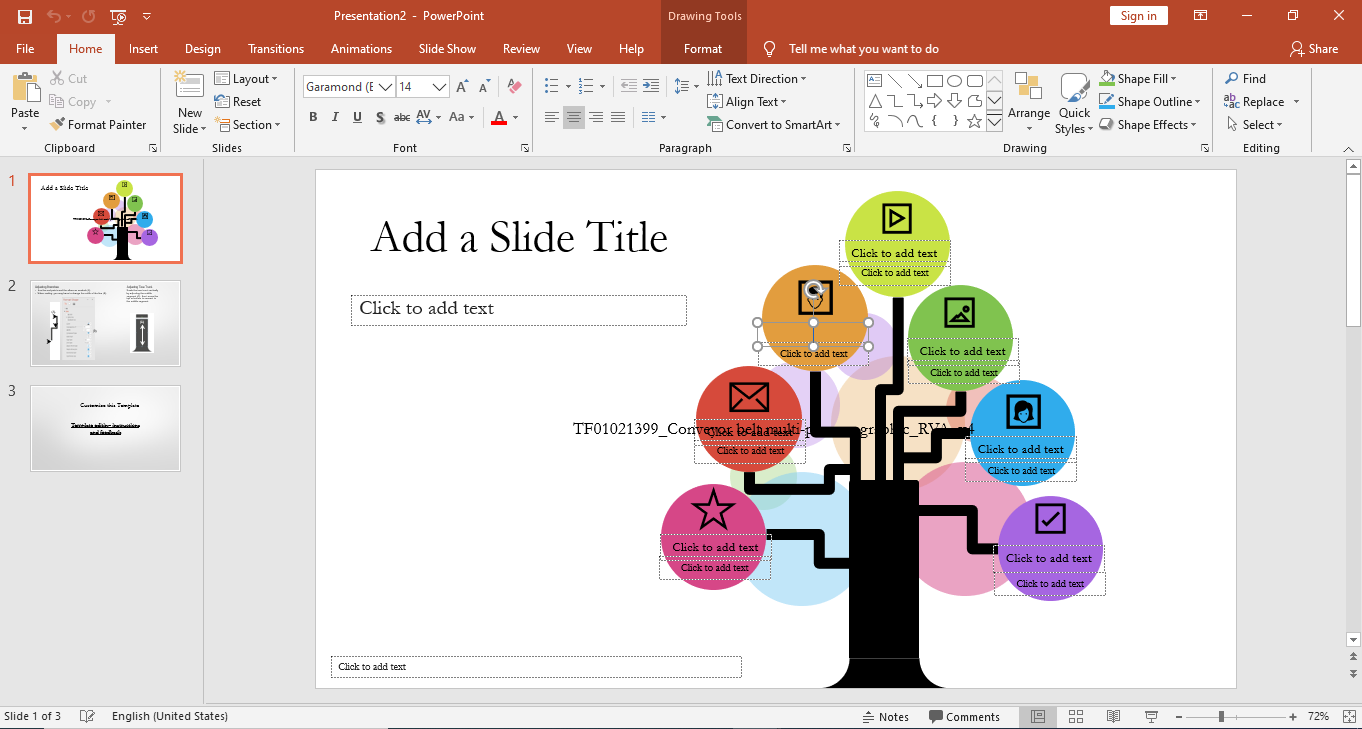
Step 4: You can edit the template in the PowerPoint and replace the text in the Decision boxes and outcomes by clicking the Placeholder text.
This section is all about how to make a decision tree in PowerPoint! Next, let's learn how to make a decision tree in EdrawMax Online!
Make a Decision Tree in EdrawMax - Easier and Better
Step 1: After logging in, go to the New tab just beneath your email address. Next, go to the Project Management tab. You can see the Project Management menu in the screenshot below.
Step 2: From the Project Management menu, go to the Decision Tree tab. A collection of templates and the option to create a new decision tree will appear in the menu.
To make a Decision Tree from scratch, click the large + sign.
Step 3: Choose a template from the available options. When you click on the template, it will be revamped in the EdrawMax online editor. Next, edit the template to fit your needs. You can see a Decision Tree template revamped in the editor in the below image.
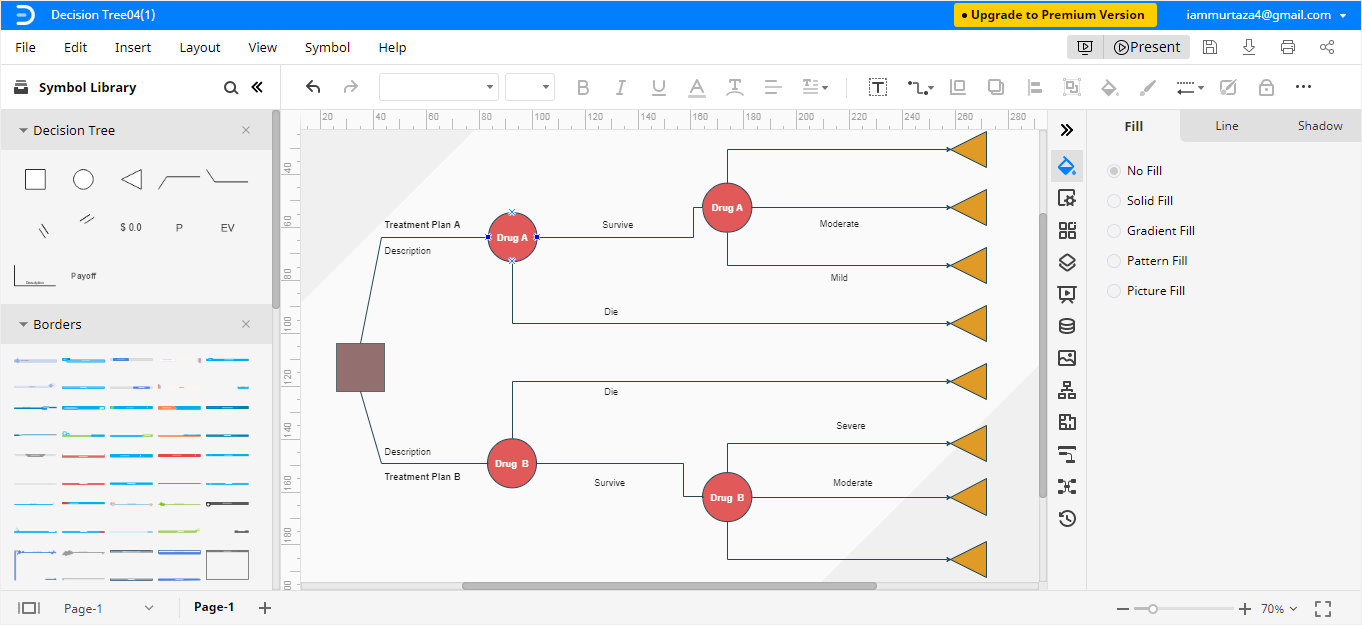
Step 4: Click the content you want to edit and replace it with your text in the Decision Tree nodes, click the placeholder text, and type whatever you want in the place of pre-set content. You can insert or remove the decision boxes and outcomes as well.
Moreover, you can change the pattern of the lines and shadows as well. You can fill the boxes and symbols using whichever type you want. With EdrawMax Online, there are endless editing options to make sure you get the exact decision tree that you had imagined in your head!
How to Save an Edraw Diagram as a PowerPoint File
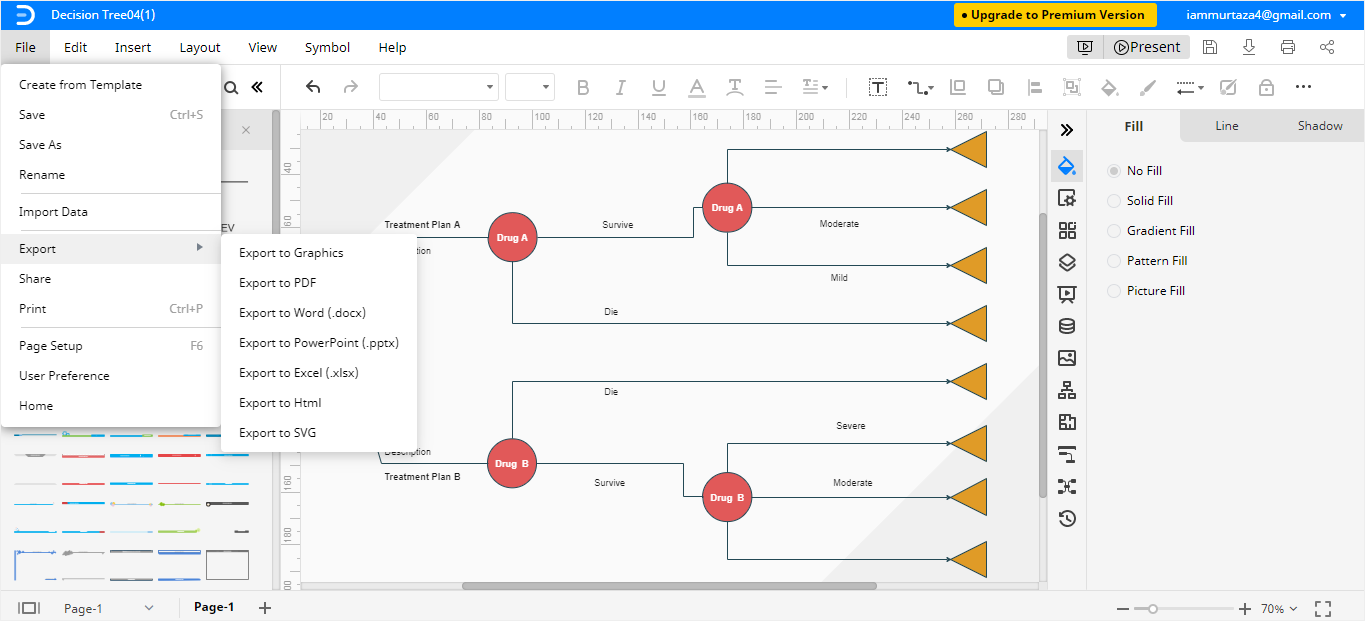
After you have created a Decision Tree in EdrawMax, you can save it in different formats. If you want to save your decision tree in PowerPoint format, it is an easy two-step process. Follow the steps below to save your Decision Tree in PowerPoint format.
Click on File in the top left corner, and from the drop-down menu, select Export. From the Export menu, select Export to PowerPoint (.pptx), and your Decision Tree will be saved as a PowerPoint file on your computer. You can save and export your Edraw files to Dropbox and Google Drive as well!
That’s all about how to make a decision tree in PowerPoint and EdrawMax. So, what are you waiting for? Sign up on EdrawMax Online today and make charts without any hassle! It’s here for all your presentation solutions!


