How to Make a Decision Tree in Word
A decision tree is a flow chart or tree-like structure where a decision indicates the consequences in the form of nodes or branches. A branch can have multiple leaves if a decision shows further results as well.
A decision tree is a useful visual tool to identify the best-case scenario or condition. In this article, you'll find out the step-to-step process of how to draw a decision tree in Word and Edraw Max. You'll also learn the design principles of a decision tree that make up a perfect decision tree.
How to Make a Decision Tree in Word
Step 1 – Open MS Word and select SmartArt Graphics
Create a decision tree Word using the SmartArt Graphics provided in the Illustrations.
Open Word on your computer. From the Insert tab, go to the Illustrations and open SmartArt Graphics. Unfortunately, there’s no decision tree template in Word.
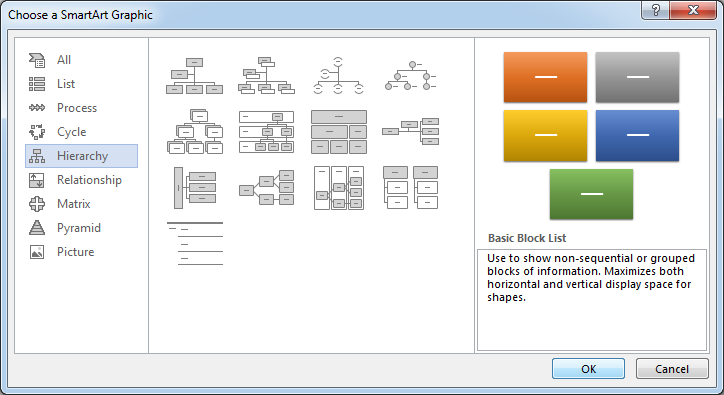
Step 2 – Select Hierarchy template
Choose a SmartArt Graphics from the Hierarchy template that can work best for your needs. Once it is opened, type your decisions in the small editing box just aside beside the SmartArt Graphic.
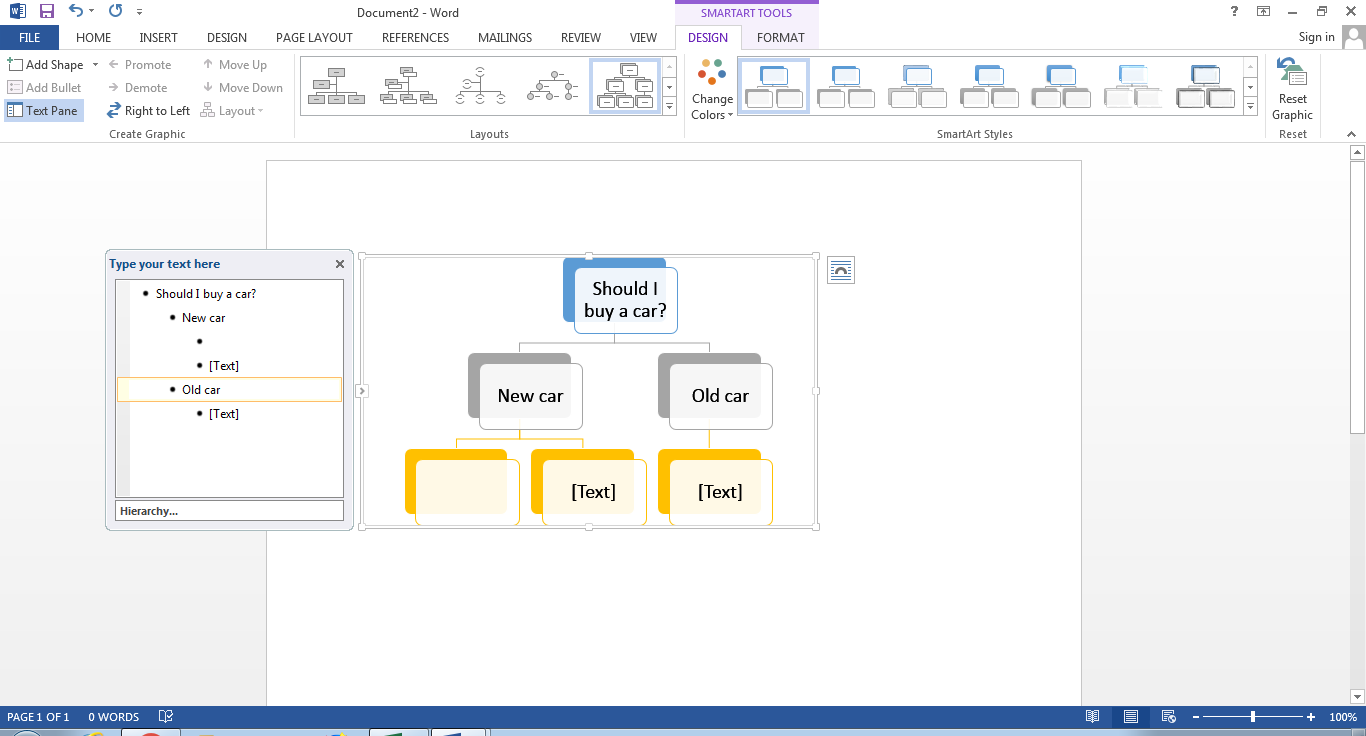
How to Make a Decision Tree in Edraw Max
A decision tree can work as a great visual tool to help you identify the best-case scenario by considering all the possible options. Microsoft Word can build a very simple and basic level decision tree.
If you try to draw a full-fledged decision tree in Word, the result would be very messy and difficult to comprehend. Edraw Max is a dedicated diagramming tool where you can easily build a complete decision tree, which will not only be an attractive diagram but also very simple to understand. Let's learn the procedure.
Step 1 – login to your Edraw Max Online
Log in to your registered Edraw Max account to draw your professional decision tree.
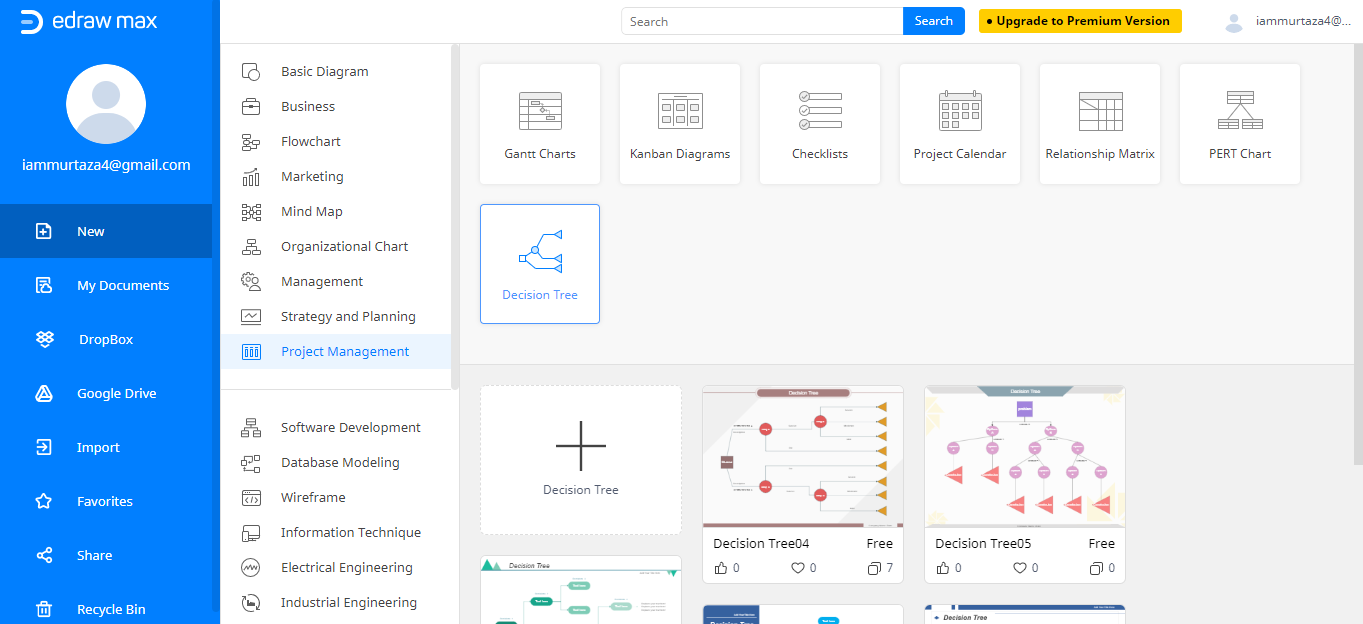
Step 2 – Select Project Management
Edraw Max has tons of different design solutions for every field. No matter what design, diagram, or chart you’re trying to make, Edraw Max has all the solutions.
A decision tree is an entity of project management and you need to go to the Project Management section in Edraw Max to find templates for decision tree.
In the Project Management section, select the Decision Tree tab. You’ll see several templates under the Decision Tree.
Choose any one of them that suits your needs. The template will open in a new tab where you'll edit the template using different editing options.
Step 3 – Edit your decision tree template
Once your template is opened in the new tab, analyze the template, whether it is suitable for your needs or not. The primary focus should be on keeping it easy to understand so that your team can extract the perfect scenario from the decision tree.
Start with replacing the pre-set text with your primary decision or event right at the first node or decision node. For that, double-click the box and type whatever you want. Make sure the Decision node is as concise and brief as possible.
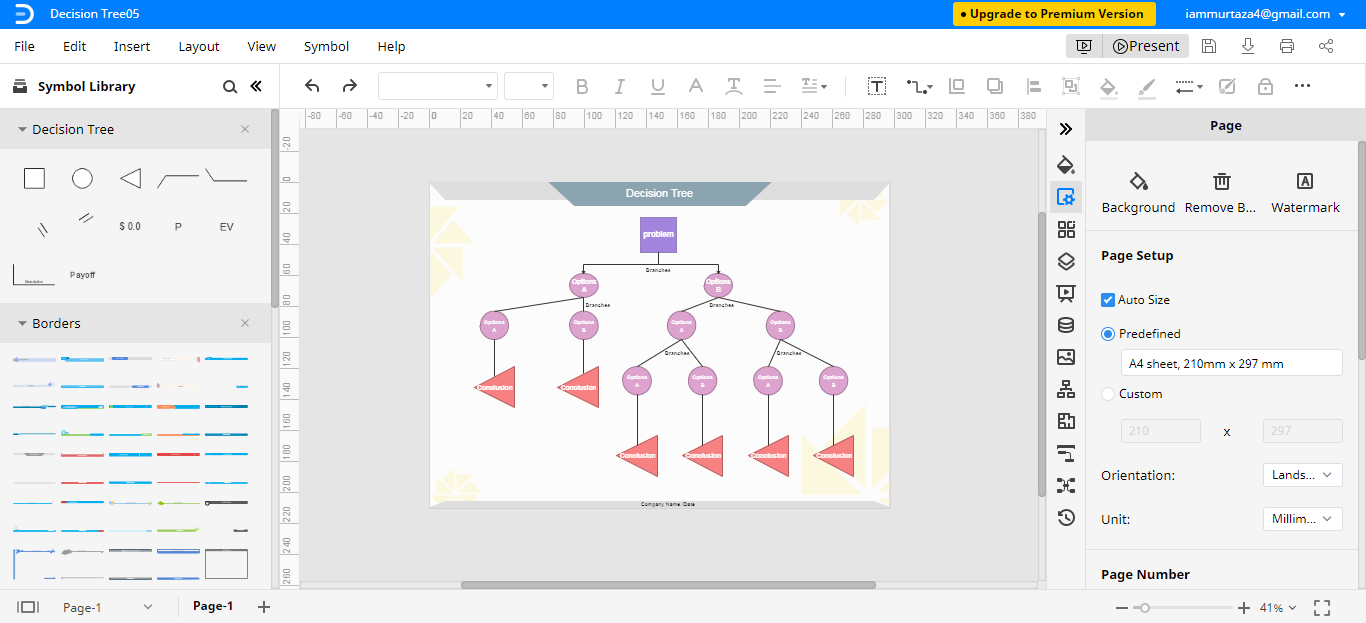
Step 4 – Select symbols from the Symbol Library
If you think that the template is not enough to represent all the decisions and consequences, then Edraw Max facilitates the users to add the shapes from the Symbol Library. On the left side of the interface, you'll find different shapes and connectors. Edraw Max offers ease of use ,so the inclusion of these shapes is also very easy. Just drag the shapes and drop at the positions where you want to fit them in the template.
How to Export an Edraw Diagram as a Word File
In case you’ve created the decision tree, but you need to make some changes to it, Edraw Max allows the users to export the files in different formats.
You can save the decision tree Microsoft Word in Word format and open it later in the corresponding software that supports the format. This will help you make some quick adjustments. To save the decision tree in Word format, go to the File menu and select Export, then select Export Word (.docx).
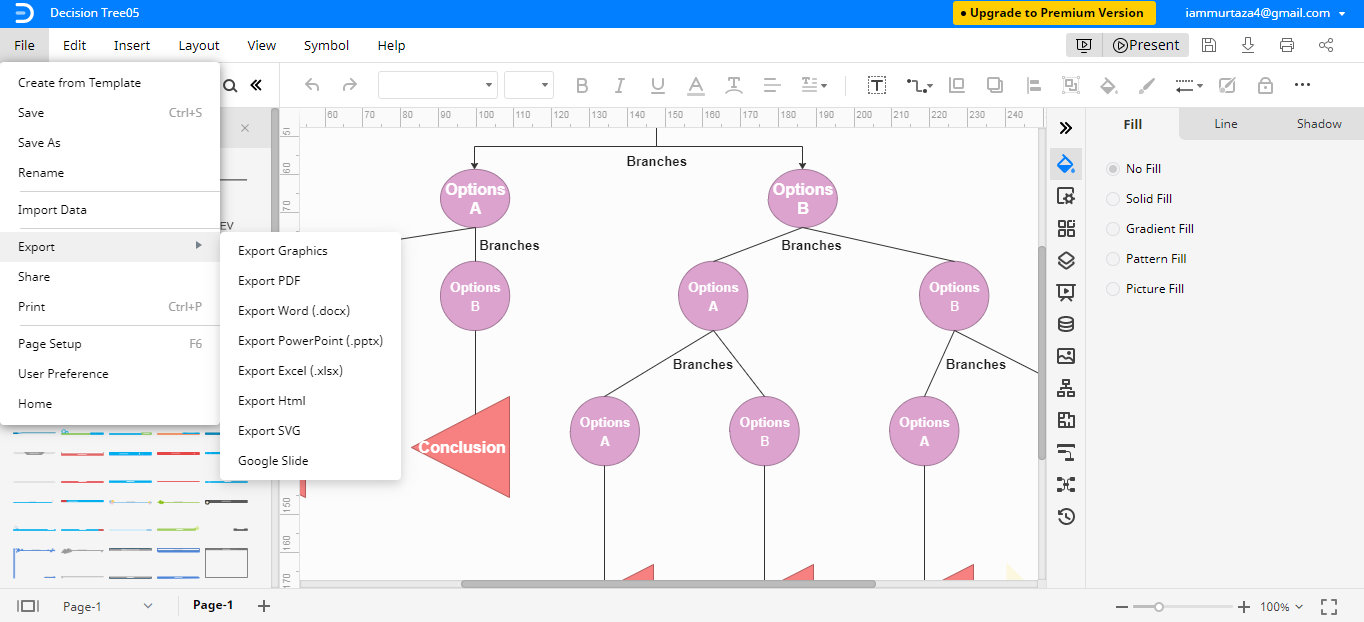
You can also save the decision tree to your cloud storage like Google Drive and Dropbox. You can access your files from anywhere.
Microsoft Word and Edraw Max both can be used to create a decision tree. Microsoft Word, with its limited functionalities, can help to create a decision tree in Word. Edraw Max is a dedicated diagramming tool and offers a lot of functions that are essential to creating a high-level decision tree. You can't go beyond a limited design with Microsoft Word—the finished design would be a very basic-level decision tree. Edraw Max, on the other hand, offers several free templates as well that can be a much better choice. You can get a professional and attractive decision tree using Edraw Max.


