How to Make a Flawless Flowchart Design? A Detailed Guide
Knowing the accurate strategies to design and formulate your flowchart is highly necessary for better ideas' understanding & retention.

Flowcharts are exceptionally instrumental in every life sphere, ranging from personal to-dos to business strategy development, especially when you need to deconstruct complex processes for personal or audience understanding. However, a fallaciously-designed flowchart can result in a chaotic stockpile of disorganized ideas, leading to further confusion, misapprehension, and distraction.
On the other hand, the diligently-constructed design of a flowchart can do wonders. Taking these concerns into account, this article attempts to put indicative procedures for flowchart design to the forefront, assisting you in making a transcendental flow diagram.
1. Overview of Flowcharts
Flowcharts are visual illustrations of a complex process, strategy, or automation, serving either as a blueprint for future planning or a guideline regarding current processes for the audience. Offering a simplified panorama of complicated scenarios, flowcharts enable users to streamline their activities and enhance their productivity.
Generally, flowcharts hold different kinds, including processes, workflows, swimlanes, SDLs, EPC, and more, depending on their usage. The most important one is the process flowchart, which encompasses various other kinds, such as data flow, system, decision flowcharts, etc. Each flowchart type carries its unique purpose, designing process, and advantages; for example, process flowchart exhibits the sequential mechanism or visual depiction of how a process will work out.
2. How to Design a Flowchart?
Whenever it comes to designing flowcharts, we exploit a general rule of thumb, i.e., to proceed with the sequence of events chronologically and stop the process when the incident is ended. However, some artful practices can render your flowchart not only exquisite but also well-understandable.
Design Process Charts Using EdrawMax
The foremost step to crafting a digital-driven flowchart is having a clear conception of the sequential flow of ideas in mind. The clarified perception will assist you in deciding where to start. Another thing you must not forget is the purpose and type of your flowchart; for example, if you are making a process flowchart for a new business strategy, knowing the purpose will enhance your understanding of the ideas' arrangement patterns.
We are employing the EdrawMax application to fabricate our sample process chart; to get a detailed insight about designing a flowchart, follow the below-given steps:
- Step 1: Download and launch the "EdrawMax" application to use it for designing the process chart.
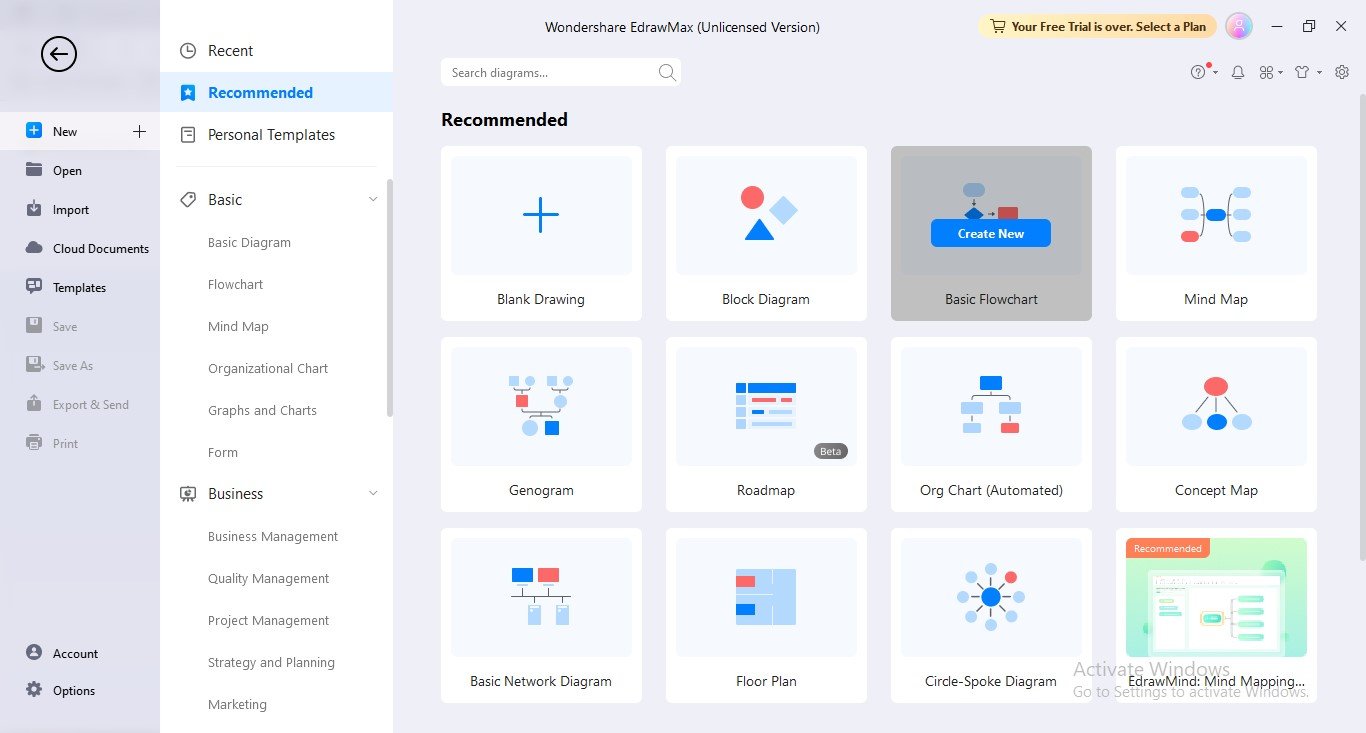
- Step 2: Navigate to the "New" option in the left panel and choose the "Basic Flowchart" option from the main widget.
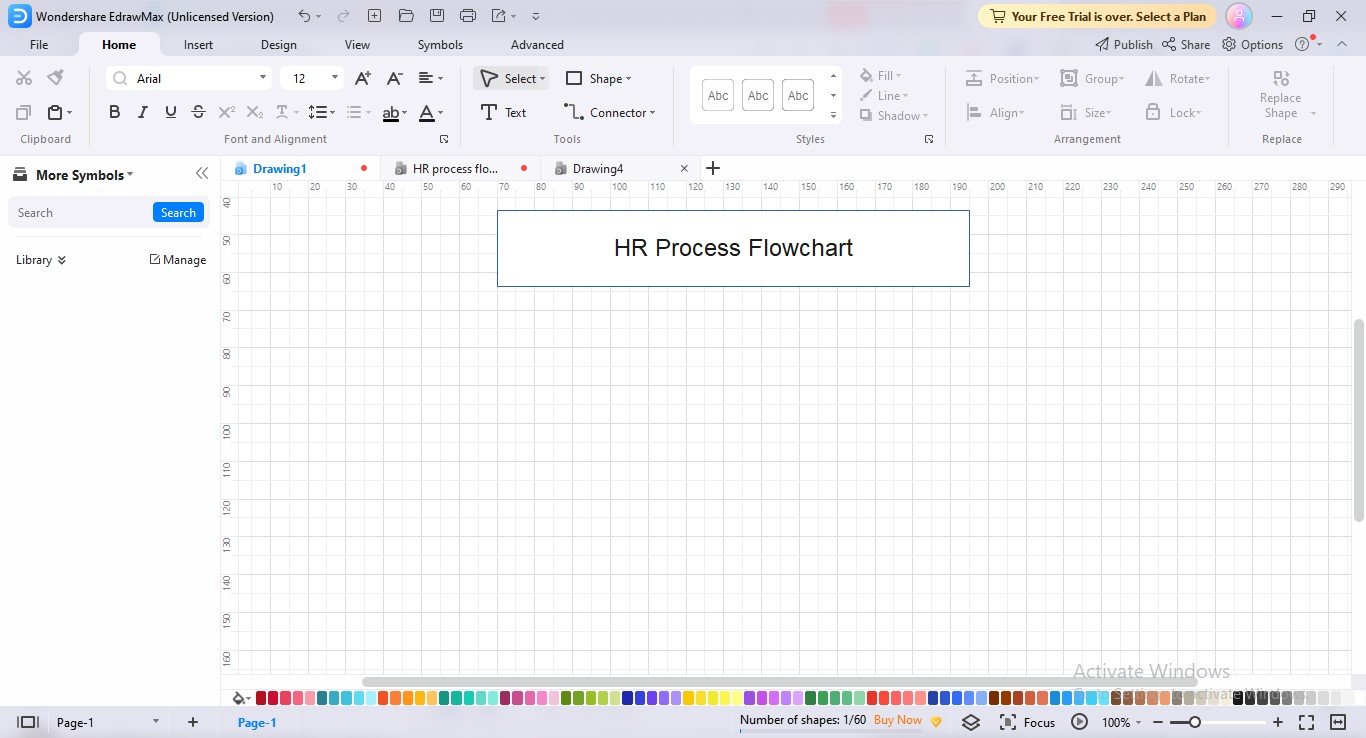
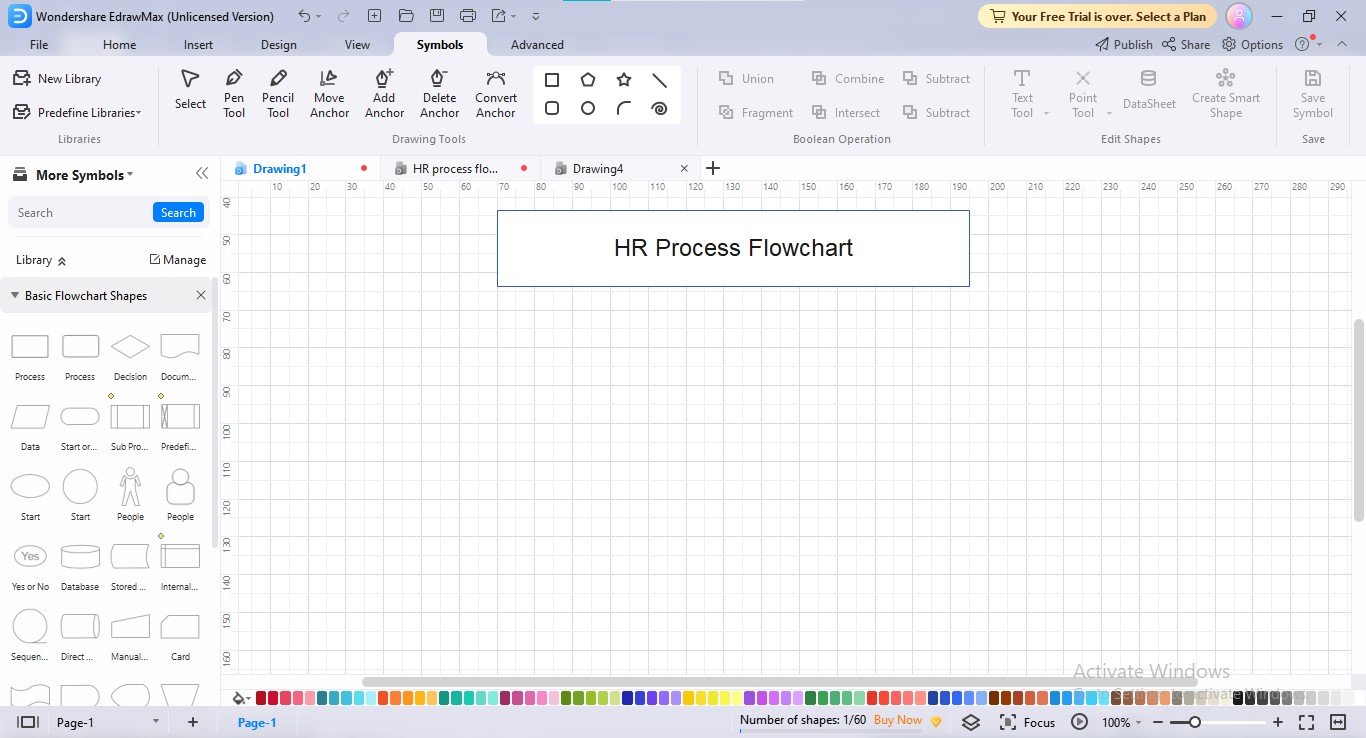
- Step 3: The most significant step now is to introduce the core concept of your flow diagram in sequential form; for this, you can first jot down concepts in chronological order so that ideas are not jumbled later. Give a title to your flowchart diagram by introducing a text box; to add text, click the "Text" option under the "Home" option in the menu bar.
Selection of Shapes & Symbols to Design a Flow Chart
Flowchart symbols are the pivotal component in a flowchart; each symbol and shape carries a meaning in flowcharting. Thus, you cannot add shapes haphazardly to your flowchart; another factor you must consider during shapes insertion is the consistency of shape standards throughout the flowchart. For example, if you have chosen an oval for the terminal (Start), you must end your flowchart with the oval.
Let's see how to add shapes in EdrawMax flowcharts:
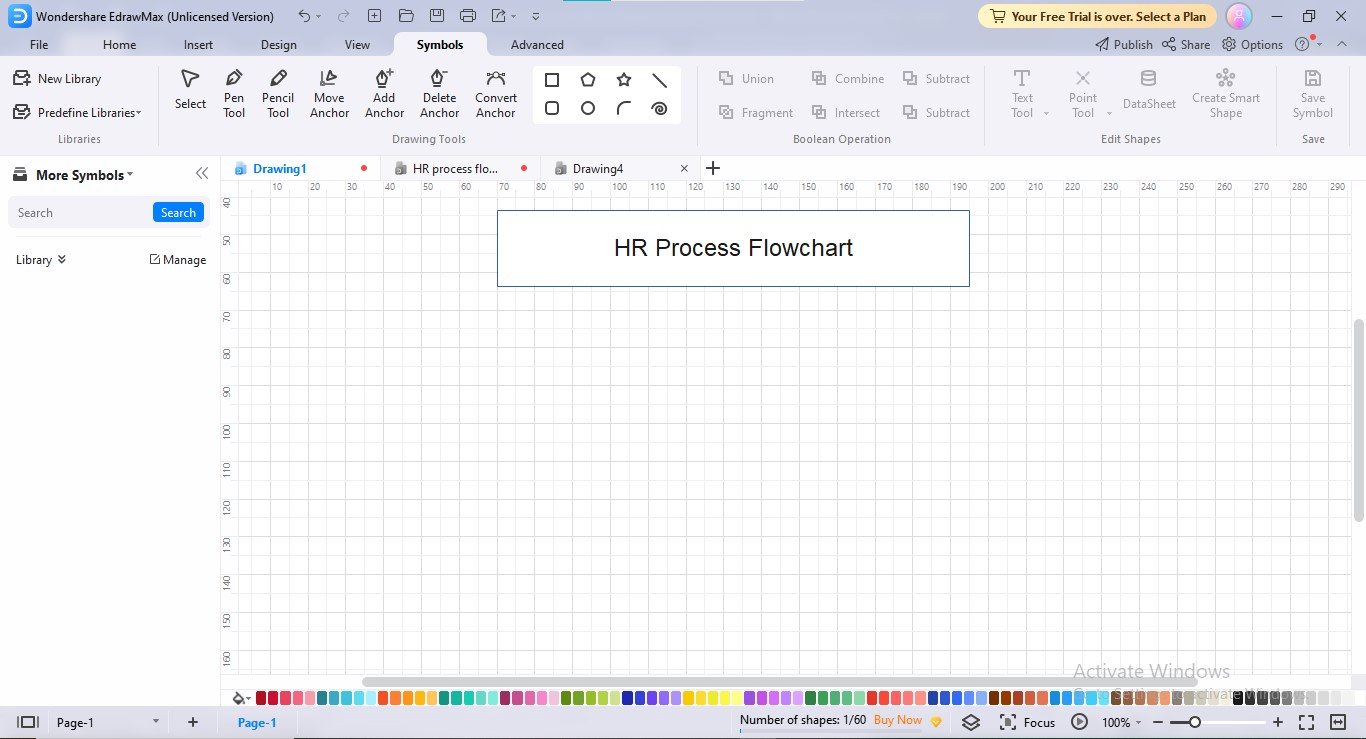
- Step 1: Generally, EdrawMax displays the basic shapes required for flowcharting in its left panel. However, if you don't see any library imported in your left bar, click the "Symbols" option present in the menu bar.
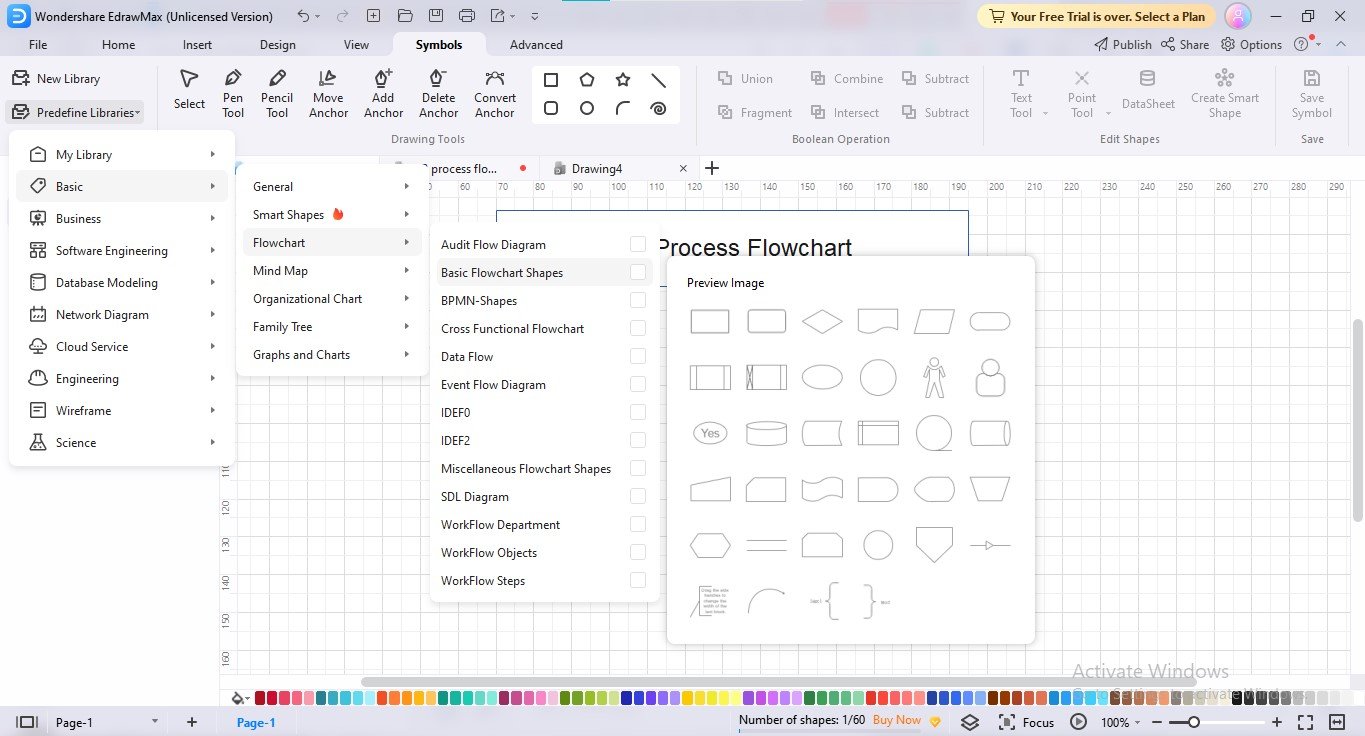
- Step 2: Navigate to "Predefine Libraries>Basic>Flowchart>Basic Flowchart Shapes" to import shapes for adding to your flowchart. You can also import other flowchart shape libraries relevant to your field by clicking your preferred flowchart library checkbox.
- Step 3: Your selected symbols library will start displaying in the left panel.
- Step 4: Insert the shape one by one sequentially (you can add shapes through drag-and-drop or clicking the shape) and complete the flowchart by adding text to your flowchart shapes.
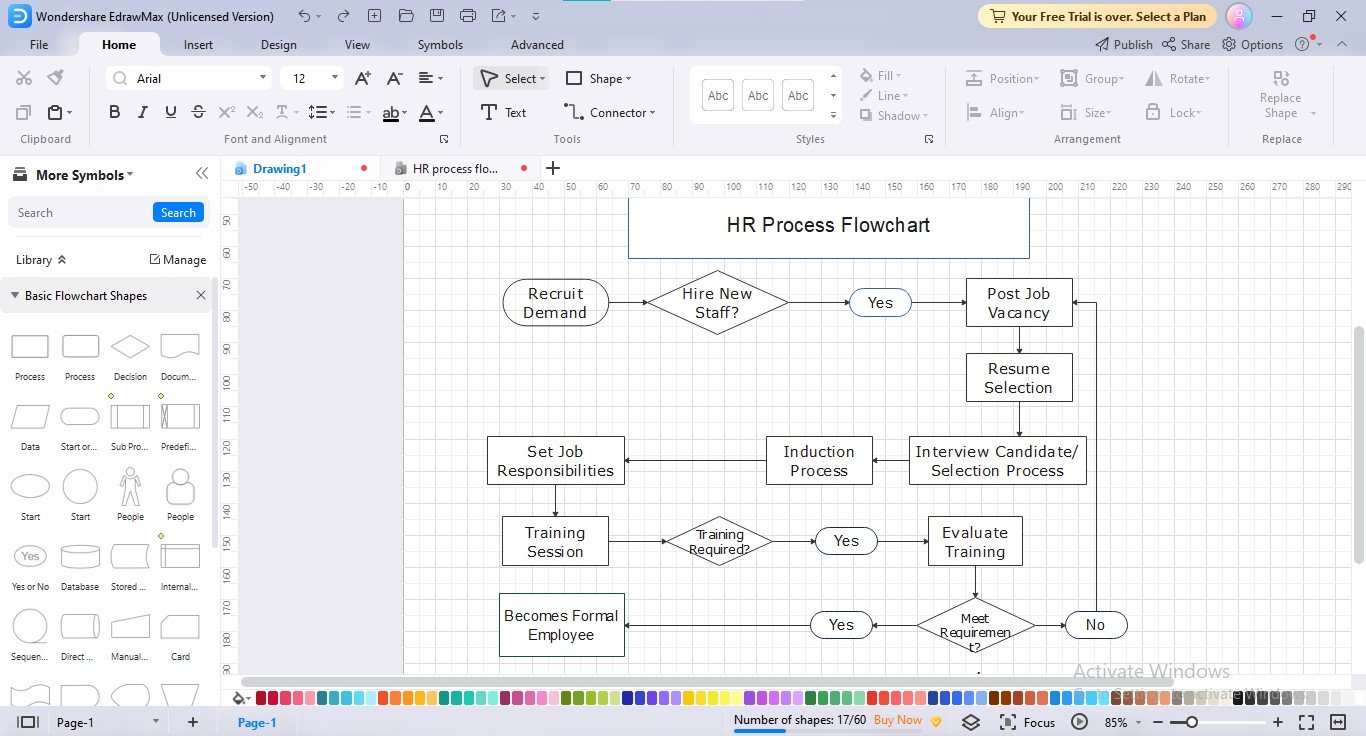
Layout Design For Flowcharts
The next step after adding the flowchart shapes is to arrange them into a proper pattern since without suitable alignment, a mere cluster of shapes and connectors cannot be regarded as a well-managed flowchart. Let's dive into how you can design the layout of your flowchart:
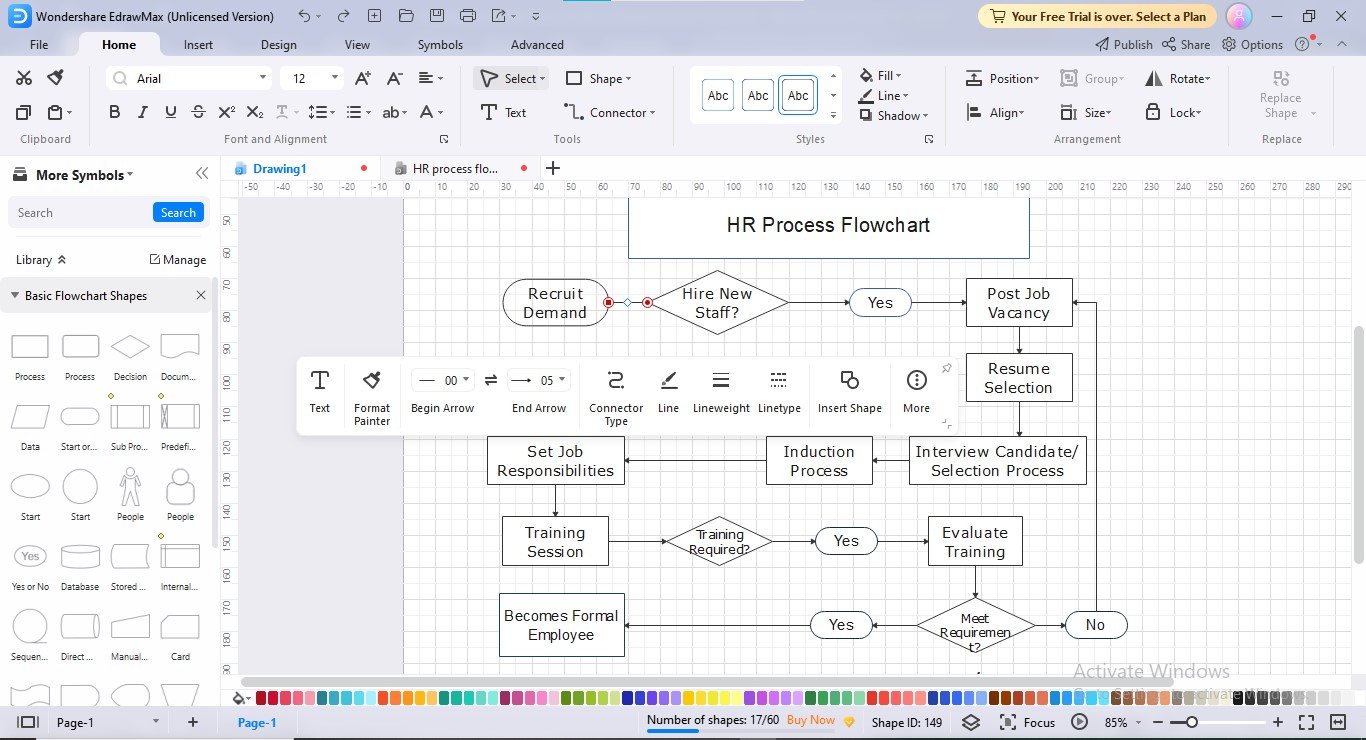
- Step 1: To customize the layout of your flowchart elements, click any shape or connector, and a customization bar will open, showing different customization options.
- Step 2: The same rules apply to the shape layout customization, as presented below:
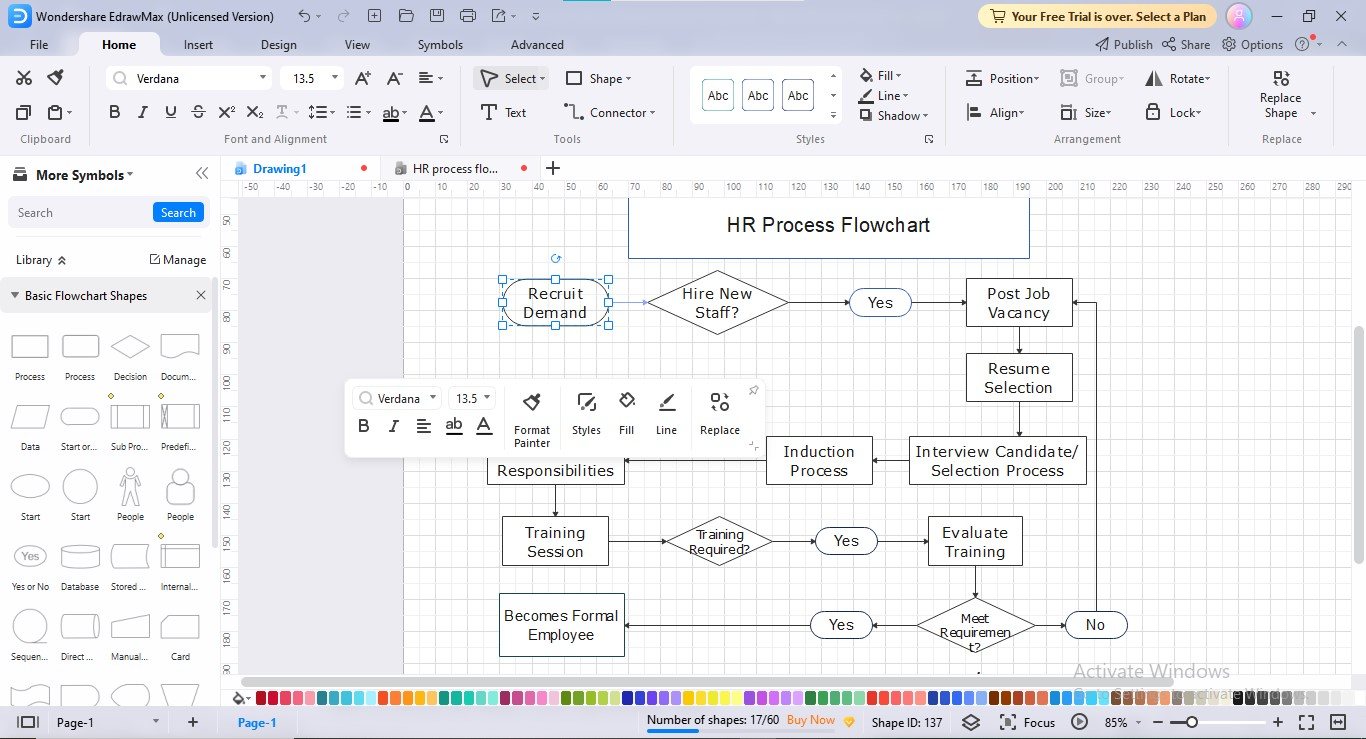
- Step 3: To align the shapes properly to avoid misstructuring, move the shapes here and there, adjusting them where they seem aligned & balanced; a built-in ruler will guide you about accurate shapes alignment when you displace the shapes.
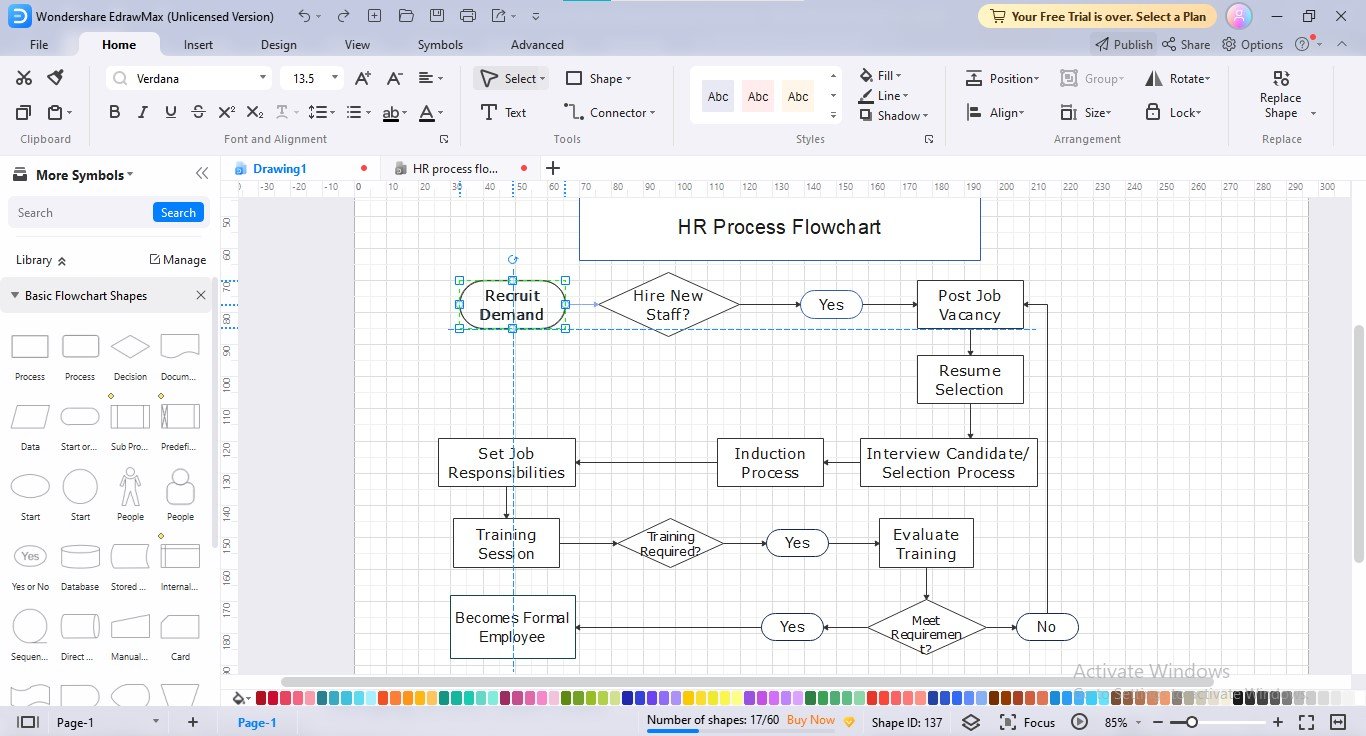
Changing of Flow Chart Colors
Accurate color concoctions are the most crucial aspect of flowchart creation since they revive the dull appearance of flow diagrams. Adding multicolor to your flowchart shapes is not requisite; however, your flowchart must contain at least three colors for enhanced understanding and ideas discernment. Additionally, your flowchart colors should not be too flamboyant to cause eyesores.
EdrawMax is stockpiled with interminable color customization choices, providing you complete freedom to unleash your innovative thoughts on the canvas. In addition to colors library, EdrawMax offers several built-in color schemes and themes for one-click beautification, especially if you are not acquainted with rightful color combination ideas. You can also configure the background with color, picture, or texture, depending upon your preferences.
Follow the given procedure to customize your flowchart colors:
- Step 1: EdrawMax provides quick, one-click colors inventory in the bottom panel to fill in your flowchart shapes.
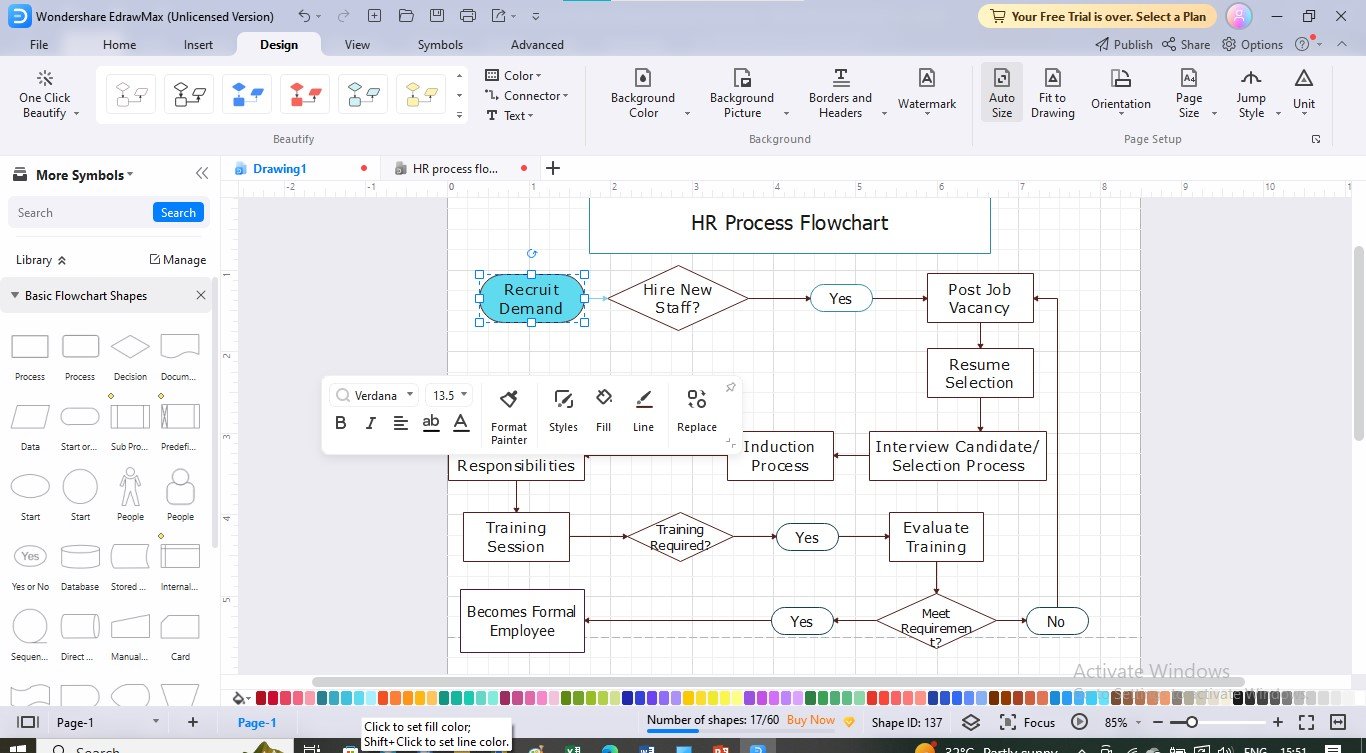
- Step 2: Another way to customize the fill and border color of any shape, click once that specific shape and the customization bar will launch; click the "Fill" option to change the fill color, and the "Line" option to customize the border color.
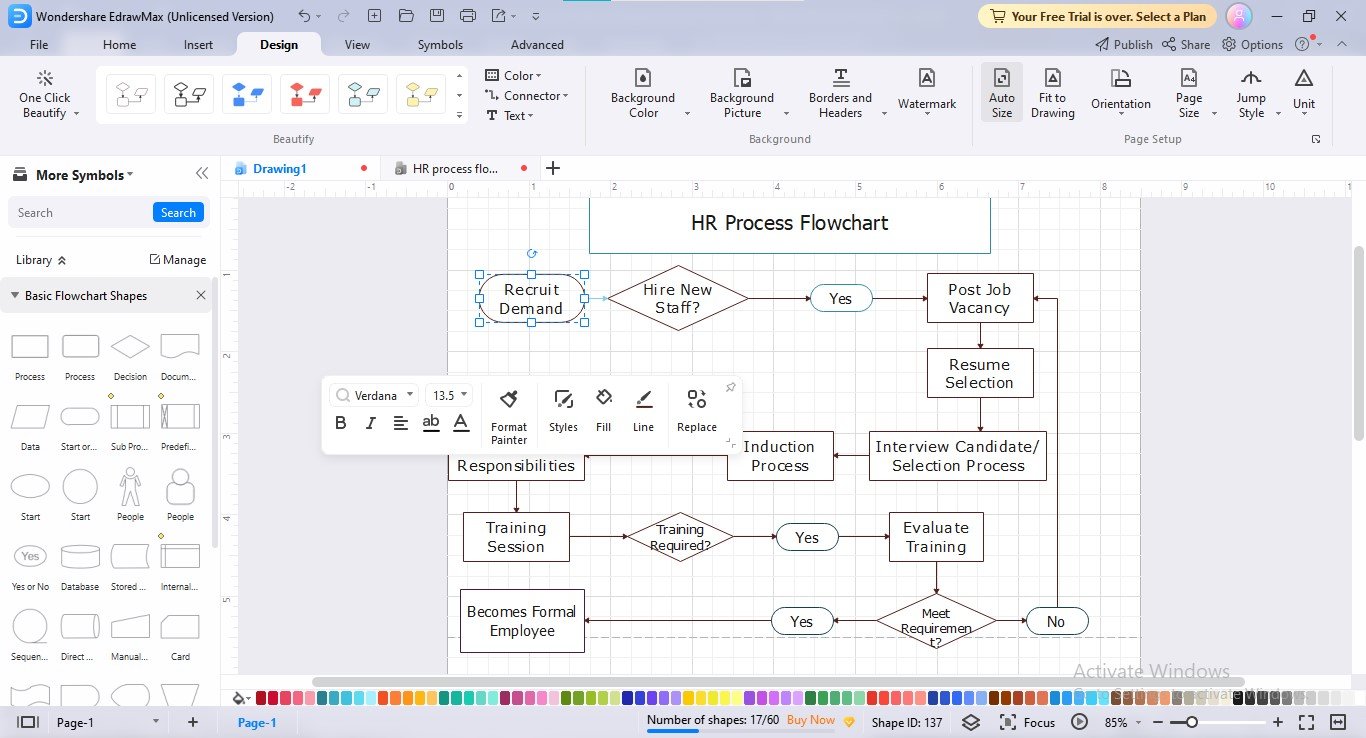
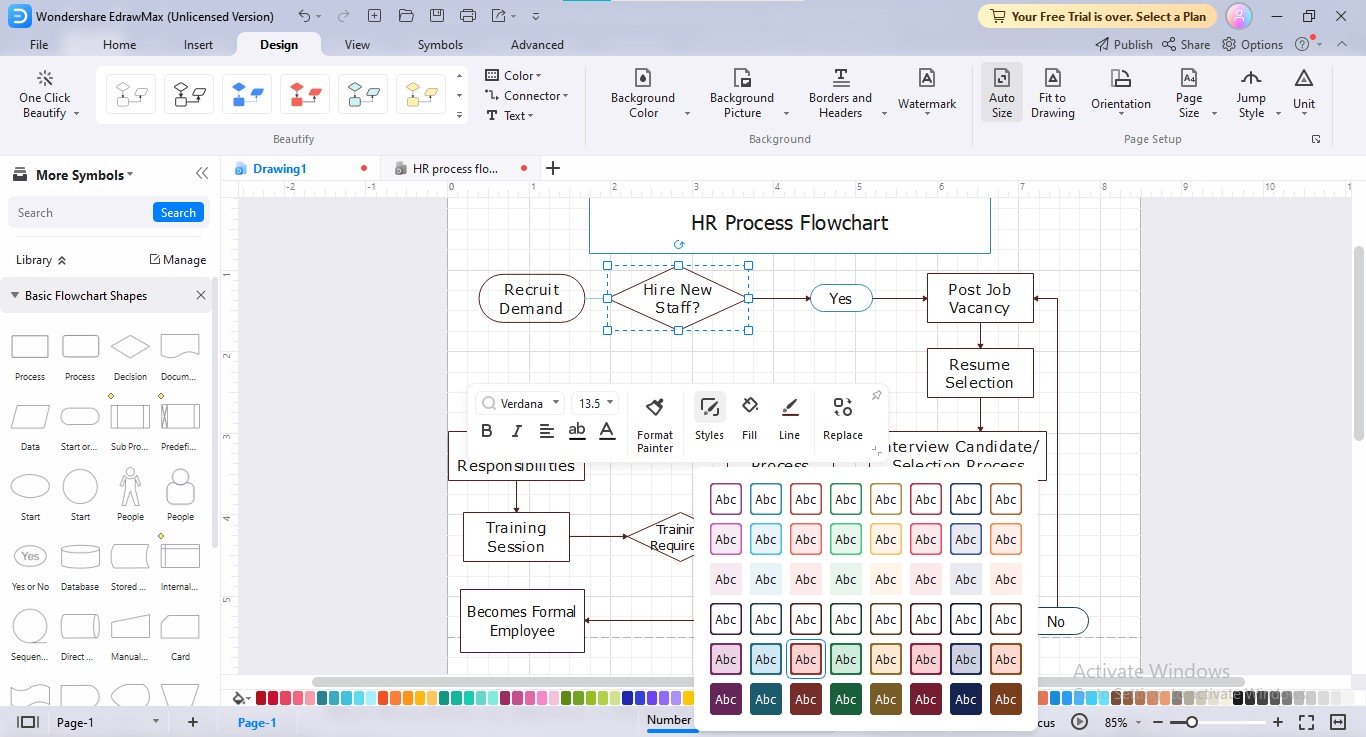
- Step 3: For ready-to-use fill and border color customization, click the "Styles" option in the customization bar, and choose your preferred prebuilt style.
- Step 4: To access EdrawMax's professionally-built color schemes for one-click beautification, click the "Design" option in the menu bar and navigate to the "Color Scheme Gallery" or "Color" option beside it.
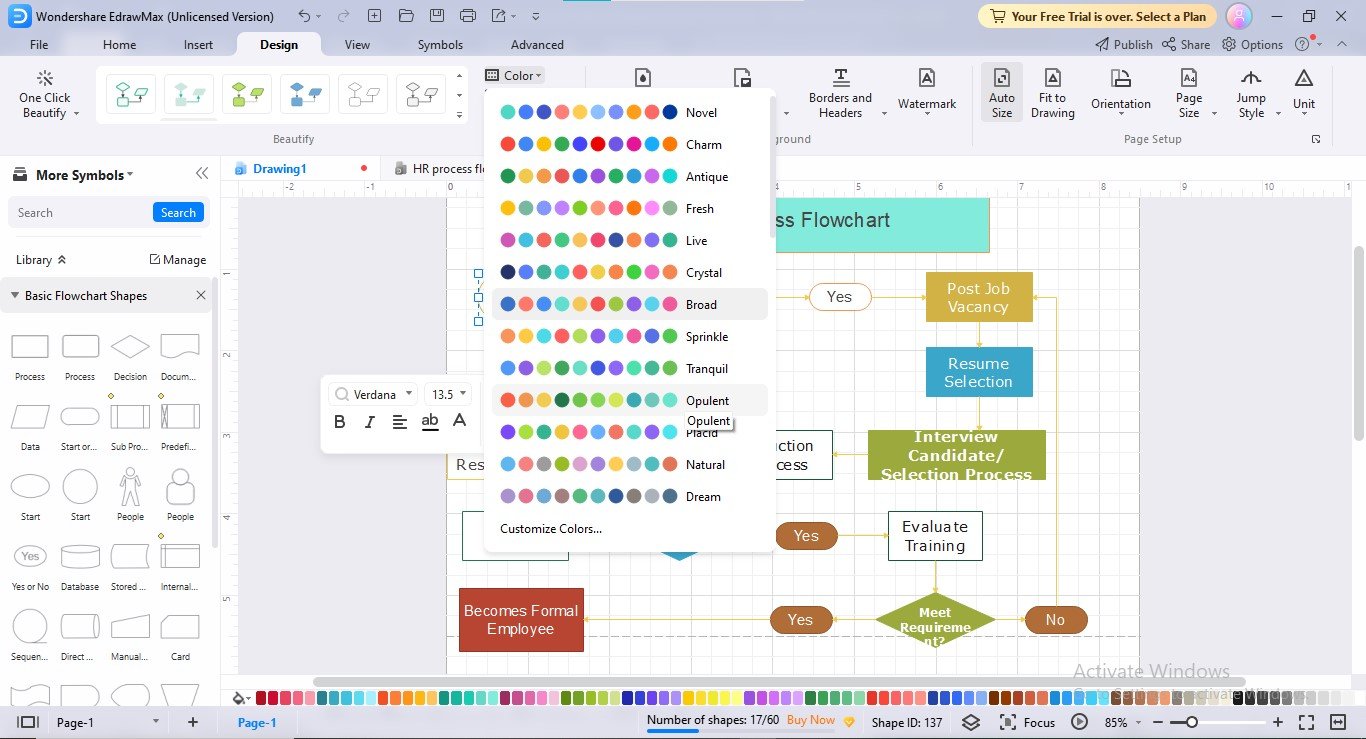
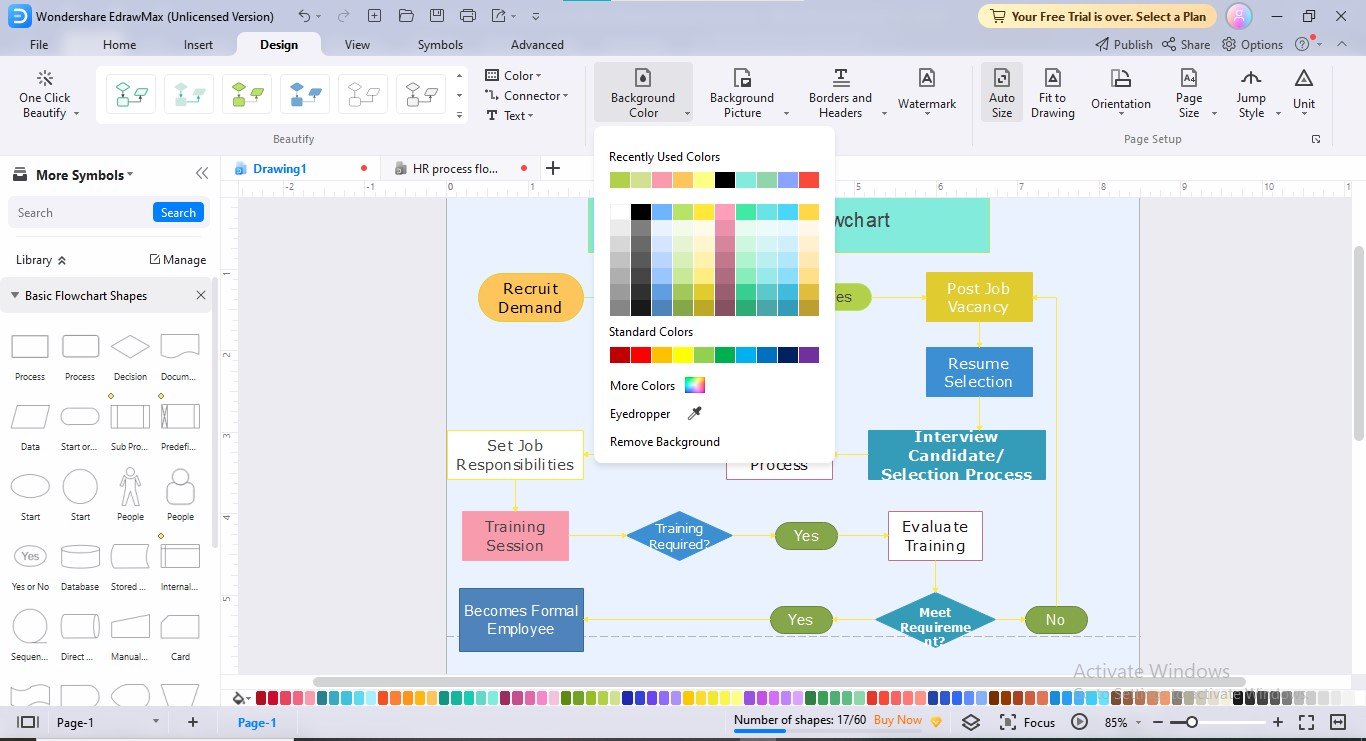
- Step 5: Navigate to the "Background Color" to customize the background color to make your process flowchart stand out. You can also set a picture or texture as a background by clicking the "Background Picture" option.
3. Best Practices to Design a Flowchart
Flowchart creation has always been a valuable idea for data visualization, but some common issues, such as shape sizes' misalignment, improper connection points, tilted connector lines, and messed up flows, can devastate your entire flowcharting experience.
However, observing some actionable practices can make your flowcharts super-expressive and well-coordinated. We have curated a few strategies that will aid you in achieving better shapes balance and rightful alignment:
- Using Consistent Shape Standards:
Using consistent shape standards throughout your flowchart is necessary since wrong symbols can mislead the audience, resulting in understanding something other than what you wanted to convey. Generally, an oval is used as a terminator, a rectangle as an input, & a diamond as a decision box.
- Maintaining Appropriate Distance Between Shapes:
It is advisable to maintain a significant distance between the shapes so that the flow diagram remains uncongested, clear, and appealing. Drawing the shapes too close to each other can result in messy and disorganized flowcharts, making the understanding process difficult.
- Keep Everything on the Same Page:
Try to place everything on one page because extending your diagram to the next page can distract the audience's attention. Even if your process flowchart is long-winded, you can use certain strategies, such as scaling or hyperlinking.
- Scaling:
Scaling refers to adjusting the size of the flowchart by decreasing or increasing the overall size of the diagram.
- Hyperlinking:
If your flowchart is complex, you can make different fragments and link them to one other using hyperlinks, a technique called hyperlinking.
- Using Eye-catching Color Combinations:
Another practice is to utilize vibrant color combinations for your flowcharts so that they look inviting and intelligible to the users. You can use a combination of blue and aqua, light green and lavender, and so on to beautify your process charts.
4. Conclusion
Flowchart creation from scratch has never been easy without acquiring proper knowledge about its fabrication techniques. Even some minor mistakes can ruin the whole outlook of the flow diagrams, converting them into an utter fallacy. Given this pursuit, we explained enough of the designing approaches to glorify your flowchart-designing journey.
