Quick Guide for EdrawMax Online
Looking for some help? Here you can get quick answers and step-by-step instructions on how to use EdrawMax Online.
EdrawMax Online Guide
-
Get Started with EdrawMax Online
-
Basic Shape Operations
-
Basic Elements
-
Format
-
Insert Object
-
Page Setting
-
Document
-
How to Create an Organizational Chart
-
How to Create a Floor Plan
-
How to Create a Gantt Chart
-
How to Customize Smart Shapes
-
EdrawMax App Guide
-
Video Tutorial
Print Document
To print a document, you can
- Click Print icon in the upper right corner of the interface;
- Go to File tab, click Print;
- Press Ctrl + P.
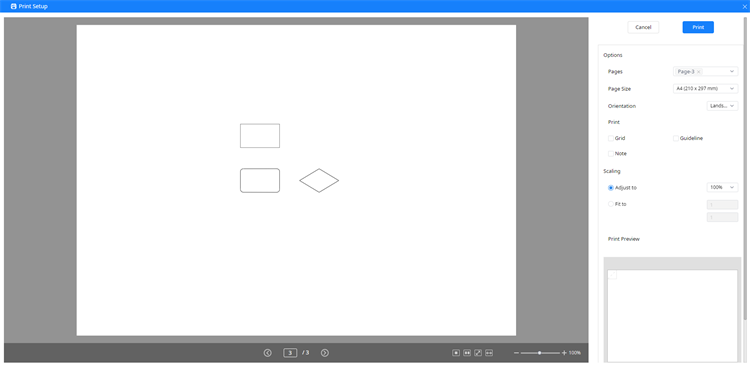
Then you will see the pop-up Print Setup window in which you can modify printing settings.

On the left side of Print Setup window, there is a huge print preview window for users to inspect details. You can switch to see every drawing page and zoom in or out the current page on the status bar.
Besides, you can click the following buttons to adjust page size to fit the preview window:
 : resize the current page to fit the view.
 : resize all pages to fit the view.
 : resize the current page to fit the view.
 : resize the current page to fit the width of the window.
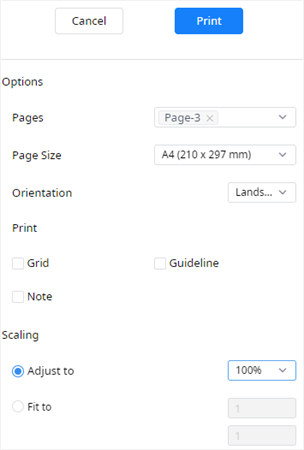
On the right side of Print Setup window, there is a print setting pane for users to modify the print settings. You can choose which page you want to print, select page size and orientation, and decide whether to print with grid, guides or note.
In addition, you can choose scaling options of printing: Adjust to or Fit to. For Adjust to option, you can change the size numbers from 50% to 400% and the default normal size is in 100%. For Fit to option, you can modify the numbers in the two boxes to add print page horizontally and vertically.
 |
 |
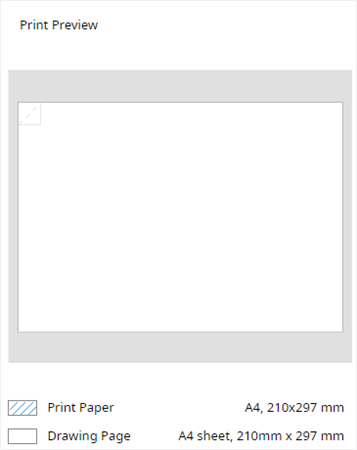
When you make changes on print scaling, you are able to see expected effects on the huge and small print preview windows.


