How to Create a WBS in Excel
A work breakdown structure is a fundamental component in project management. It is a kind of chart that shows the breakdown of project deliverables. The purpose of a work breakdown structure is to help structure the team's work into different sections. You can call it the hierarchical decomposition of the project deliverables.
It is easy to create a work breakdown structure in Excel. In this article, you'll learn how to create a work breakdown structure in Excel and EdrawMax online editor.
How to Make a WBS in Excel
Step 1:
Open Microsoft Excel on your computer. One of the ways to create a basic level of work breakdown structure in Excel is by using SmartArt Graphics. To create a work breakdown structure using SmartArt Graphics, follow the process below.
Step 2:
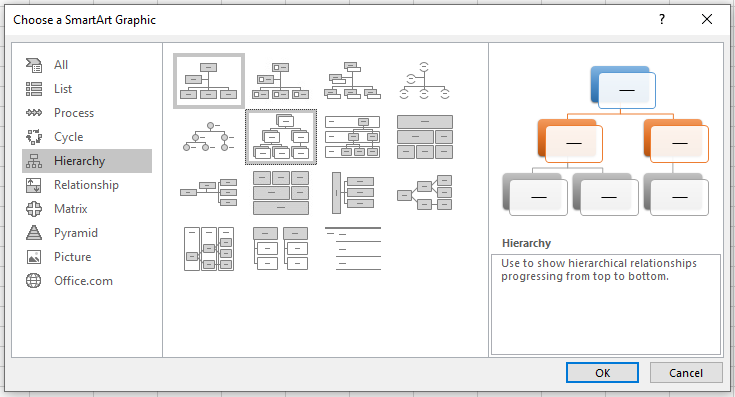
Click the Insert tab and navigate to the Illustrations section. After that, select SmartArt Graphics. A dialogue box will open that has different SmartArt Graphics categories, and you can choose a suitable shape for your work breakdown structure in Excel.
Step 3:
Next, go to the Hierarchy section and select a SmartArt Graphic to construct your work breakdown structure in Excel. After selecting a SmartArt Graphic, click the OK button.
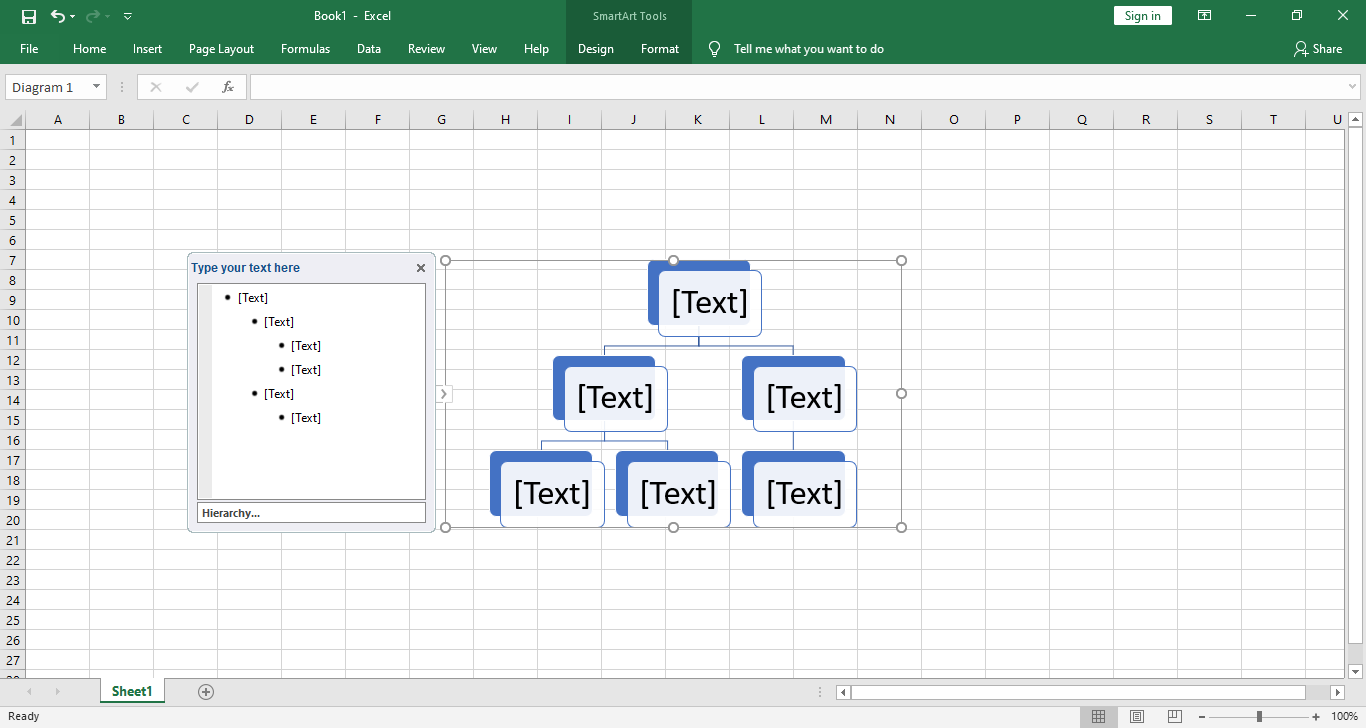
The SmartArt Graphic will revamp on the Excel sheet. You can see the Hierarchy SmartArt Graphic revamped on the Excel sheet below.
Step 4:
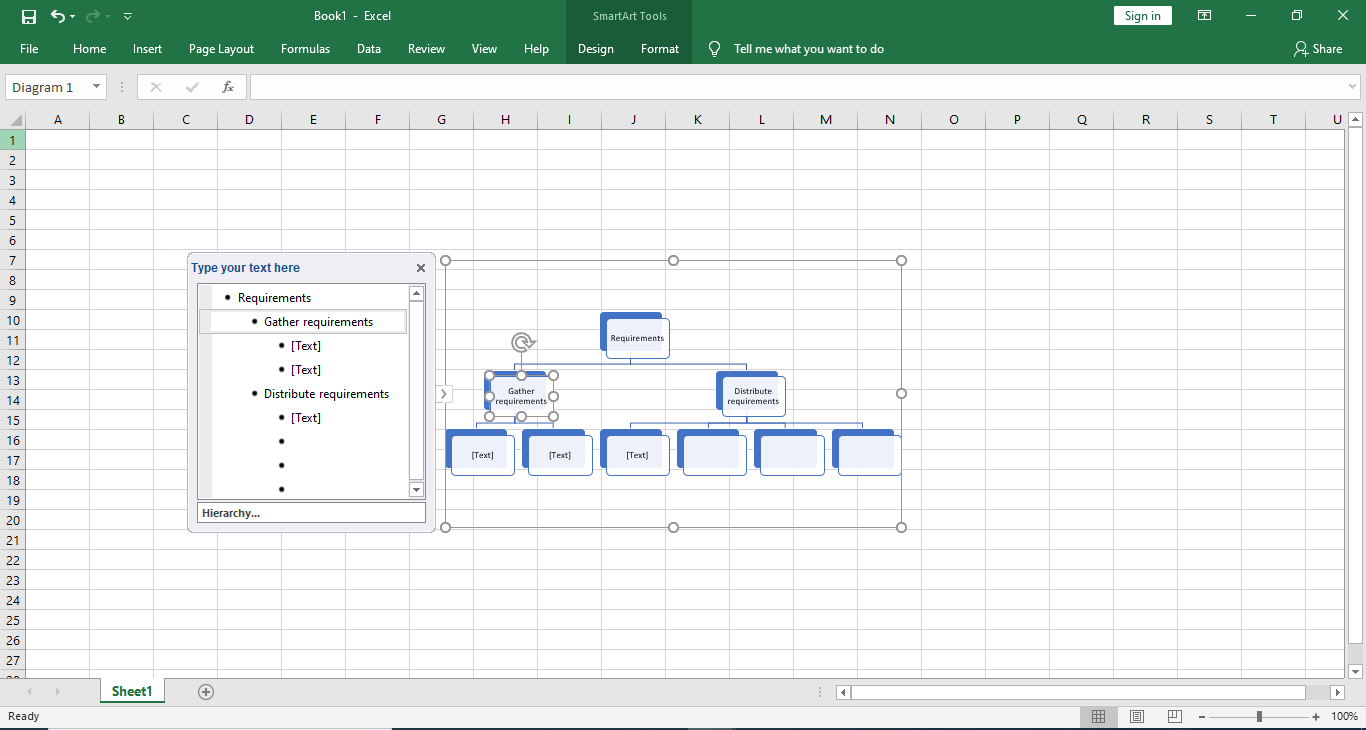
Type the title of the first task in the top box of the Excel WBS SmartArt Graphic. The editor will appear beside the SmartArt Graphic, and you can type the content to be displayed in the WBS Excel. Then, move to the boxes below and type the description of the subtask in the editor window.
You can manipulate the boxes in the editor window to add new boxes to define more tasks in your work breakdown structure. You can assign different colors to each box as well. Select the box and then click the Change color button.
How to Make a WBS in EdrawMax
Step 1:
At first, you need to log in to your EdrawMax account. If you don’t have used EdrawMax before, you can sign up for a free account with your email address. Then you can use Edraw Max Online for free.
Step 2:
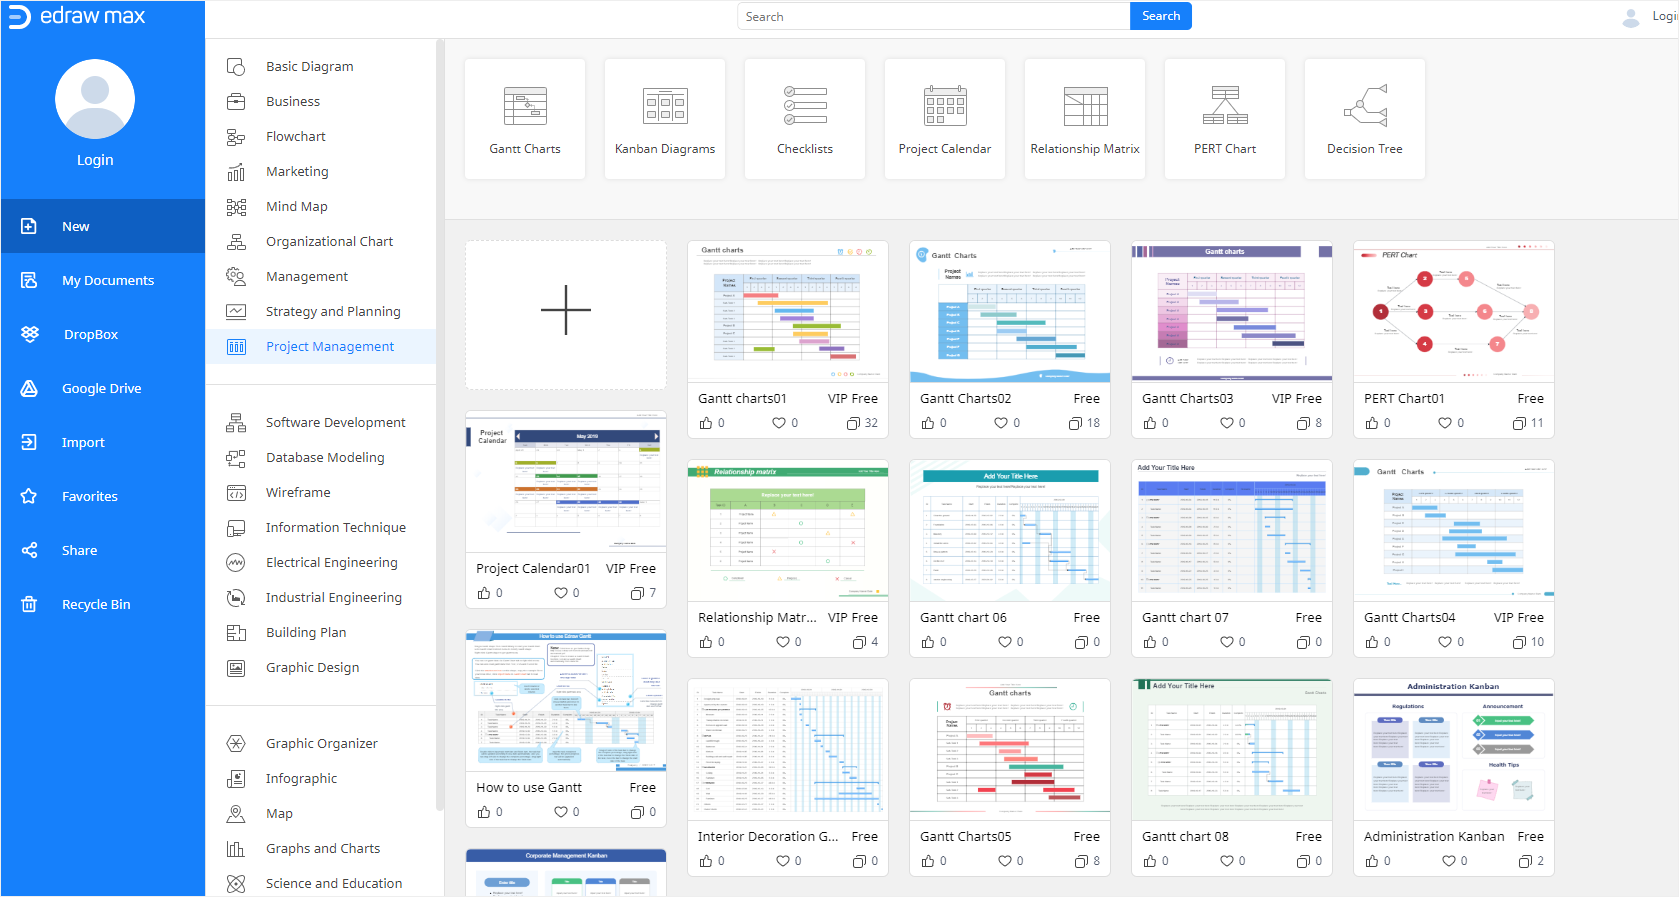
From the New menu, click the Project Management tab, and another menu will open.
You can see the menu in the screenshot below. From the Project Management menu, click the large + sign to create your work breakdown structure.
Step 3:
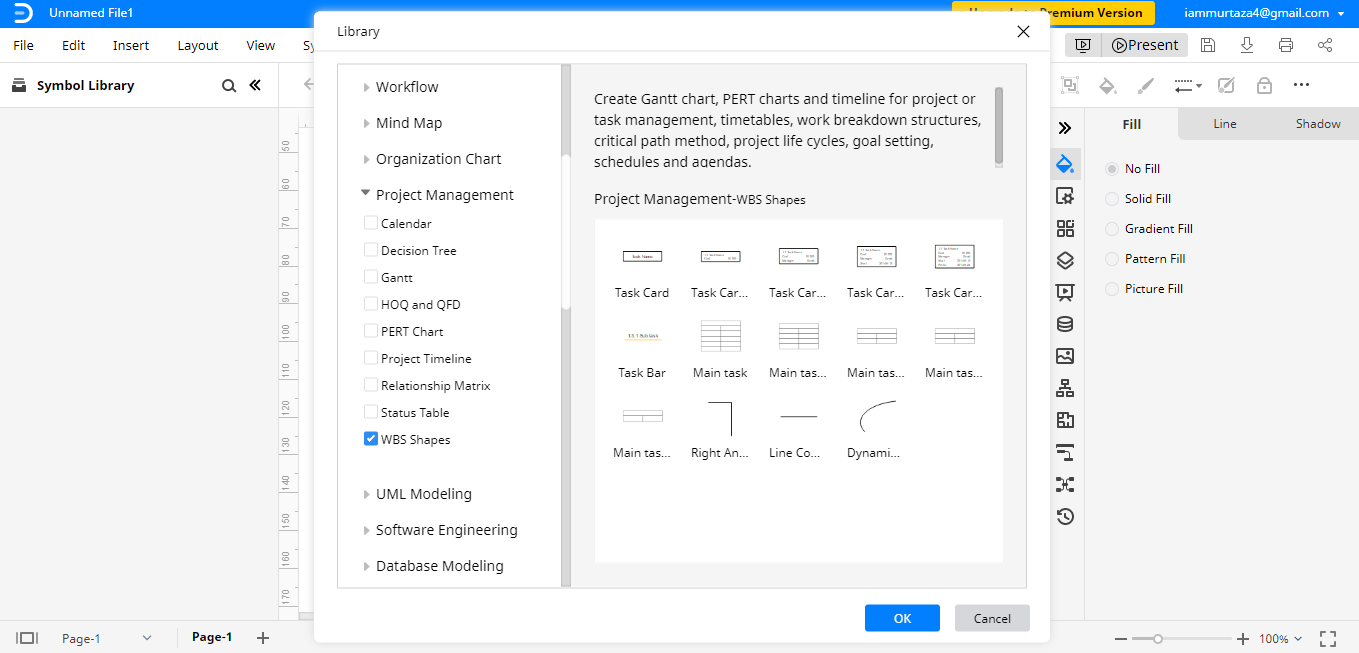
When you click the create button, a new editor window will open. In the editor window, you need to insert symbols from the Project management symbols to create your work breakdown structure.
To insert the symbols, go to the Symbol Library and click the Project Management tab. A dropdown menu will open. From the dropdown menu, mark the WBS shapes and then click the OK button.
Step 4:
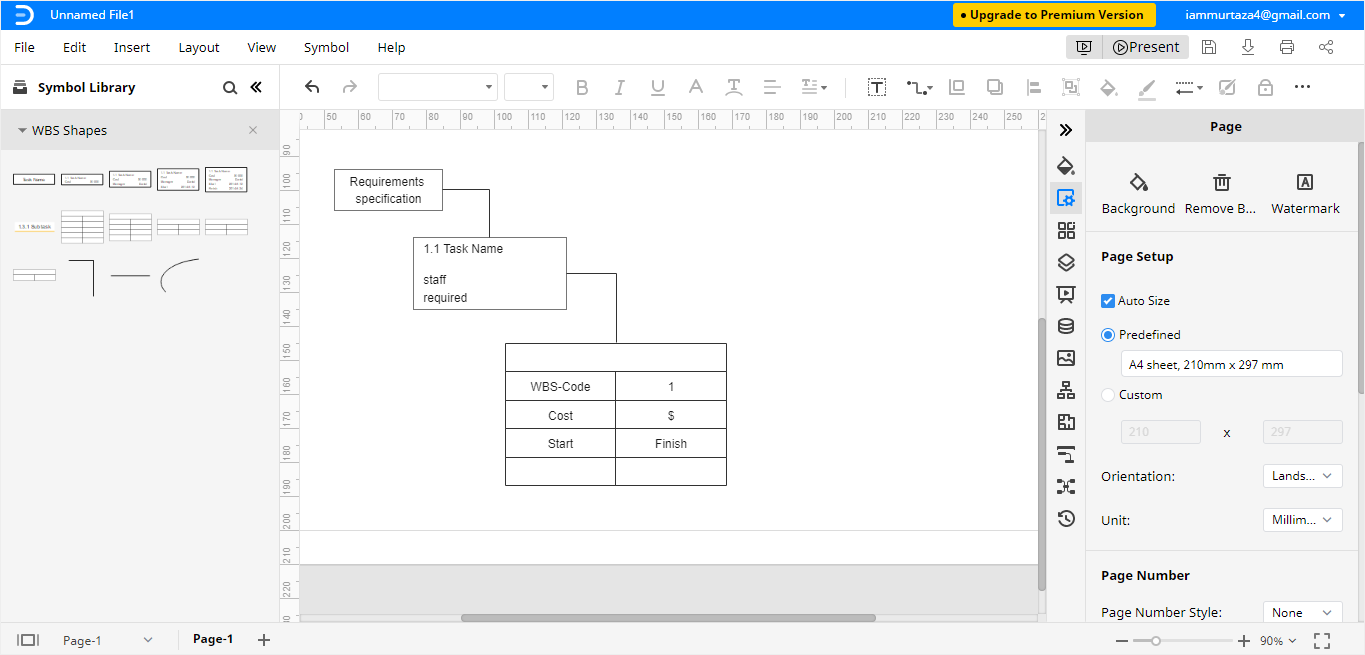
When you click the OK button, the WBS Shapes will be imported to the editor window. You can drag and drop the symbols in the editor window.
Then, you can type the content in the shapes, and using multiple shapes and connectors, and you can complete your work breakdown structure.
How to Export an Edraw Diagram as an Excel File
After you have created your work breakdown structure in EdrawMax's online editor, you can save it in different formats. If you want to save your work breakdown structure in Excel format, it is an easy process of two steps. Follow the below steps to save your work breakdown structure in Excel format.
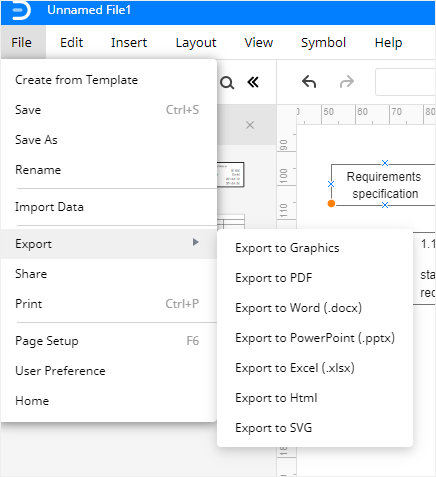
Click on File in the top left corner and then from the drop-down menu select Export. From the Export menu, select Export to Excel (.xlsx) and your work breakdown structure will be saved as an Excel file to your computer. You can export your Edraw files to Dropbox and Google drive as well.
