How to Draw Floor Plans in SketchUp?
1. How to Create a Floor Plan in SketchUp?
Floor plans serve as the medium for visualizing the ideas of the architecture to the buyer. It gives the property buyer a virtual experience in actual dimensions and measurements. Floor plans illustrate the construction details, including the dimensions, column placement, and measurements of all the physical features making it a perfect design blueprint.
SketchUp is a 3D modeling computer software designed for various drawing applications such as interior designing, architectural design, civil and mechanical engineering, video and filmmaking, etc. Let's learn drawing a floor plan with SketchUp.
Step 1: Draw a Floor Plan
To get started, browse the website of SketchUp and download the application. Let's begin with creating the walls of the structure. First, draw a rectangle that will act as a base for the wall. Using the Push tool gives the rectangle a height forming a 3D shape.
Step 2: Enter Dimensions and Calculate Area
To input the dimensions of the width, height, or length, make sure that your cursor was going in the right direction in which you wanted the specified length; you can also enter the length with your keyboard and press enter. Select the plane you want to calculate the area, right-click, and select "Entity Info."
Step 3: Add Doors and Windows
To introduce the walls and doors, you have to leave voids when designing the walls. Use the Push and Pull tool again; initially, draw an outline of the window on the wall using a pencil or rectangular tool. Afterward, use the push tool to push the plane into the wall with the same thickness as the wall to cut out a perfect void into the wall.
Likewise, if you want to save your time, you can hover to SketchUp's 3D warehouse, and from here, you can pick up pre-designed doors and windows; you have to download a door or window that someone has already designed.
Download the doors and windows of your choice and place them into their respective places. To place them in their proper places, use "Move Tool," which will assist you in grabbing the end of each object and placing them into their places.
Step 4: Add Stairs
Place a rectangle of the size of the one step of the stair and pull each rectangle to a specific height using the push and pull tool.
Step 5: Put Some Furniture and Fittings
From SketchUp's 3D warehouse, you can place various pieces of furniture onto your floor plan. You can use the Move tool to place the furniture wherever you want. Change the color and texture of the furniture as per your requirements using the Material tool. You can even delete some furniture parts, modify the size rotation, break it into small parts, etc.
When you are done with placing the furniture, you can also change the color of the walls and apply different materials, including tiles, carpets, or wooden boards, onto your floor.
2. How to Create a Floor Plan Online Easier?
As you can see that designing a floor plan is tricky and challenging in SketchUp, the process will consume your time. Beginners with no prior design experience won't be able to draw floor plans on SketchUp.
There is an excellent solution for this problem as we will now learn how to create a floor plan in EdrawMax Online, which offers a user-friendly experience, and beginners can also use the application with no hurdles. EdrawMax Online is an all-in-one diagramming tool solution that can accomplish your diagramming purposes. The software is compatible with Windows, macOS, Linux, and Online use. You can draw flowcharts, p&id, UML diagrams, design floor plans, office layouts. EdrawMax provides solutions for more than 280 types of diagrams.
Step 1: Choose a Template
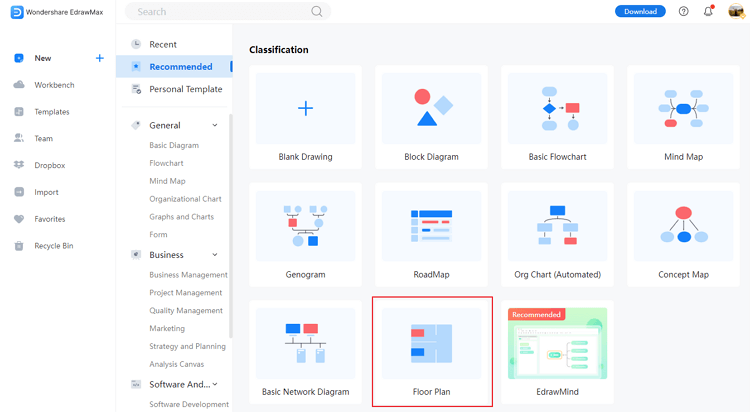
Browse the EdrawMax web application and sign-up with your email or social media account. To see a list of other diagram categories, click "New." Select "Floor Plan" from the drop-down menu. Select an acceptable template that fits your floor plan; otherwise, you can also click "Blank Drawing" to start over and build your floor plan from scratch.
Step 2: Choose a Scale for Drawing
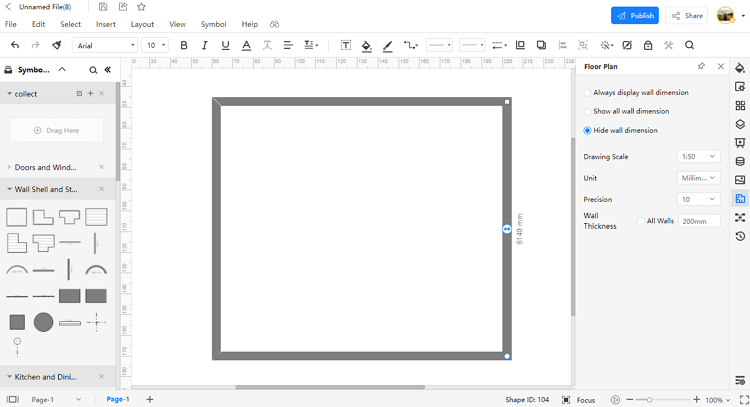
To set a scale for your drawing, click the Floor plan button on the right vertical bar. A window with the "Drawing Scale," "Unit," and "Precision" will appear. Select "Drawing Scale" from the drop-down menu and type the scale you want.
Step 3: Draw Exterior Walls, Doors and Windows
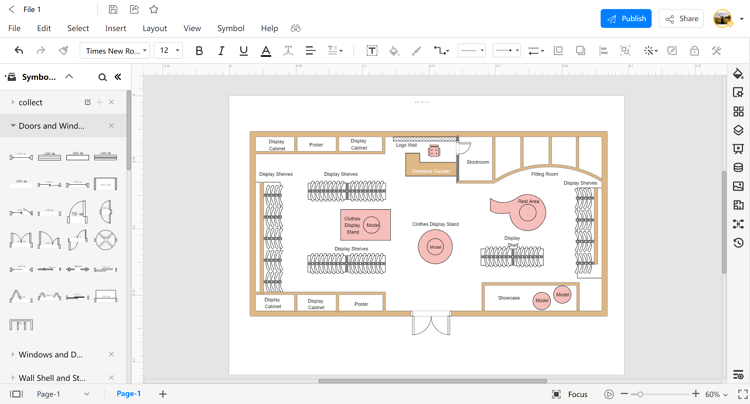
To draw the outer walls, go to the left pane and select "Wall Shell and Structure," then drag and drop any pomade external wall shape into your drawing canvas. Under the "Wall Shell and structure" section, select "Door and windows," and then position the doors by connecting them to external or interior walls. By clicking and dragging the rotate button on the door form, you can show the doors open or closed.
In the "Doors and Windows" area, select any video of your choice, drag them onto your drawing canvas, and position them on any walls in your floor plan. You can change the length of the window by dragging it out or entering a precise value.
Step 4: Add Other Elements
Now is the time to add some furniture, plants, and other decorative materials to your floor plan to make it more beautiful. Hover your mouse over the "Bedroom" section on the left side; from here, you can choose any furniture of your choice. After you've moved the furniture or plant into place, you can rotate it and even extend or contract its size.
Step 5: Set up Dimension Lines
To ensure accurate measurements of the walls, spaces, and corners, add dimension lines to your floor plans. Hover to the "Dimensioning" section on the left side and choose from the different dimension icons available. Drag and drop your chosen dimension line, placing it close to a wall or whichever area you'd like to get measured.
3. Floor Plan Templates
We have learned to design a floor plan, and before that, we have also seen some of its usage. Let's explore some floor plan templates
Template 1: Restaurant Floor Plan
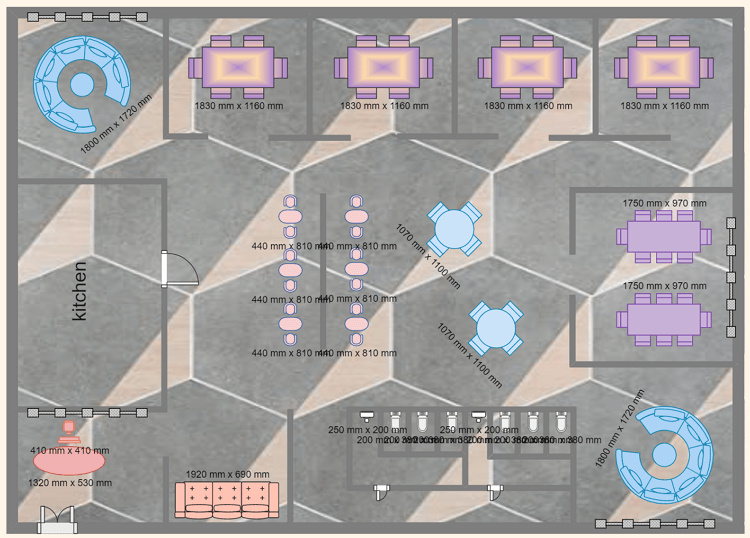
This is a floor plan for a restaurant; the Map depicts the distances and relationships between the restaurant's rooms and other physical features. The restaurant's floor plan illustrates the seating plan for 1-2 guests like couples or friends; seating plans for large families are also included. Separate private cabins for families are also included. The map has a single beautiful entrance with a front desk. The kitchen is placed on the right down of the Map, separated from the seating. Separate washrooms for Ladies and gents are also included in this map.

Template 2: Shop Floor Plan
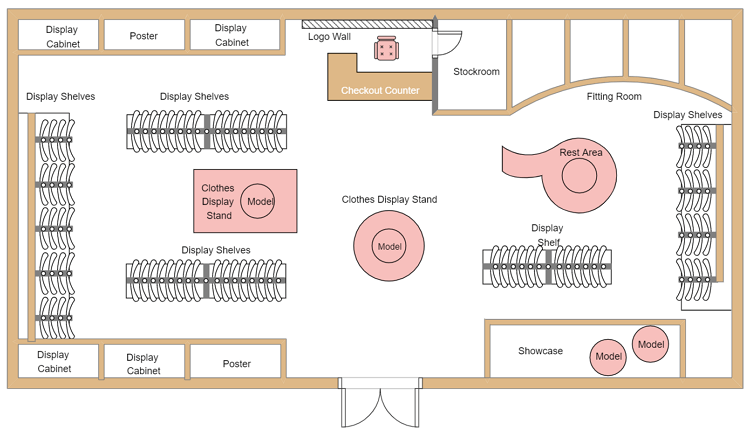
This is the floor plan of a wardrobe shop. Here, you will see the model or a dummy wearing the clothes for display after entering the gate. The right side of the map includes the showcase with models wearing clothes, display shelves, a couch or a sofa is also there for customers to sit and rest, and there are fitting rooms for anyone who wants to try the dress before purchasing it, there is also a room to store the stock. On your left side, you can see that there are a lot of display shelves, Walls with display cabinets and posters of advertisements, and clothes display stands and Models at the center.
Template 3: Kitchen Floor Plan
This is the floor plan for an ideal kitchen with all features that a modern kitchen includes. Upon the entrance, there is a table, and on the right side, there are cabinets to put cooking stuff or utensils. There are cooking stoves, washbasins, modern cabinets, and a microwave on the left side. There is also a large counter for cutting, mixing, and washing activities at the center. There are two utensils washing areas on the right side, which includes washing sinks and huge cabinets to store them.
4. Online Floor Plan Maker
Designing floor plans in SketchUp could be complex and can cause a long hold up as you first want to learn the software. The users with no prior experience and want to map out the floor plan for their houses, but there is no need to worry about it as EdrawMax Online is a diagramming solution with an easy to use interface; the software comes up with free floor plan templates and symbols that the users can alter and use as per their needs.
EdrawMax allows users to create over 280 different diagrams, facilitates team collaboration, and offers a reference center where users may connect if they run into any issues while using the product. The software includes a complete Templates Community where you may explore a comprehensive collection of templates and personalize them to save time and effort. You can diagram a fantastic look using dedicated features. Once the diagram is finished, you can export it to various formats, including PDF, VSDX, PNG, SVG, and more.
5. Key Takeaways
floor plans serve as a helpful guide for the constructors on-site and from the buyers of that project. They help the workers to refer to the dimensions and material checklist, assisting them in preparing all necessary arrangements prior. You can create a great floor plan with a diagramming tool like EdrawMax Online; the application offers a great user experience with pre-set templates and 50,000 different shapes and symbols. You can give your interior ideas a visual look.


