How to Make a Graphic Organizer On Google Docs
1. How to Make a Graphic Organizer on Google Docs?
In case you're wondering how you can insert your organizer tool on Google Docs, you are in the right place. Google Docs has an important feature called Drawing that allows you to embed any type of diagram into your Google Docs. Below is an elaborate guide on how to make a graphic organizer on Google Docs:
Step 1:
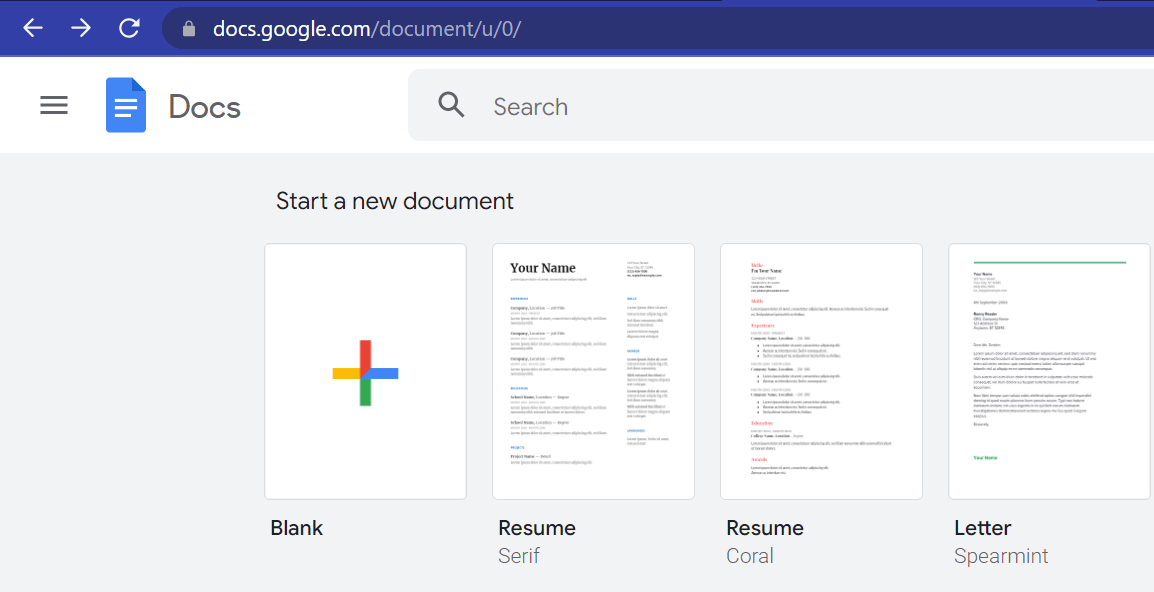
Launch Google Docs on your browser and create a new document. You can easily do this by clicking on the + icon which leads to a blank document. If you're inserting a graphic organizer on an already existing document, all you need to do is place your cursor at the point you would like to insert your diagram and follow the succeeding steps.
Step 2:
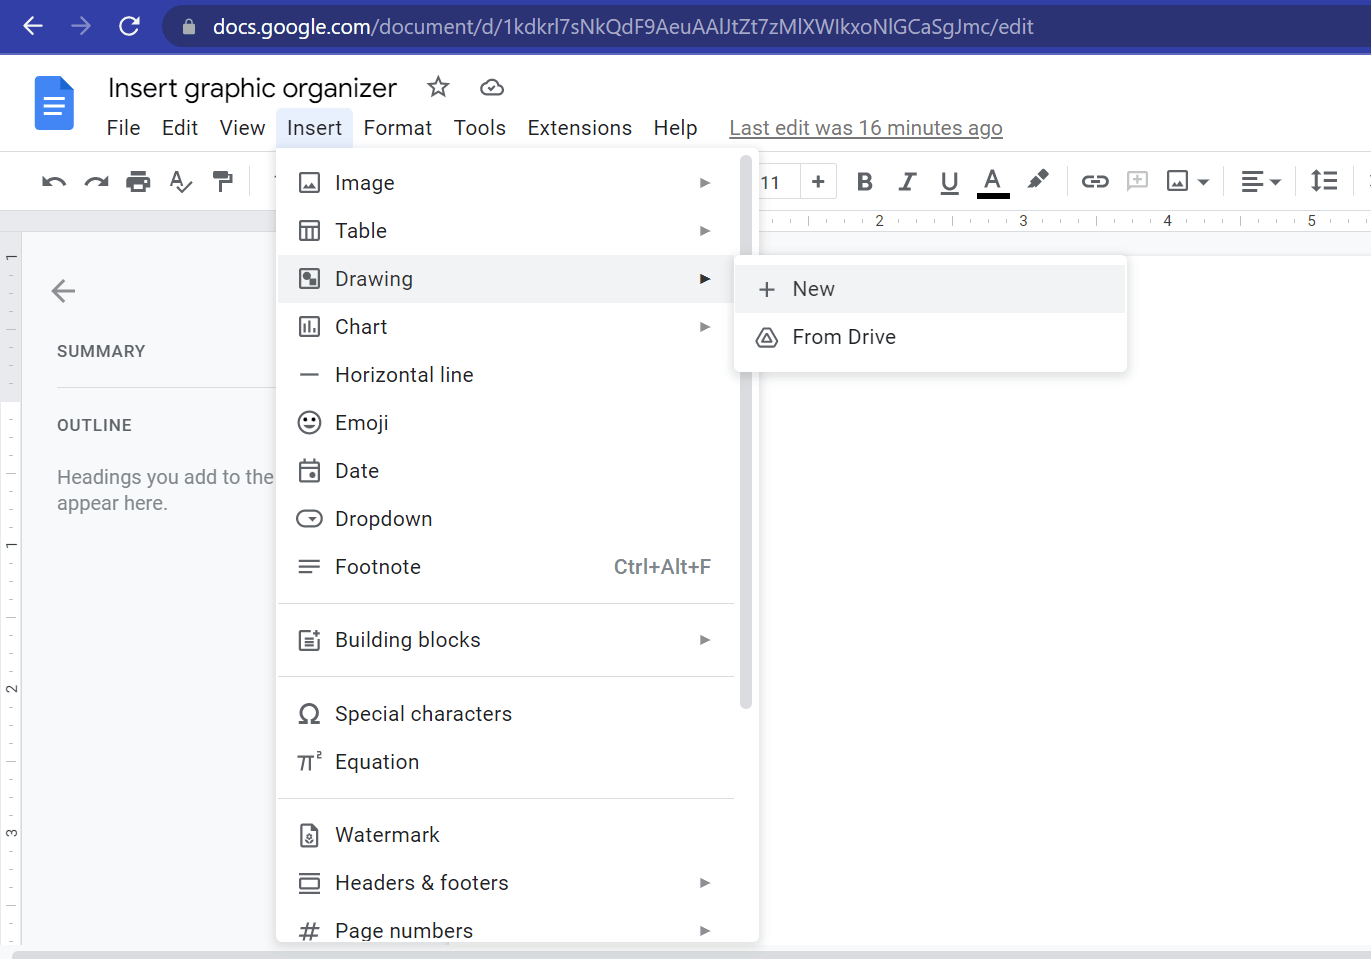
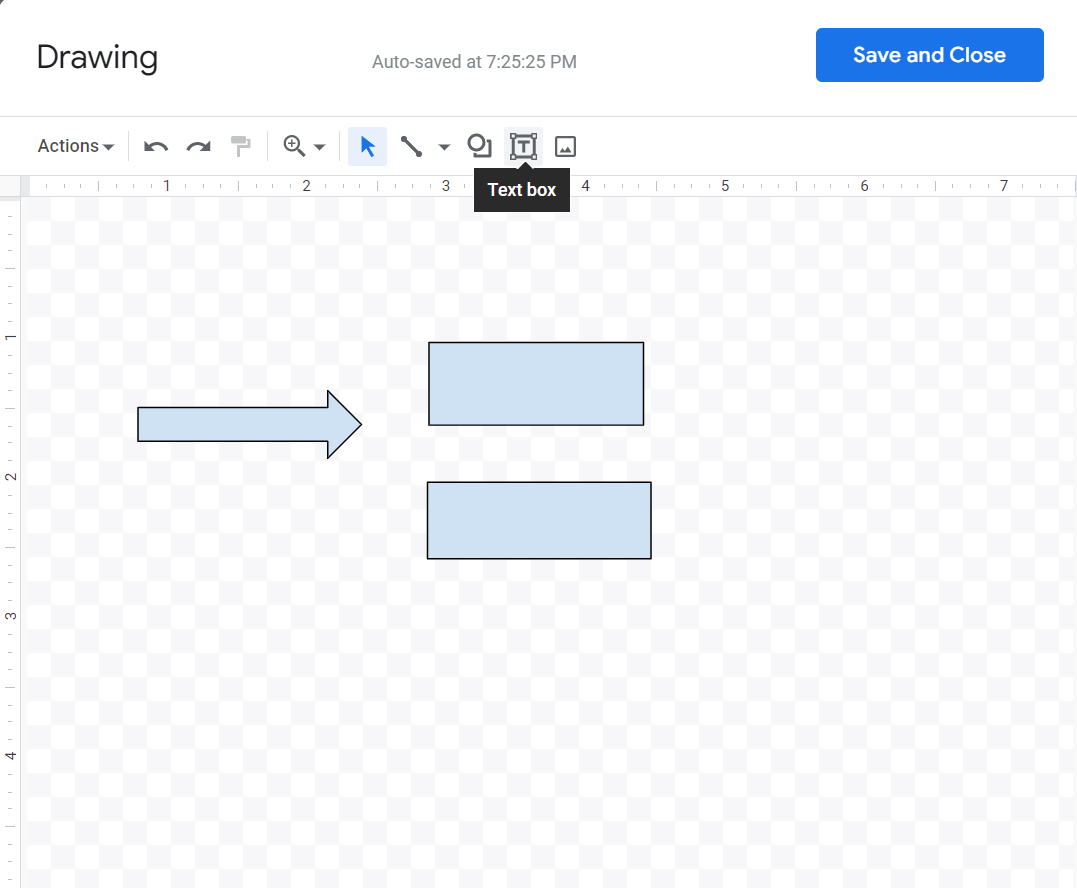
Now that your document has a title, we can proceed to add a diagram. Click on the Insert button on the toolbar. From the drop-down menu, select Drawing and then New. As you move your cursor along the toolbar, the functions of each tool displayed will pop up. Among them are undo, redo, paint format, zoom, selecting arrow, line choices, shape choices, text box, and insert image. You may notice that some tools may be inactive at first but once you start drawing they are automatically activated.
Step 3:
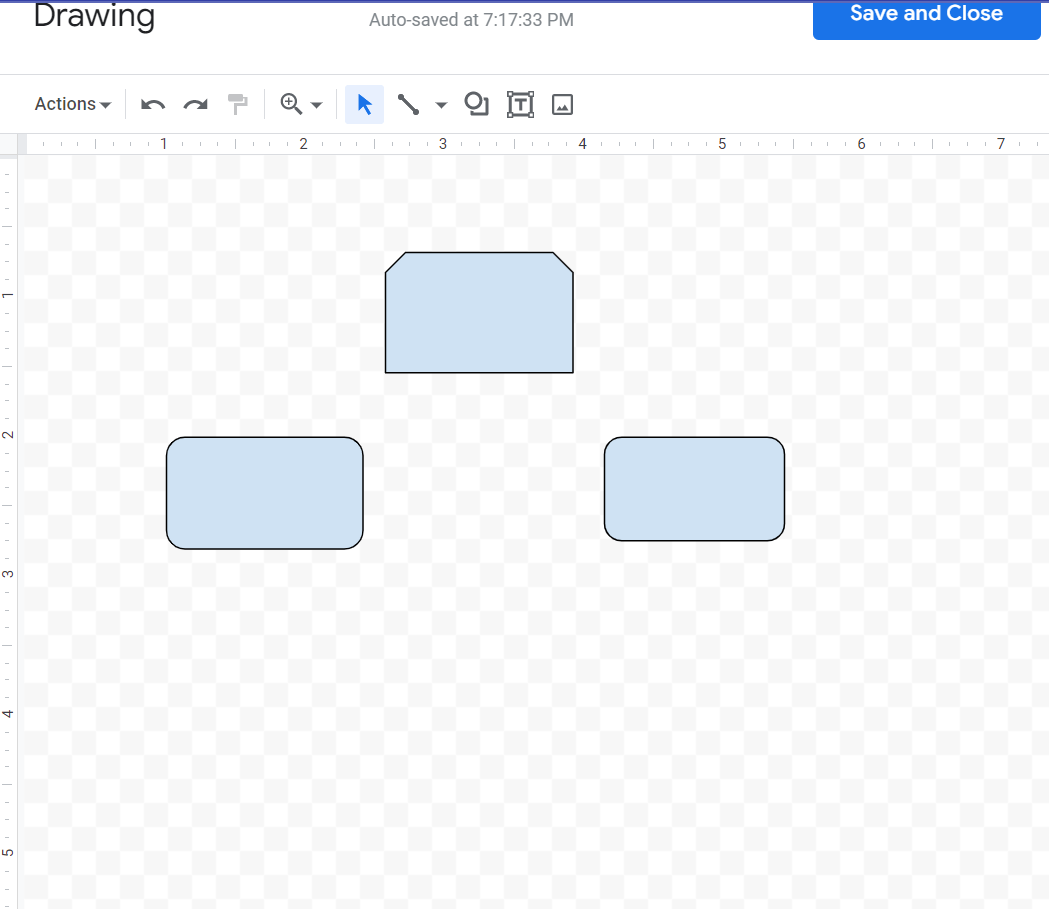
Now we're ready to create a graphic organizer by juggling your preferred shapes from the menu bar. Unlike in the EdrawMax tool where you employ a drag-and-drop feature, you need to select a shape and a + sign becomes your pointer on the drawing page. You can draw your shape by dragging the + pointer and releasing your mouse once you reach your desired shape.
Step 4:
Connect your shapes with arrows from the line choices. This will give your content some flow and guide the reader. You can add text in or next to your shapes. To add text in your shapes, double-click inside the shape and a text box will pop up below the shape. Add the text you would like to appear inside the shape and click outside the box demonstrated below: To add text next to your shapes, click on the T icon from the menu bar and drag your mouse pointer back to your drawing page.
Click on the drawing page where you want your text to appear and add the text as you would before. Click outside the box for it to disappear
Step 5:
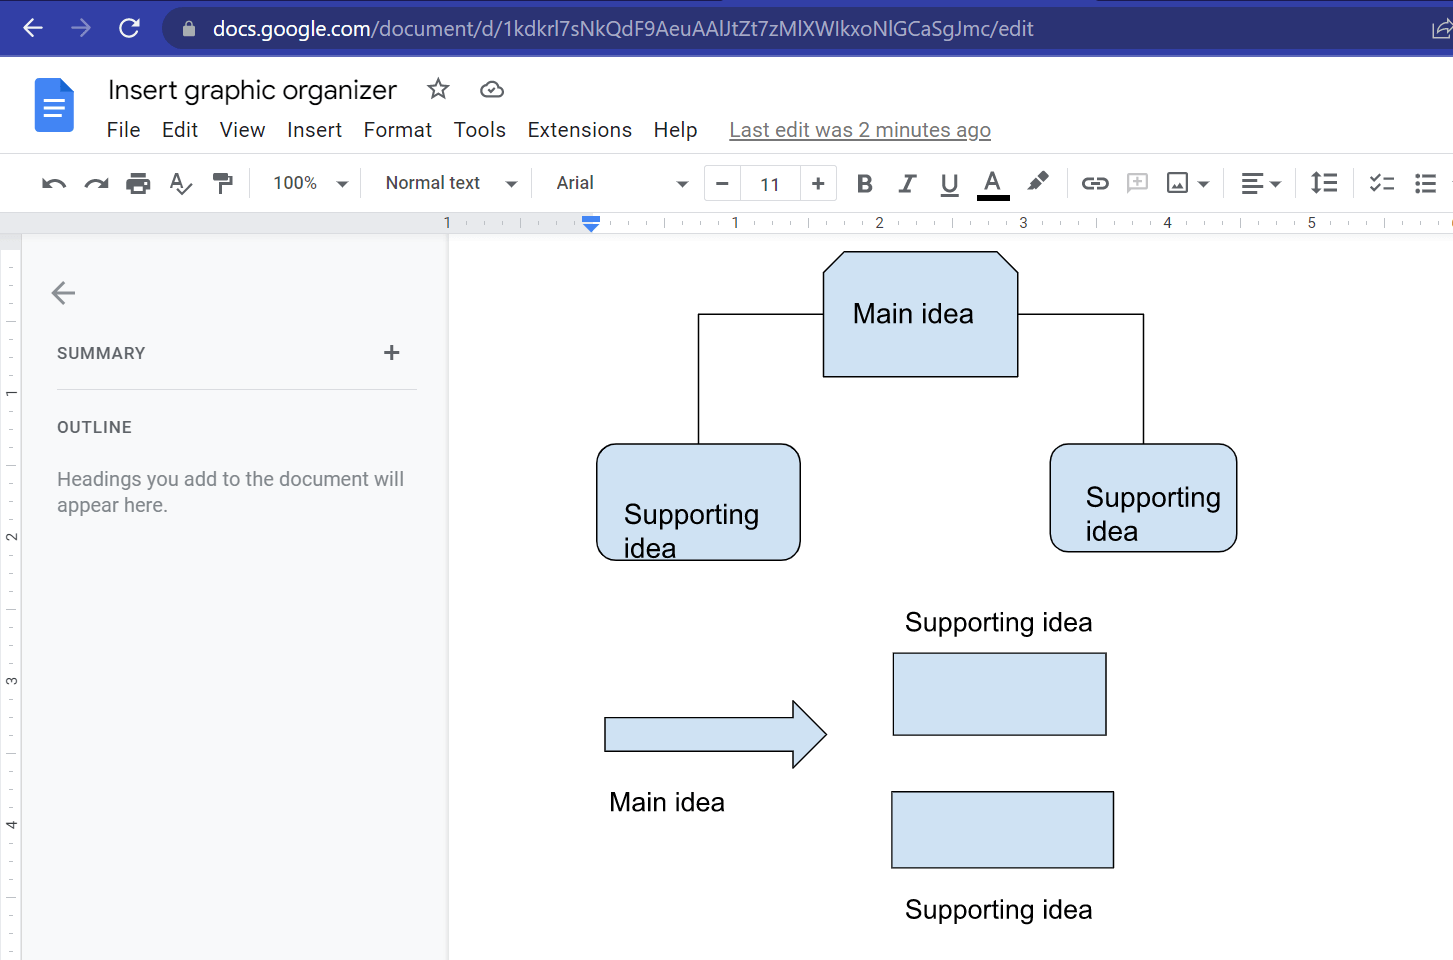
Click on the Save & Close button to save your drawing. You will now see your drawing on your Google Docs.
2. How to Make a Graphic Organizer Online Easier?
Whether you are doing it online or have downloaded the EdrawMax software, EdrawMax offers you 1500+ templates to display your ideas and content. There are also over 26,000 symbols you can embed on your designs to make your work stand out. Whether it's an official presentation or a student's learning tool, you will find sufficient tools to use on EdrawMax. Follow this simple guide to create a graphic organizer on EdrawMax:
Step 1: Open EdrawMax and login
Launch the EdrawMax Online tool on your browser and sign in, if you are a first-time user. Otherwise, input your login credentials.

Step 2: Template selection
Once logged in, you can either select a template from Templates Community or click on the + icon to get a blank template to create your graphic organizer.

Step 3: Create from scratch
Creating a graphic organizer from a blank template is similar to drawing on the Google drawing page. Here, you may unleash your imaginative edge and make your production. Move your diagram around the page to your satisfaction and get to play around with different shapes, connecting lines, color fills, borders lines and back fills to make your diagram captivating to the viewer.

Step 4: Add Other Elements
From the Symbols Library, add relevant elements to your graphic organizer, such as furniture, plants, etc. Drag and drop the symbol you need into the position you need it to be on the drawing page.

Step 5: Add components
Customize your drawing by adding relevant details to it. You can add text by double-clicking inside your feature and typing the text on the text box pop up. You can also add images as you please.

Step 6: Export or share
Click on the Export icon to save and download your drawing in whichever format you desire; HTML, MS Office, JPG formats, SVG, PDF, and much more. You can also share it with relevant parties.

3. Graphic Organizer Templates
We have learned to design a graphic organizer, and before that, we have also seen some of its usage. Let's explore some graphic organizer templates
Template 1: T Chart Graphic Organzier
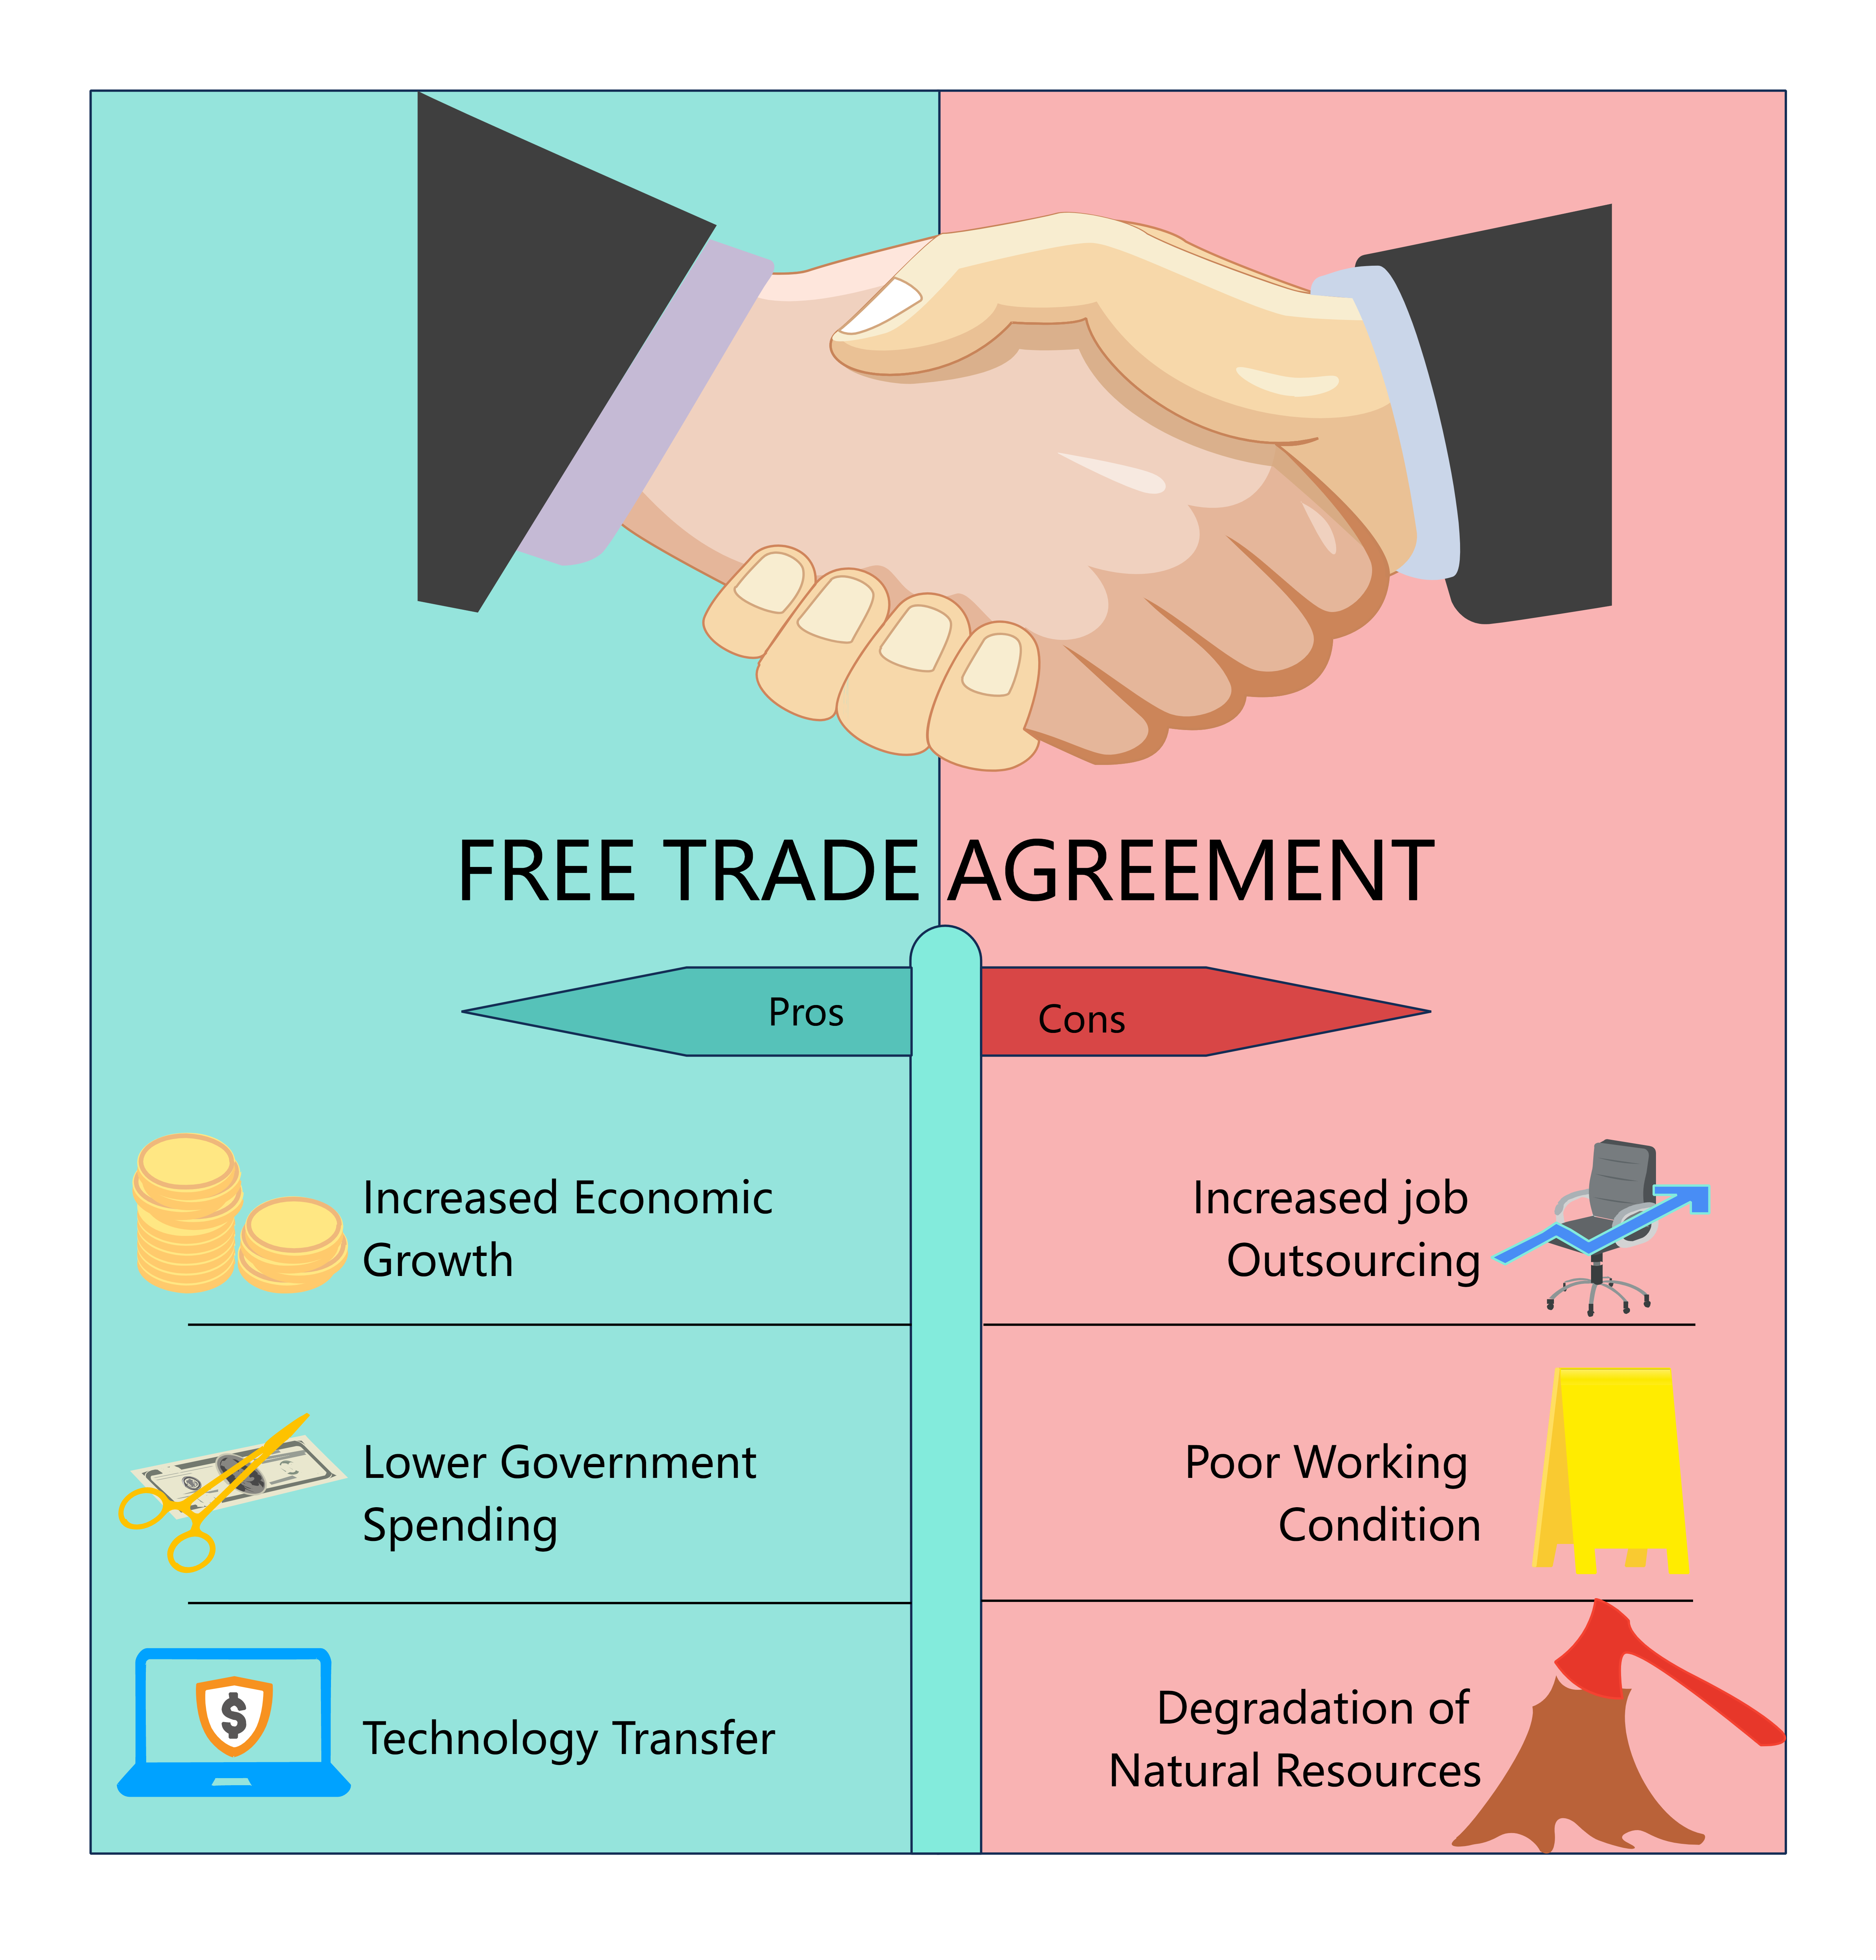
The T- chart shown in the diagram describes the pros and cons of a " free trade agreement". This diagram very clearly and in short sentences tries to explain the advantages and disadvantages of the free trade agreement. The pros part shows the positive effects of free trade agreement by putting points like increased economic growth, lower government spending, and technology transfer. Whereas the cons part emphasis on negative effects of the free trade agreement by points like increased job outsourcing, poor working conditions, and degradation of natural resources. The diagram is made attractive and catchy by the use of pictures for each point.
Template 2: Idea Web Graphic Organizer
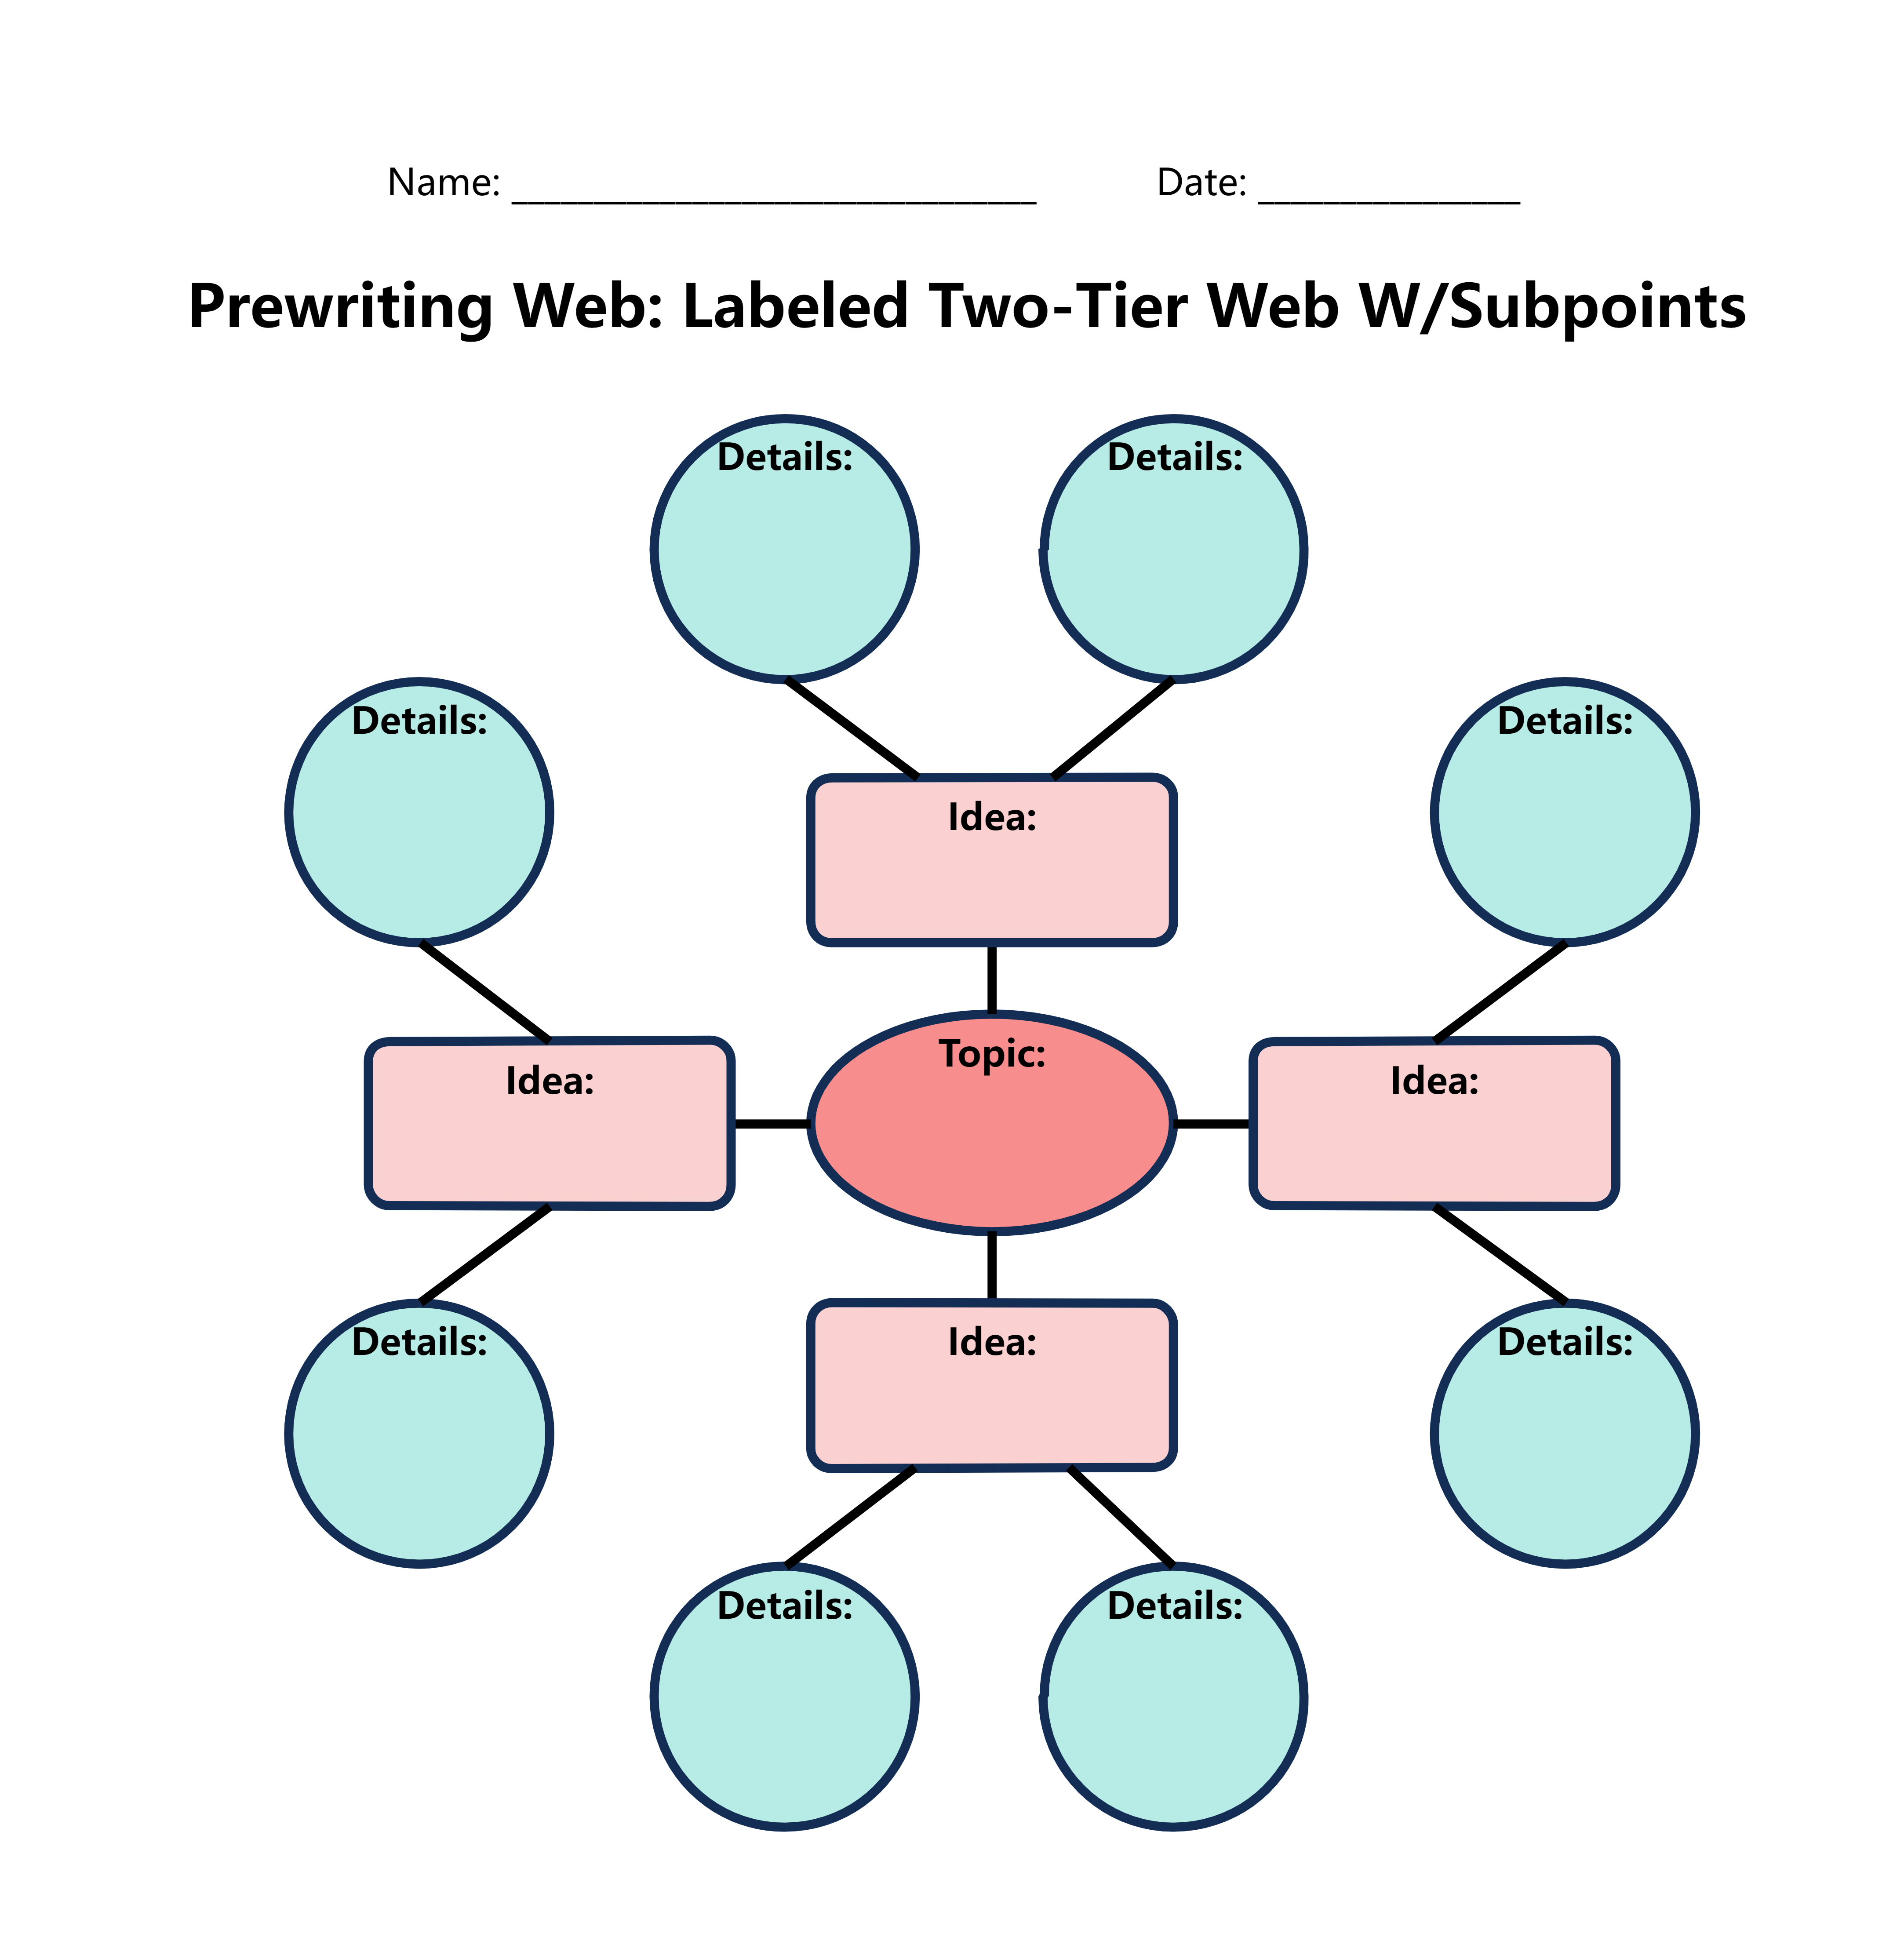
Such web graphic organizers include all ideas evolving around a topic. Based on the variation of the topic, the number of ideas will also vary. That is why idea web graphic organizers on different topics have different numbers of ideas. In these organizers, the topic is placed at the center and the major ideas are placed surrounding them connected by straight lines. Then, the details of each idea are placed surrounding the corresponding idea and are connected through straight lines. Based on how much description an idea needs to cover, the number of boxes with details will vary. In most cases, there are two detail boxes for each idea.
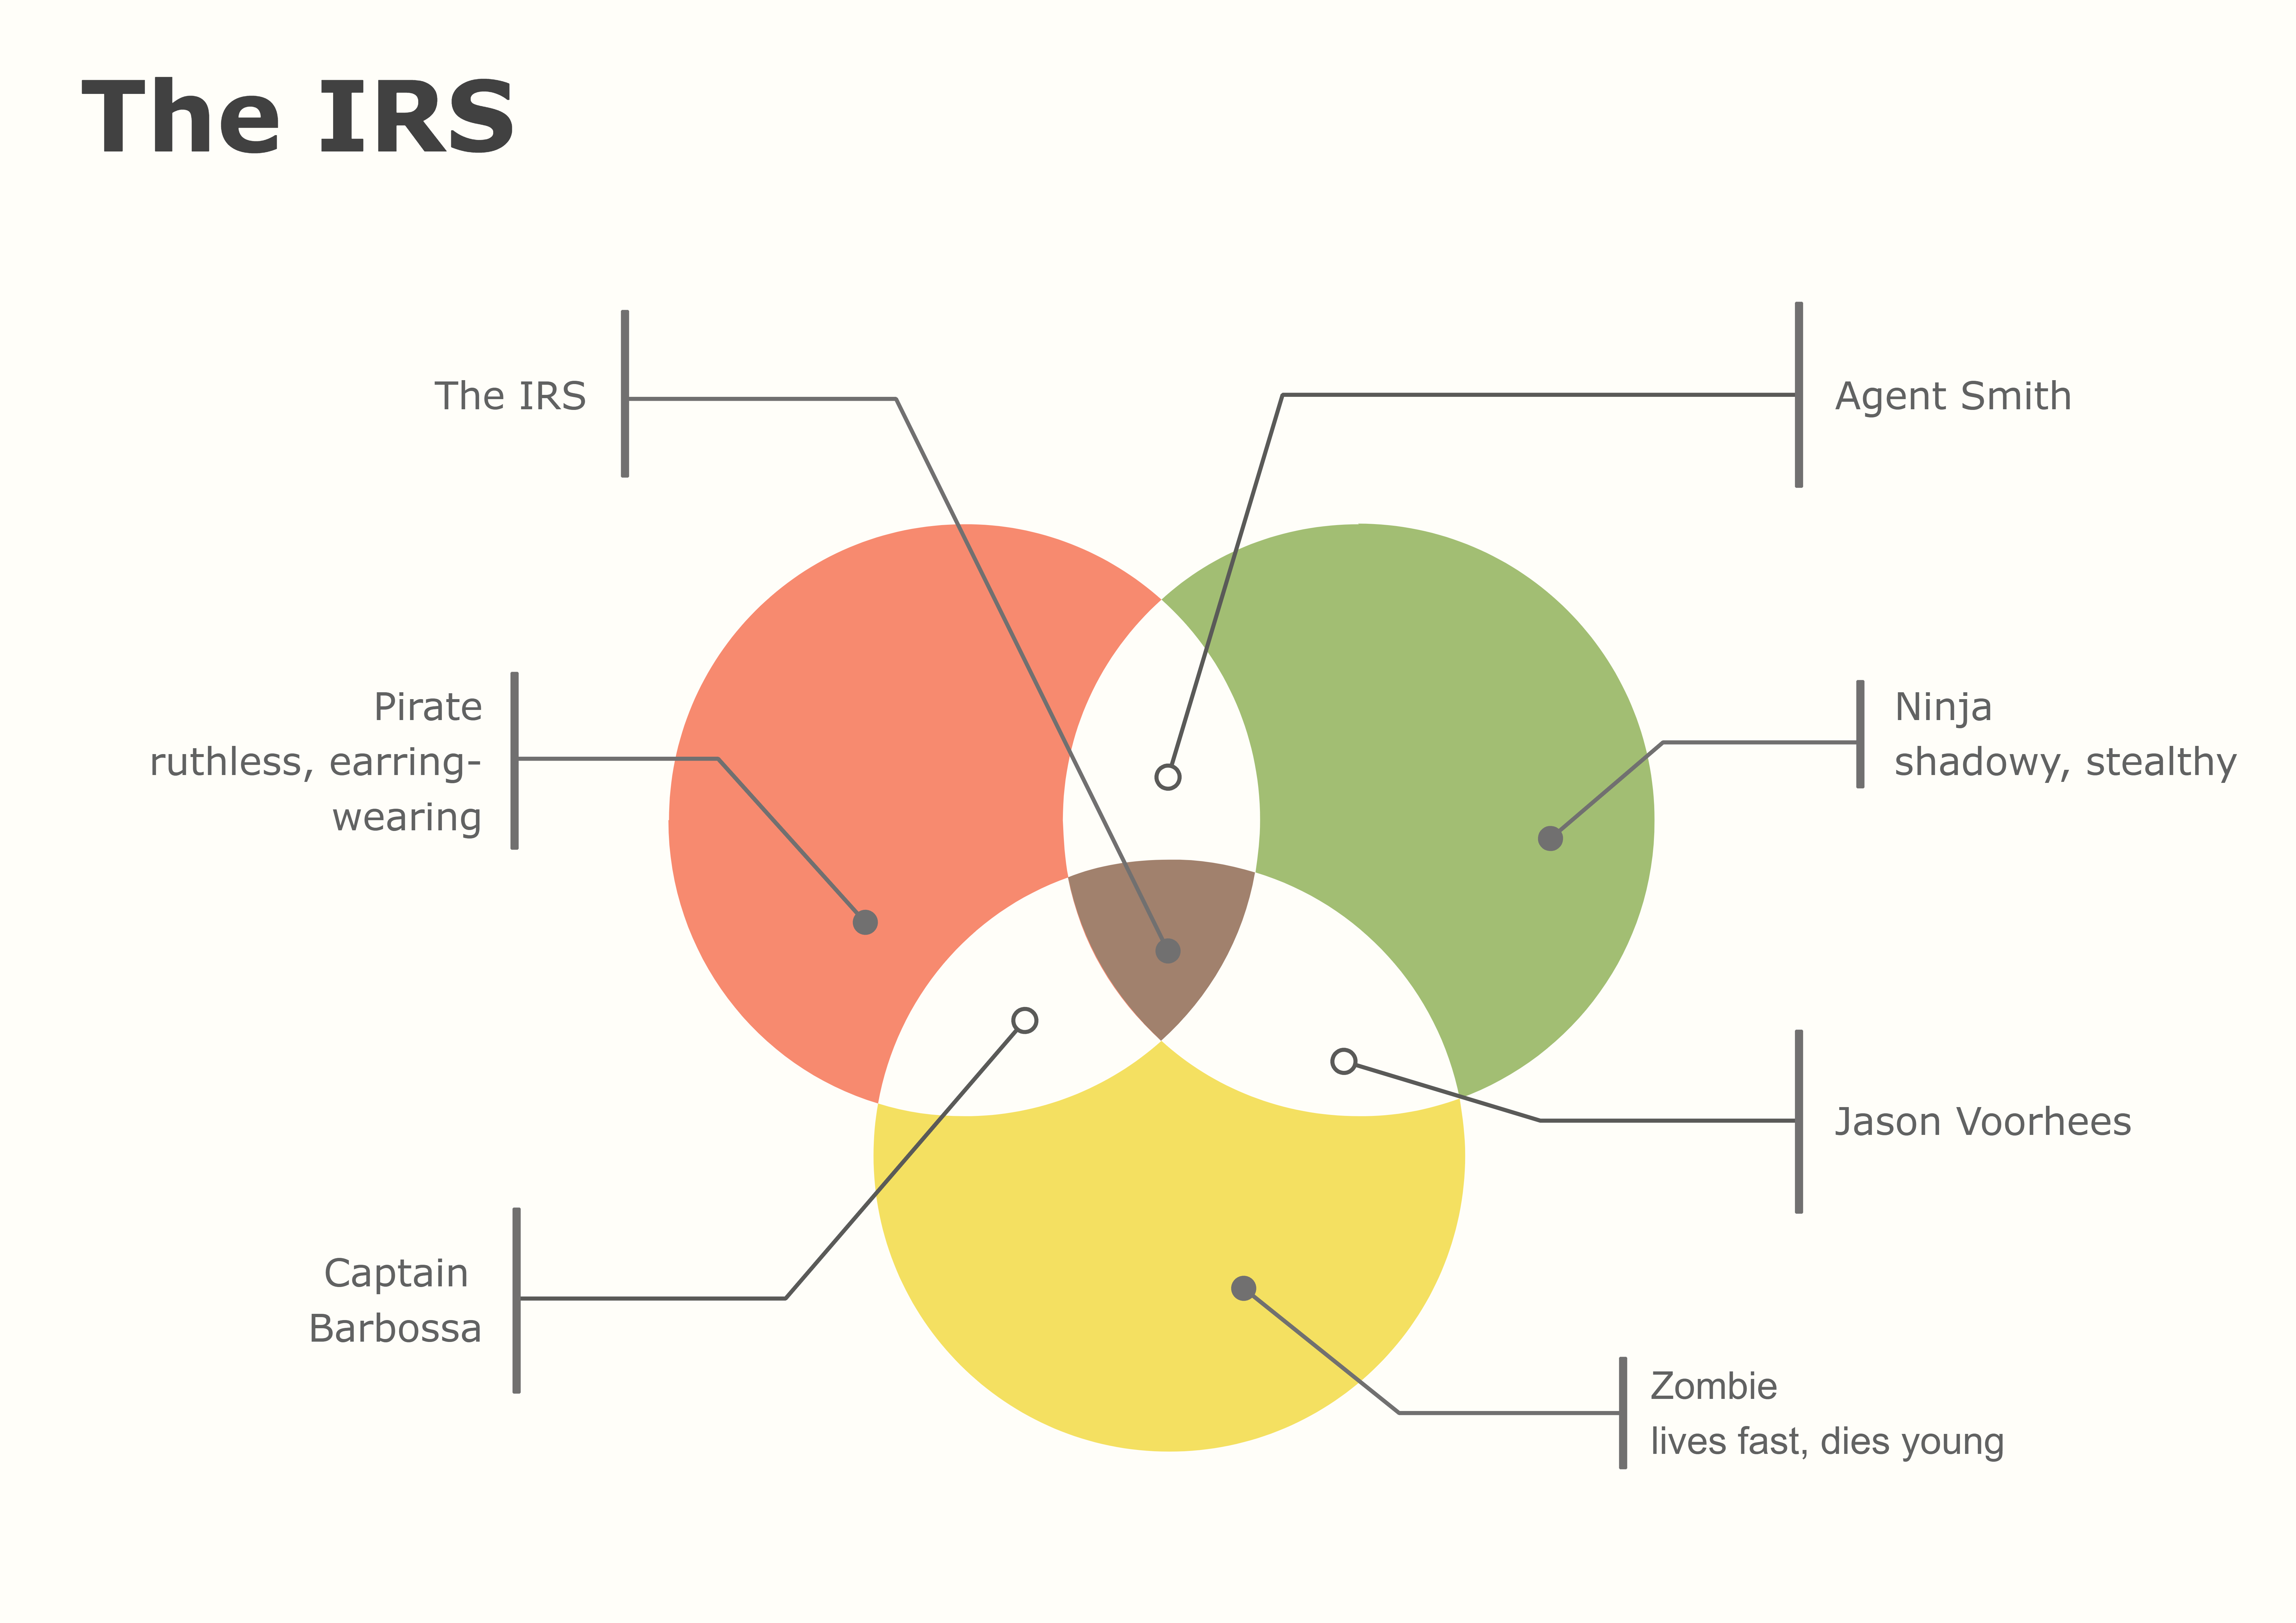
Template 3: Venn Diagram Graphic Organizer
A Venn Diagram is a graphical illustration of mathematical or logical elements that represent the values in sets. Typically, a Venn Diagram comprises of two or more circles partially overlapping each other.
4. Online Graphic Organizer Maker
4.1 EdrawMax Online Vs Google Docs
As demonstrated above, it is possible and easy to create your graphic organizer program on either tool. However, some of their features are rather contrasting, such as:
- Google Drawing limits you to a general drawing and graphic organizer diagram. However, with EdrawMax Online, you can easily create a graphic organizer, flow chart, timeline, or cabinet design as its database is well equipped.
- EdrawMax Online offers a free version and a free trial period before making a subscription. Comparatively, Google Drawing will give a perpetual of free access.
- EdarwMax provides its users with numerous design templates from the Templates Community and symbols from the Symbols Library.
4.2 Features of EdrawMax Online
Besides having free templates for your ideas, EdrawMax offers the following features:
- Collaboration tools that enable you to effectively share templates and messages with your colleagues at the cloud workspace.
- Uncountable built-in templates and symbols that help you harness your design acumen when creating a graphic organizer.
- It has embedded social media outlets to enable its users to share their drawings on social media.
- A manifold of visualization tools to efficiently simplify and organize your content; flowcharts, concept and circuit diagrams, and much more.
5. Key Takeaways
Creating a graphic organizer diagram is not rocket science. In fact, if graphic design is one of your fortes, you are greatly advantaged. Nonetheless, the task is independent of prior knowledge in the graphic design industry. Let our guide on how to make a graphic organizer on Google Docs serve you. And as they say, practice makes perfect! The more you explore EdrawMax user interphase, the smarter you get in navigating one of the best graphic organizer software in the market.


