How to Create a Flowchart in Pages- A Detailed Guide
Pages on MacOS is a built-in tool that assists you in various errands; particularly, it's quite efficient at designing detailed flowcharts.
The effectiveness of flowcharts in every walk of life is undeniable because complex projects are often considered hard to comprehend, given the numerous interlinked processes. Especially if you're working in a team, it seems pretty complicated to brief the project's tasks & processes each teammate. Therefore, you can opt for designing a comprehensive flowchart to visually demonstrate each phase & process more perceivably. In this connection, creating a flowchart in Pages is quite handy if you're a Mac user. This detailed guide explains the step-by-step procedure of how you can create a compelling flow chart in Pages.
1. Overview of Pages on Mac
Pages is a word processor for IOS & Mac-operated devices that mostly comes pre-installed on Apple devices. If your device doesn't have Pages installed, you can still download it instantly from App Store as it is a free tool.
If you've used MS Word already, then you might better perceive Pages functionality as it's much similar to MS Word. Additionally, Pages on Mac presents much more benefits to its users; you can use it to efficiently carry out multiple tasks. For instance, it does an amazing job at designing Gantt charts & flowcharts.
2. How to Design a Flow Chart in Pages?
Creating a flowchart in Pages is pretty easy; still, here we've elaborated in-depth procedure to create a flowchart with visual illustrations. You just have to precisely follow all the steps stated below.
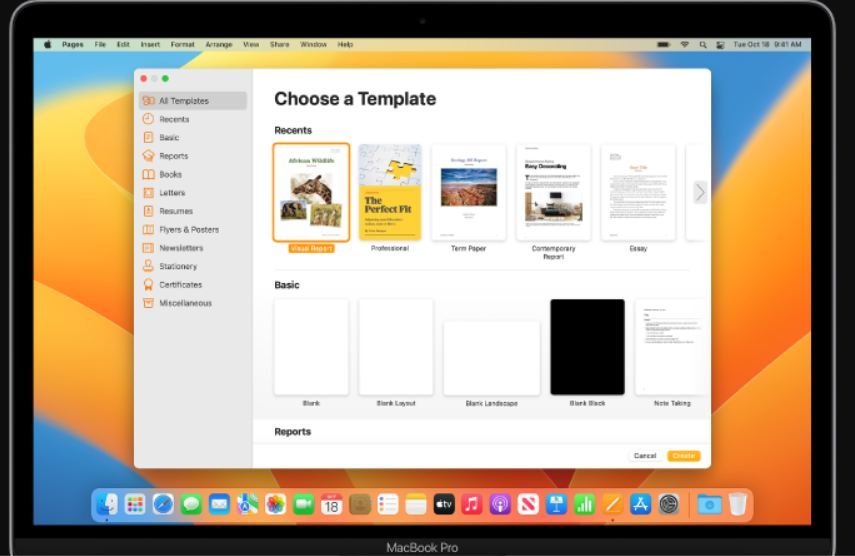
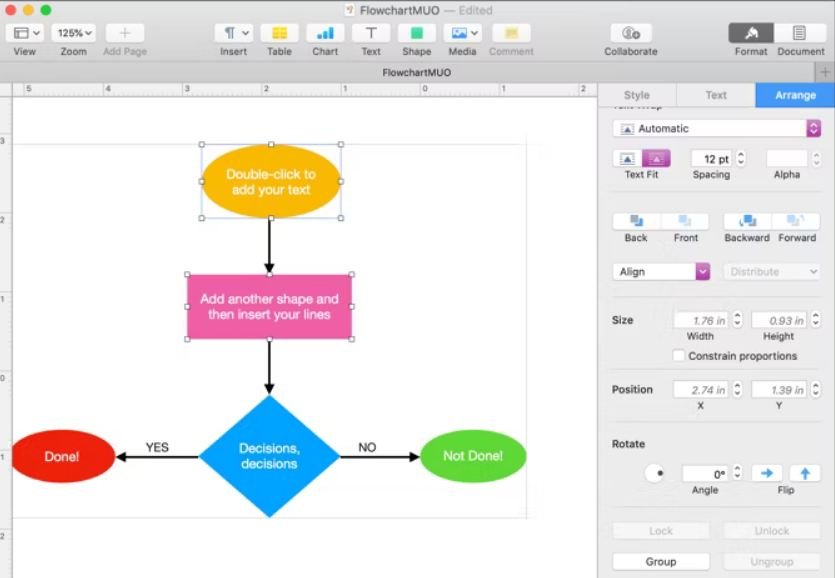
- Step 1: In the first place, launch the Pages App on your Mac device and navigate to the Templates to get started with a blank sheet.
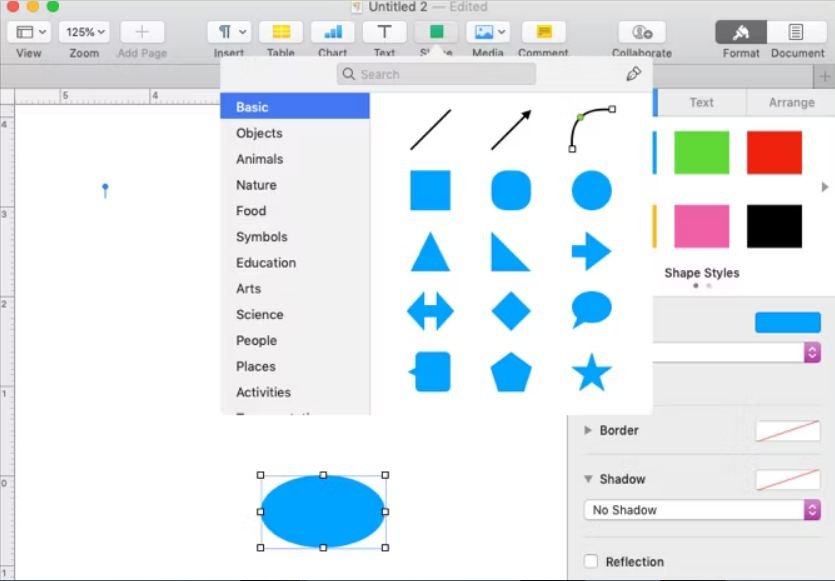
- Step 2: Click on the Shapes option in the toolbar to insert objects. Here you can preview the shapes beforehand to insert the accurate ones in your blank sheet.
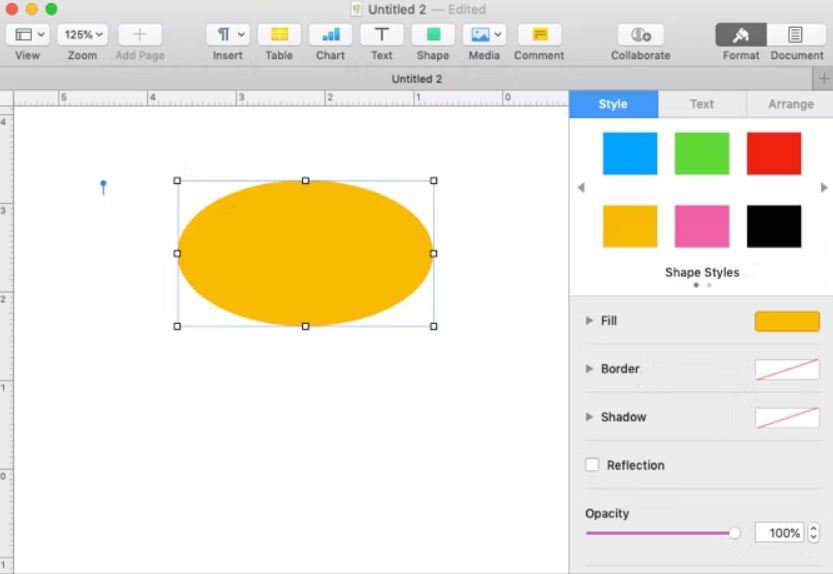
- Step 3: Select the Format option in the top right corner to change the style, border, shadow, opacity, etc., of the inserted shape to make it more appealing. However, you must first select the respective shape or object to apply any change. You can also rescale the object by selecting & picking its corner.
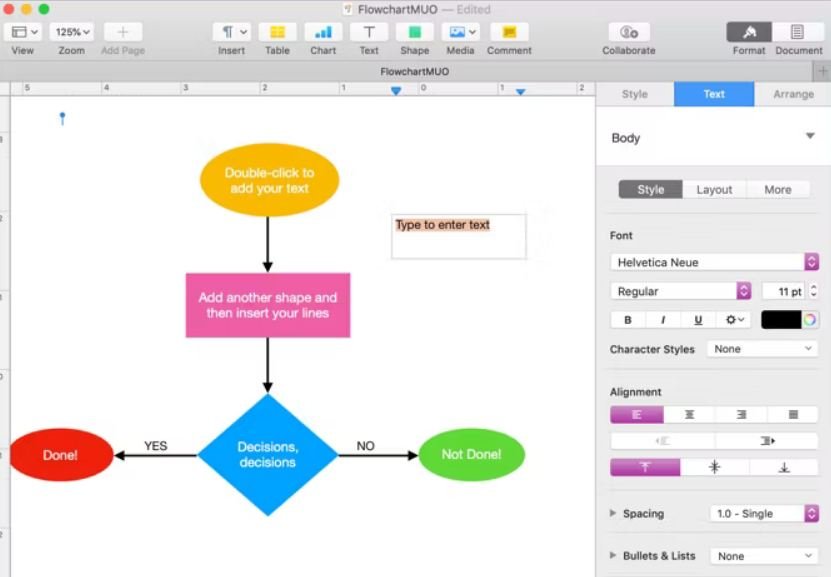
- Step 4: Double-click on the shape to add textual information to it. The text can be formatted using the sidebar menu; you can change the text's font, style, alignment, etc.
- Step 5: To connect the flowchart shapes, you need to add connecting lines; for this, navigate to the Insert option in the top menu bar and select the Lines option to insert lines on your sheet. Then you must select and relocate the added lines to connect the shapes accurately.
- Step 6: To add text-based information to connecting lines, you can add a text box by selecting the Text Box option in the Insert menu of the top bar. Then insert the required text in the added text box. You can also format the added text using the Format option in the sidebar.
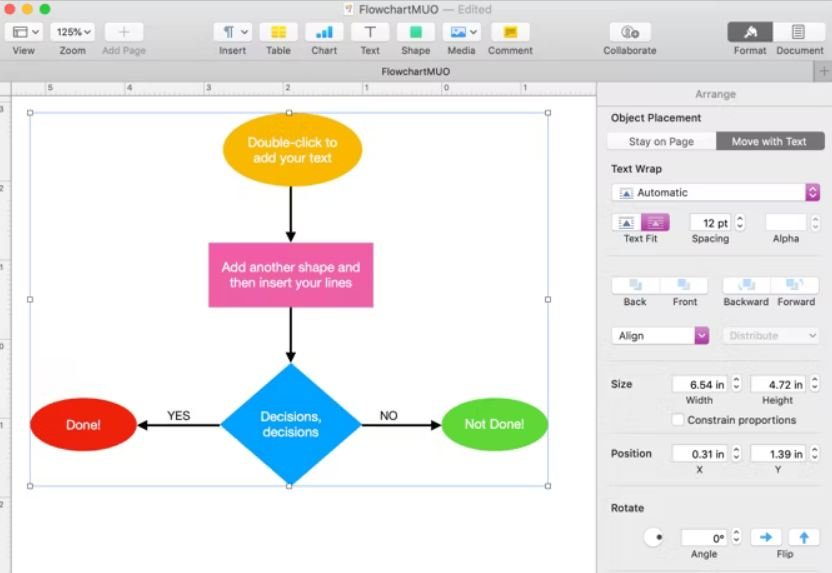
- Step 7: You may need to move the objects or shapes, causing the disruption of the associated text. To evade it, you should make an adjustment. For this, select the Arrange tab in the Format sidebar, then click on the Move with Text below the Object Placement button so that the text can move with the object whenever you need to move a specific object.
- Step 8: You can also group the flowchart objects to keep them together upon completing the design process so that the entire flowchart can be relocated more conveniently. For this, press the Command + A keys simultaneously to select all objects and click the Arrange tab in the Format sidebar. Then select the option Group located below the Arrange tab. Now, your flowchart is considered a single large object, and you can easily resize, format, or relocate it.
3. Design Flowcharts More Conveniently with EdrawMax
Pages is a multi-purpose tool to use on Mac quite conveniently. Against this backdrop, this comprehensive guide has elaborated enough on creating a flowchart in Pages, but Pages is actually a word processor that is not primarily designed to create flowcharts, so it allows you to create basic-level flowcharts only. Given this limitation, we recommend using the EdrawMax tool on your Mac device if you want to design a complex level flowchart.
EdrawMax is an all-in-one diagramming tool that efficiently meets your diagramming requirements on all scales. You can design an exceptional and altruistic quality flowchart readily using EdrawMax. The tool also offers several flowchart templates so that you can get designed an exemplary customized flowchart even if you're just starting with it.
How to Create a Flowchart Using EdrawMax?
Here we have thoroughly explained how you can create an appropriate flowchart on Mac using EdrawMax software.
- Step 1: Launch the EdrawMax Software on your Mac device. Click on the New tab in the left panel and select the Basic Flowchart option from the Recommended section.

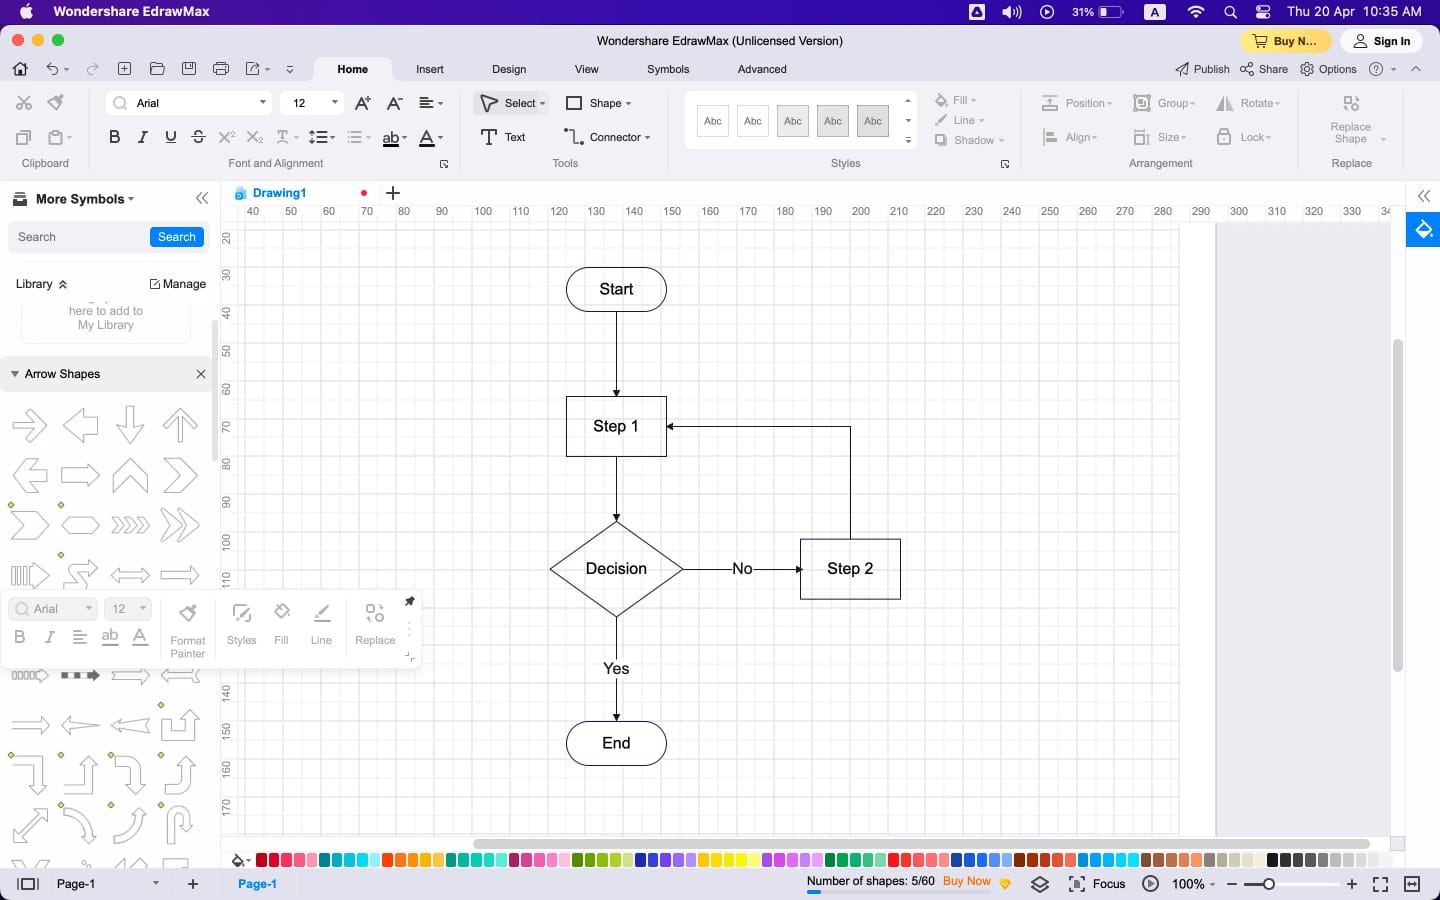
- Step 2: In the opened flowchart sheet, start designing the flowchart by adding symbols from EdrawMax's symbol library. You can initially add the oval-shaped Start symbol to initiate the flowcharting process. Then you can add all the symbols required to create a flowchart, i.e., rectangular shapes, to indicate the processes.
- Step 3: Insert the respective text in all flowchart shapes by clicking in the middle of each shape.
- Step 4: Now, you need to connect the shapes by using connectors to indicate the flow of the processes. For this, you can click on the edges of shapes and draw the connectors to each related shape.
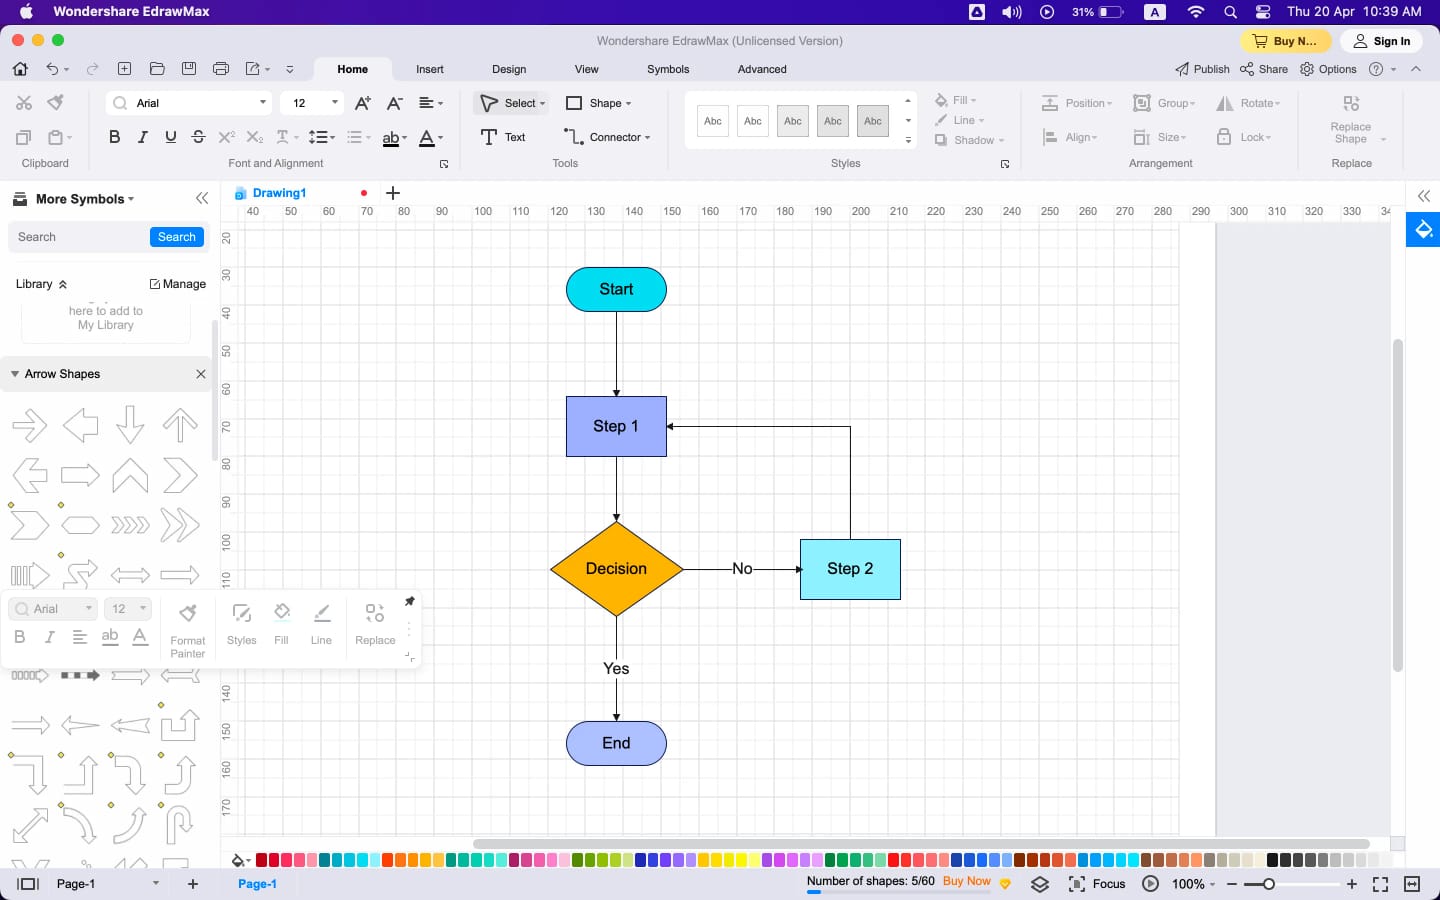
- Step 5: To customize the theme color of the flowchart, click on the Theme's icon located at the right panel and choose an appropriate theme color. The flowchart's background color, layout, style, and colors can also be changed by accessing the top menu bar.
- Step 6: Now export your designed flowchart by clicking the Export icon in the top menu bar.
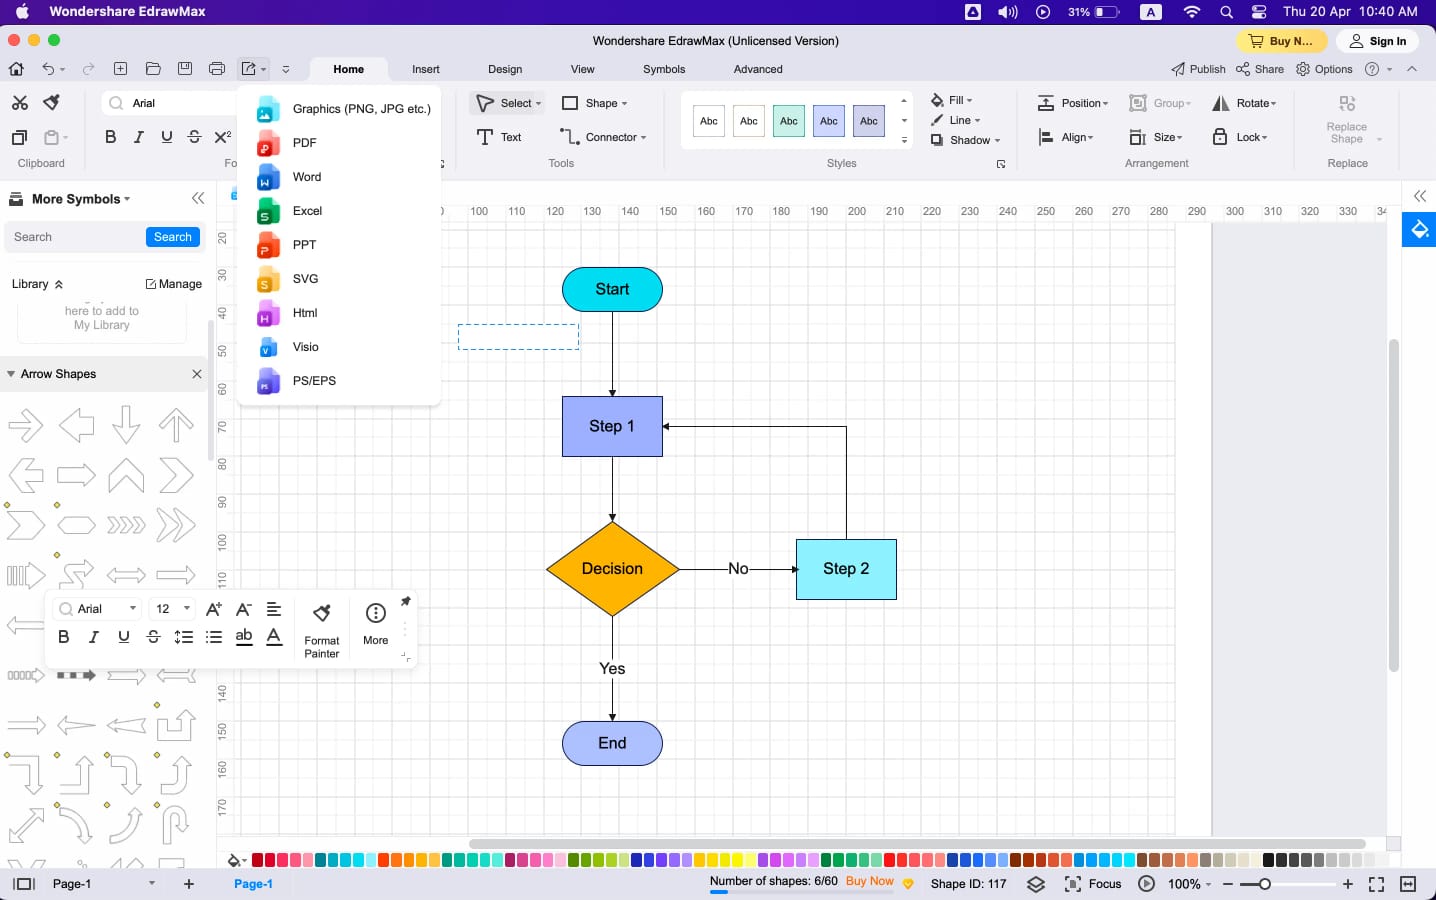
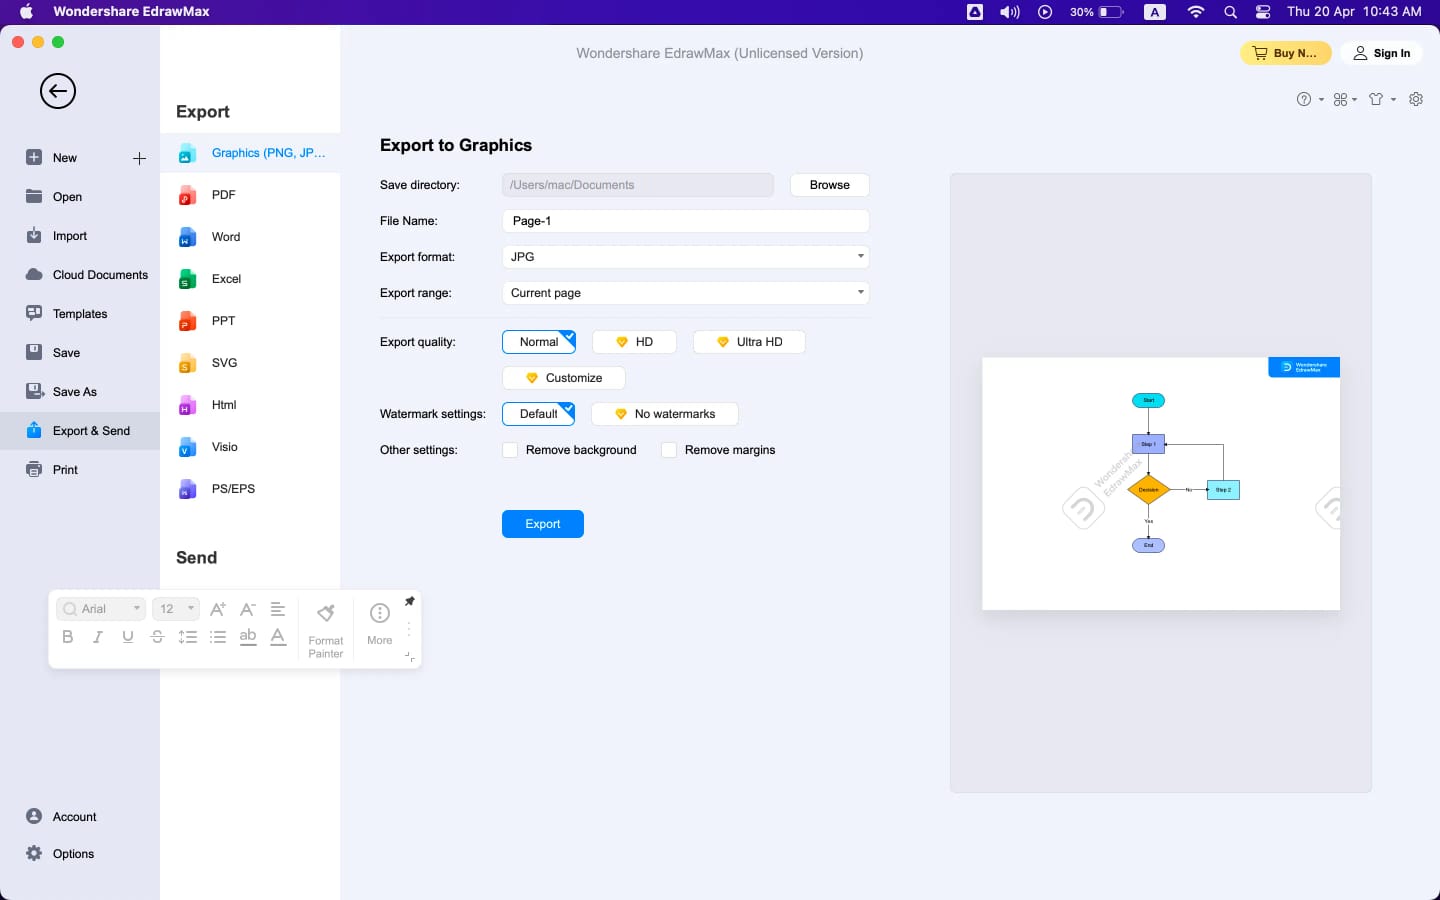
- Step 7: You can export the flowchart in any format, i.e., pdf, MS Word, MS Excel, SVG, Graphics, etc. For instance, if you opt for the Export to Graphics option, you must set the export quality, format, range, file name, etc., to confirm the Export process.
Benefits of Using EdrawMax for Creating Flowcharts
EdrawMax is the ultimate choice of numerous users for creating basic & advance level flowcharts since it is a top-of-the-line platform to establish and configure your flow diagrams, bringing the following benefits to its users:
- The tool presents an extensive templates gallery for constructing your flowcharts, saving you from the hassle of start-from-scratch.
- Offering multifarious flowcharting symbols pertaining to different fields, EdrawMax facilitates you to create every type of flowchart, including process flowcharts, workflows, systems, business flowcharts, etc.
- You can establish multiple pages within a single file; this feature is valuable, especially when your flowchart is complex and lengthy.
- The tool enables you to personalize even the minor aspects of your flowcharts, from shapes, text, & connectors to background, modifying everything according to your preference.
- You can collaborate on business flowcharts with your teammates for effective workload management, saving time and resources.
- EdrawMax provides various export options to save your file in your desired format, allowing you trouble-free file management.
4. Conclusion
Whether you're working on an academic or organizational project, you might need to draw a flowchart to demonstrate the flow of processes in a more comprehensible manner. Given this need, you may come across several choices in terms of flowchart designing tools. Still, you must consider the device compatibility factor while choosing a flowchart creator. For all Mac & IOS users, Pages serve as a great pick to design flowcharts on all complexity levels. Here you can explore a detailed guide on how to use Pages effectively to create a flowchart as per your requirements, along with the best alternative to Pages you can use.
